Kawaii Represent! My Puffy Bow Bracelet Crochet!
Ever since I began crocheting seven years ago, it had never crossed my mind to intentionally create something that would represent my character. I just crochet what I find nice and interesting for most of my projects. Although if I would go back and think of my crochet projects, I could sum them up to one word: CUTE.
Most of the crochet projects I have done were cute stuff using colorful yarns, mostly made from a pattern I saw online. However, if ever I would pick a project that I could best associate my character with, it would be the Puffy Bow Bracelet which I created the pattern myself.
PUFFY BOW BRACELET
While I like being simple on a regular day, I have also this side of liking cute and colorful stuff which I hide oftentimes to the public and only expose it during valid occasions. That's because most people think cute things are childish. A sad notion in the society but so be it. Lol. I also thought crocheting cute things became a gateway for me to express the other side of myself which often gets a furrowed eyebrows. Even if they don't tell, I can see it in their faces. Anyway, I chose this project to represent me because aside from it screams "Kawaii" ("Cute"), this is one of my few special projects. And bows/ribbons are associated with cuteness, right?
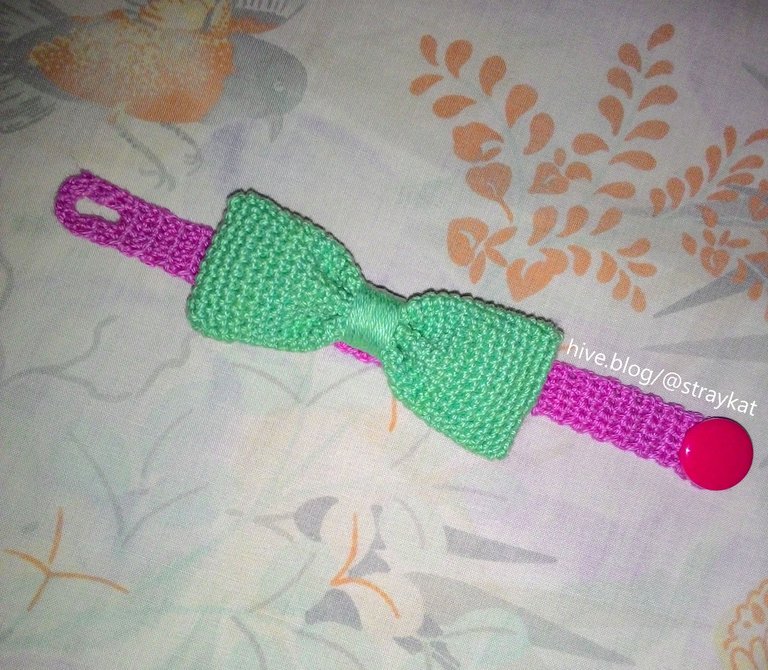
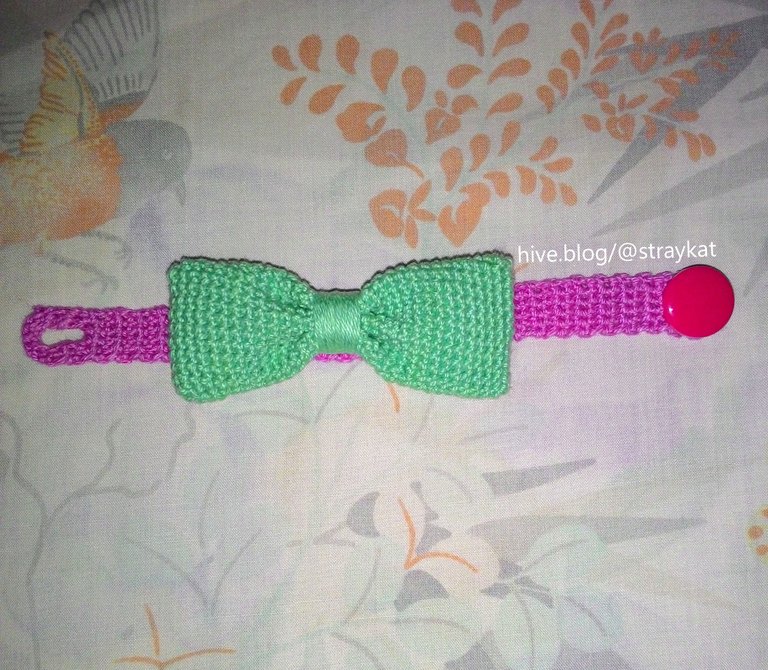
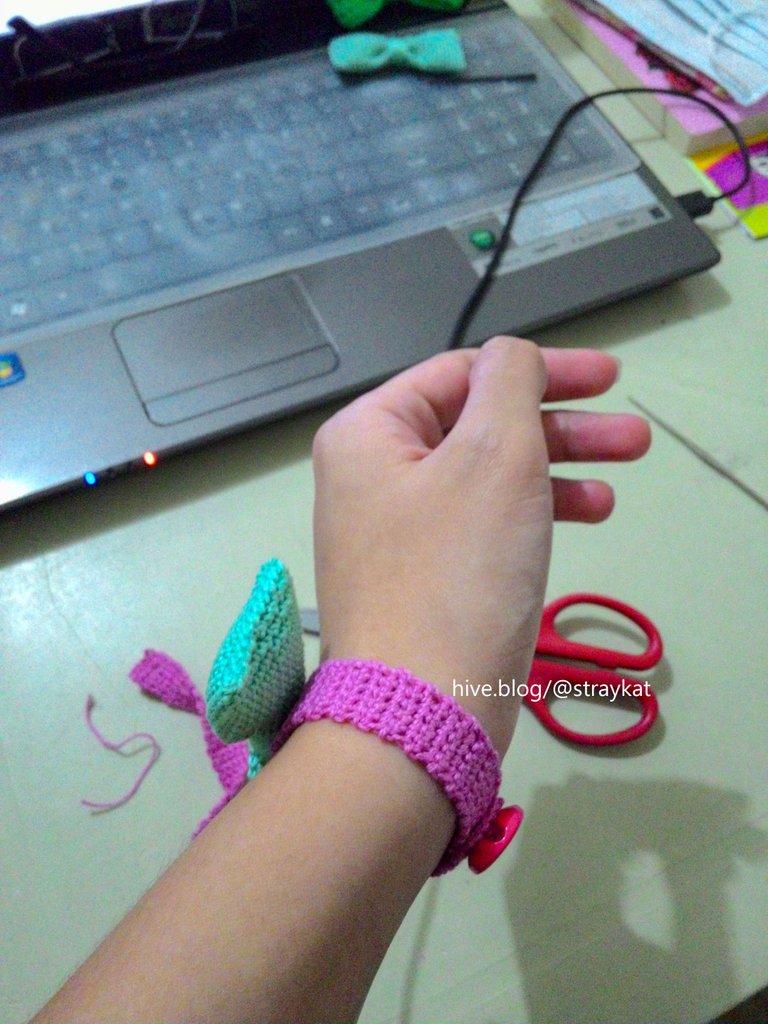
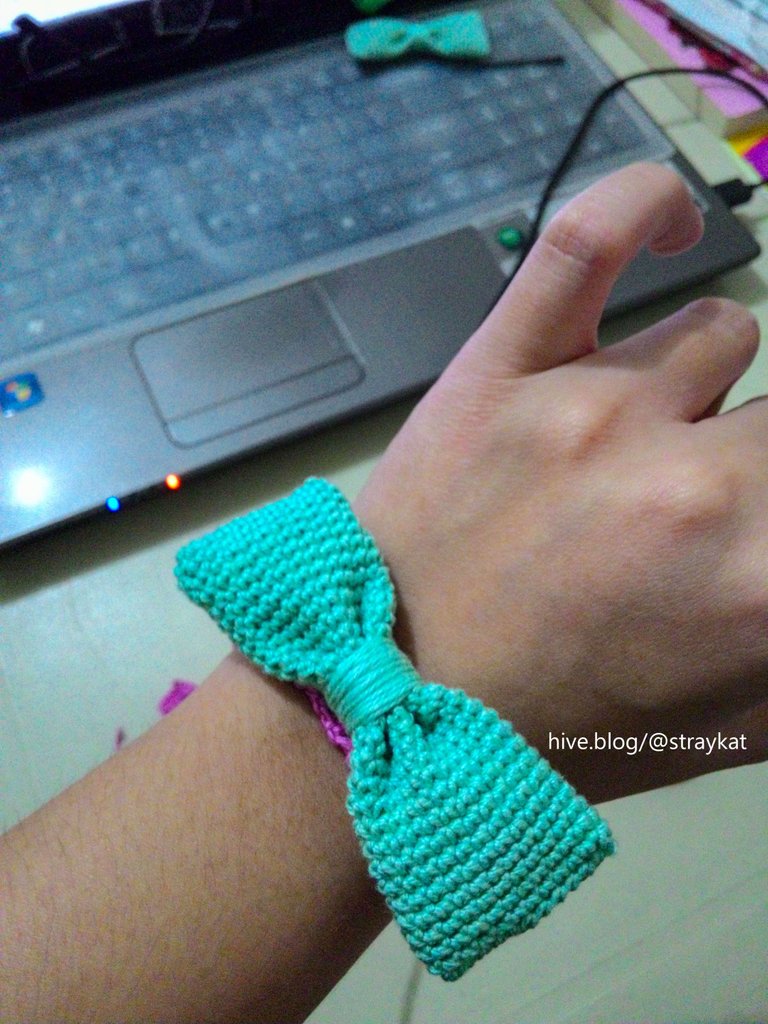
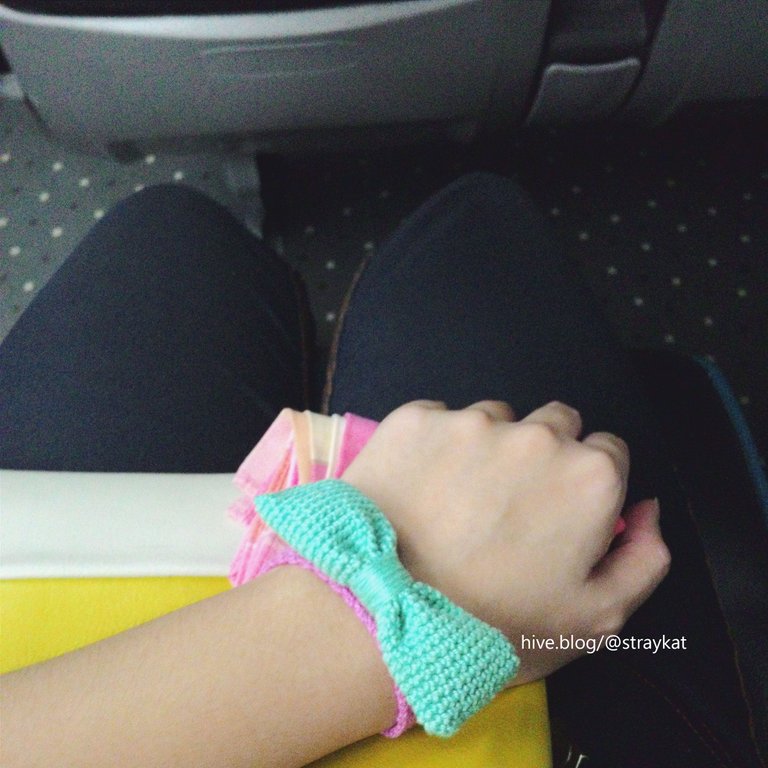
I call this project Puffy Bow Bracelet because I put stuffing inside the bow, thus, looking puffy. I made this last 2015 as an accessory when I went to watch my favorite Japanese female singer's concert in Manila. These were the years I was very much into cute things and crocheting and I've also seen videos of my favorite singer sporting a bunch of bow bracelets on some of her previous shows. That influenced me to create my own bow bracelet but with colors that exudes cuteness, pink and green.
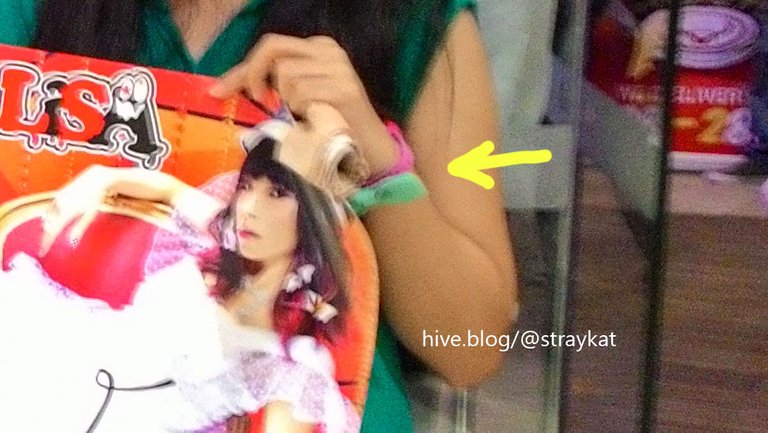
This is the first bracelet I have crocheted and even though the button hole part could have been done better, I still feel proud of it. I have never thought I would be able to use and show a crochet project of mine in public. I have always been shy of displaying my works to many people so being able to wear it in public even just thrice is a good and proud feeling for me.
If you're interested on making this puffy bow bracelet for yourself, well, it's your lucky day because I was able to take note of the pattern. Thank you Straykat from 6 years ago for documenting the pattern, now I can share this to many people today.
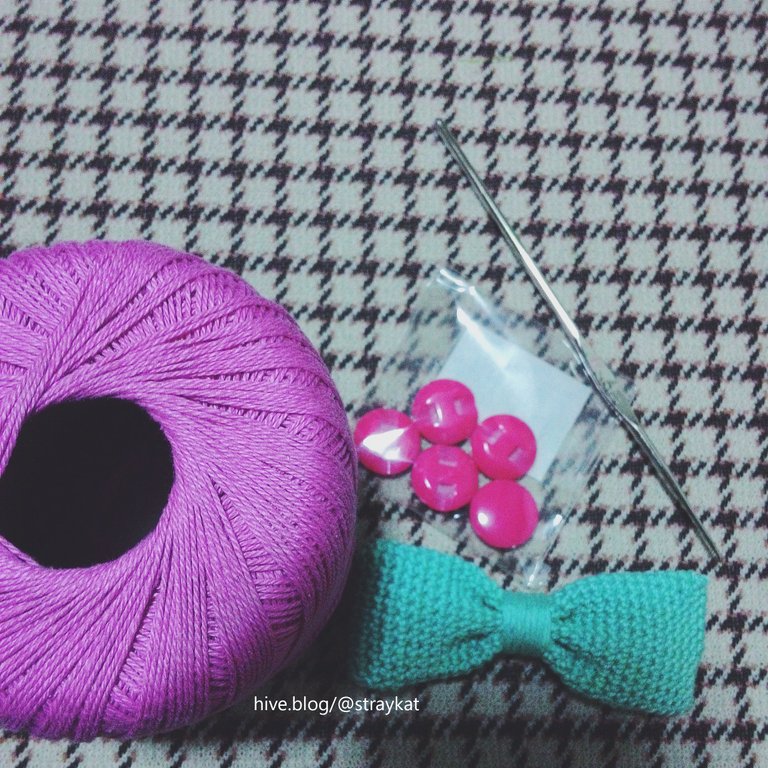
♦ MATERIALS:
- 1.30mm crochet hook
- Mercerized cotton yarn (preferrably two colors)
- 1 button
- Toy stuffing
- Needle
- Sewing thread
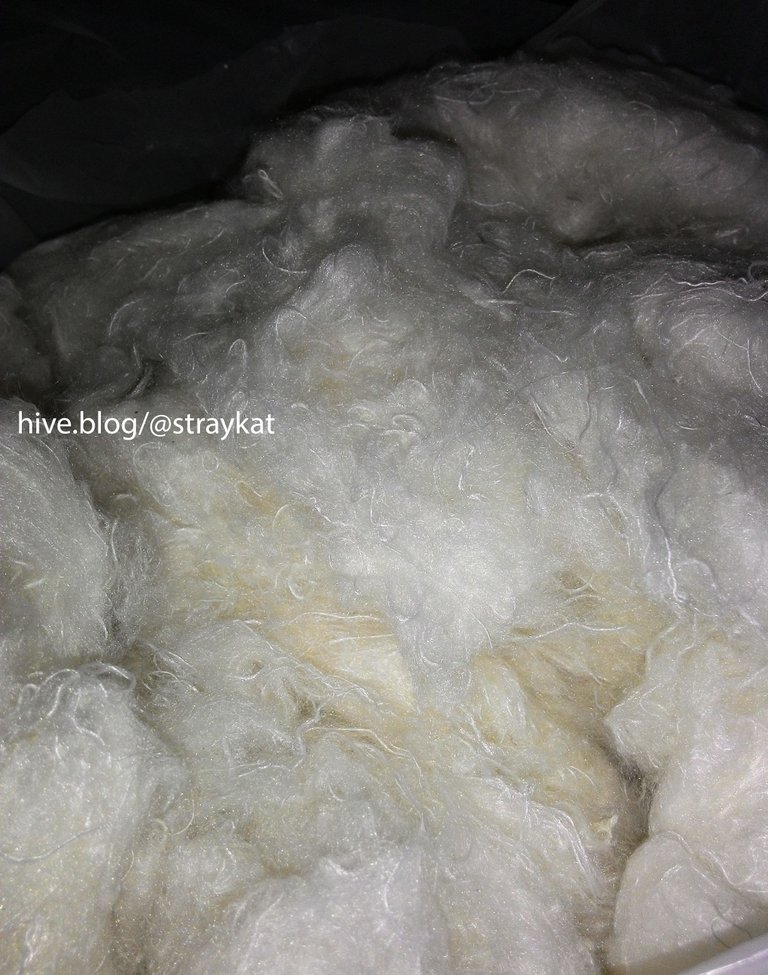
For the stuffing I used this type of toy stuffing. I don't exactly know what type of material it's made of since I didn't asked the staff of the store where I bought it from.
♦ PATTERN:
— BOW —

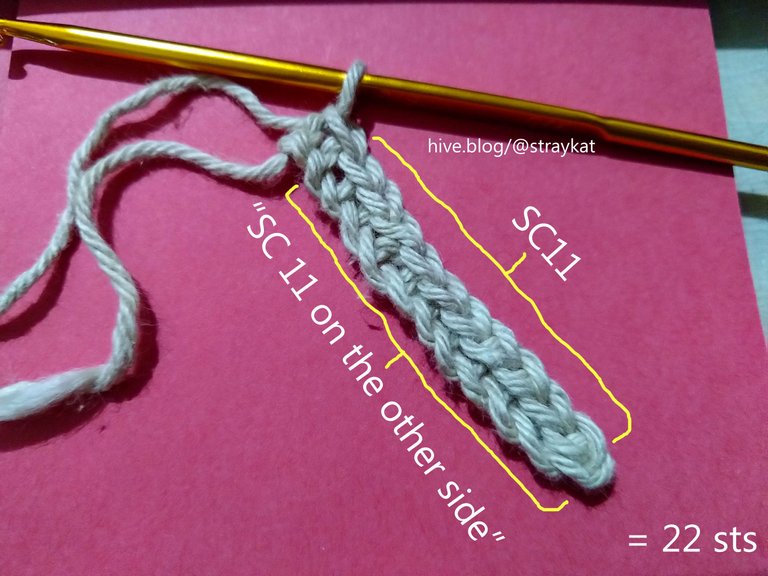
▪ CH12
▪ R1: SC11 (start on the 2nd chain from the hook), SC 11 on the other side = 22 sts
▪ R2-30: SC22= 22sts
Fasten off and leave long end for sewing and for wrapping the bow.
(For a better explanation on R1, here's a sample but with a different yarn. For sample purposes only.)
(As you go on, it should look like this.)
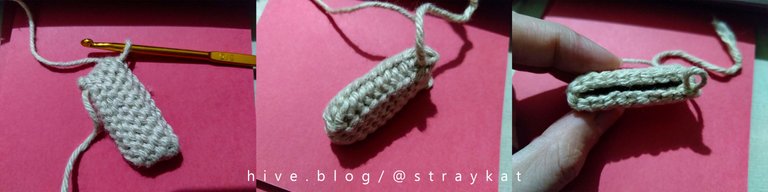
(So going back to the bow, it looks something like this.)

NOTE:
We work on the rounds continuously.
After finishing round 30, stuff half of the bow with stuffing and fold the middle part to form the shape of a bow. I like folding the bow into two to have that convex part on the middle and four concave or dimples. I think it looks more cute that way.
Hold the fold with a needle or anything that would keep the fold in place temporarily. Stuff the other half and sew the edge to close ends. With the remaining thread, use a needle and poke inside the bow until you reach the middle part.
Sew the middle of the bow to keep the folds in place and wrap with the remaining thread. Insert the remaining thread into a needle and tuck in the tail behind the bow to hide and secure the tail.
— BRACELET —
▪ CH6
▪ R1: HDC5 (start on the 2nd chain from the hook), CH1, Turn = 6 sts
▪ R2—57: HDC5 (start on the 2nd chain from the hook), CH1, Turn = 6 sts
NOTE:
The number of rounds depends until it fits your wrists. :)
(BRACELET BUTTON HOLE)
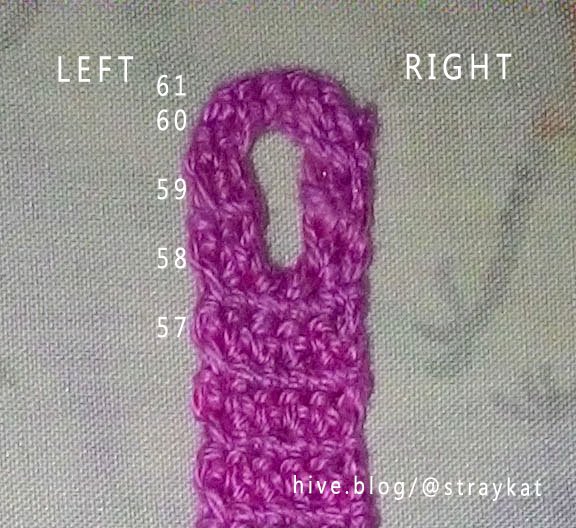
RIGHT SIDE
▪ R58: HDC2 (start on the 2nd chain from the hook), CH1, Turn = 3 sts
▪ R59: HDC2 (start on the 2nd chain from the hook) = 2 sts
Fasten off and leave a bit thread for sewing.
LEFT SIDE
Attach new thread on the 3rd HDC from R57 and CH 1.
▪ R58: HDC2 (start on the 4th HDC of R57), CH1, Turn = 3 sts
▪ R59: HDC2 (start on the 2nd chain from the hook), CH1, Turn = 3 sts
▪ R60: HDC2 (start on the 2nd chain from the hook), CH1, HDC2 (on the 2 sts from the right side earlier), Turn = 5 sts
▪ R61: SC5 = 5 sts
Fasten off and leave long thread for sewing.
NOTE:
Sew the excess threads on the bracelet's body to keep the threads from loosing.
Sew button into the opposite side of the button hole using a sewing thread. Make sure the button you choose fits the button hole. You can increase the length of the button hole by repeating R59.
(ATTACHING BOW INTO BRACELET)
Wear the bracelet on your wrist then find the area on the bracelet which land on the center of your wrist.
Remove the bracelet and sew the bow into that area of the bracelet with a needle and sewing thread.
What do you think? Would you make one for yourself too? I am not really much confident with how I made the button hole for this bracelet but at least it did its job to hold the button. If you know a better way to do it, then you can use your pattern. :)
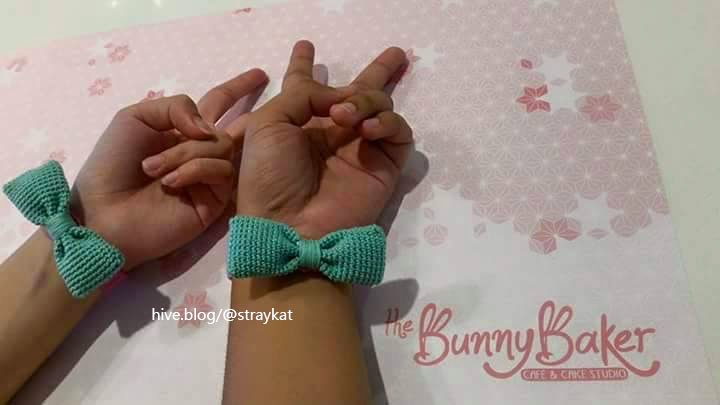
Actually, I made two of these, the other was for my friend who accompanied me to watch the concert. She said it's cute, I'm just not sure if she likes it or was only forced to wear it because I told her to. Lol. I crocheted these bracelets one day before the event because I crocheted two amigurumis prior to it. All I did two weeks before the event was crochet! 😂
"Kawaii" culture for me is a form of self-expression, not just bright colors and looking adorable. Somehow I thank myself for being able to learn how to crochet because I was able to incorporate and express the kawaii in me through it. But I didn't say I look cute! Just having a fascination with anything cute!
Hello @straykat! Welcome to the NeedleWorkMonday Community!
I would totally rock this bow bracelet! I had fun reading your post. I get you on the cutesy stuff. I’m almost 40 years old and I still love pink and cutesy. The bracelet is really cute and I love the idea of stuffing it. I’ve crocheted bows like this before but never thought of stuffing them, thanks for that tip.
The fun thing about these is you can do all sorts of color combos. Normally when I crochet items that call for a button hole, I just let the spaces between the crochet stitches work as a hole. If the button isn’t too big it should be able to fit right through there and stay put. 😉
Please remember in order to qualify for the contest you must leave a link to this post in the comment section of the original contest announcement!
Although you stated you were shy about showing your work in public I’m gonna leave this here for you
hoping it motivates you to keep sharing your nice workjust in case...😁Every week needleworkers from around the globe get together to share our work, patterns, tips, ideas and shortcuts as we support one another. Our goal is to inspire the Hive blockchain to give crafting a try.
On Monday’s we use the #needleworkmonday tag and on all other days we use the #needlework tag without the word Monday attached. We share and post our work directly from the Community page.
We encourage our members to share the process of their work through photos (as you have done here). This not only validates your work but it takes us along the creative journey with you.
For more information about what we do and for our posting guidelines please visit our FAQs.
I hope you come back to share more, your post was really nice. Thank you ~
Hi! Sorry for the late reply. I think it's cool being able to wear what you like regardless of your age! ☺️ And thanks for the button hole tip too! I'll do that when I do a crochet that requires one!
Oh, just to be clear. Yes, I do feel shy when I show my works on public but only with those that I have to wear. But for things like pouches, it feels alright.
Thanks for the warm welcome on the community!🤍
Congratulations @straykat! You have completed the following achievement on the Hive blockchain and have been rewarded with new badge(s) :
Your next target is to reach 37000 upvotes.
You can view your badges on your board and compare yourself to others in the Ranking
If you no longer want to receive notifications, reply to this comment with the word
STOPCheck out the last post from @hivebuzz:
Support the HiveBuzz project. Vote for our proposal!
Pretty project--looks like it would make a great gift, too.
Thank you! Yes, I think people who loves cute things and even little girls would feel happy to have this as a gift. 😊
I LOVE it
Thank you! 🤍
cute indeed! and lovely too
thank you! ^_^