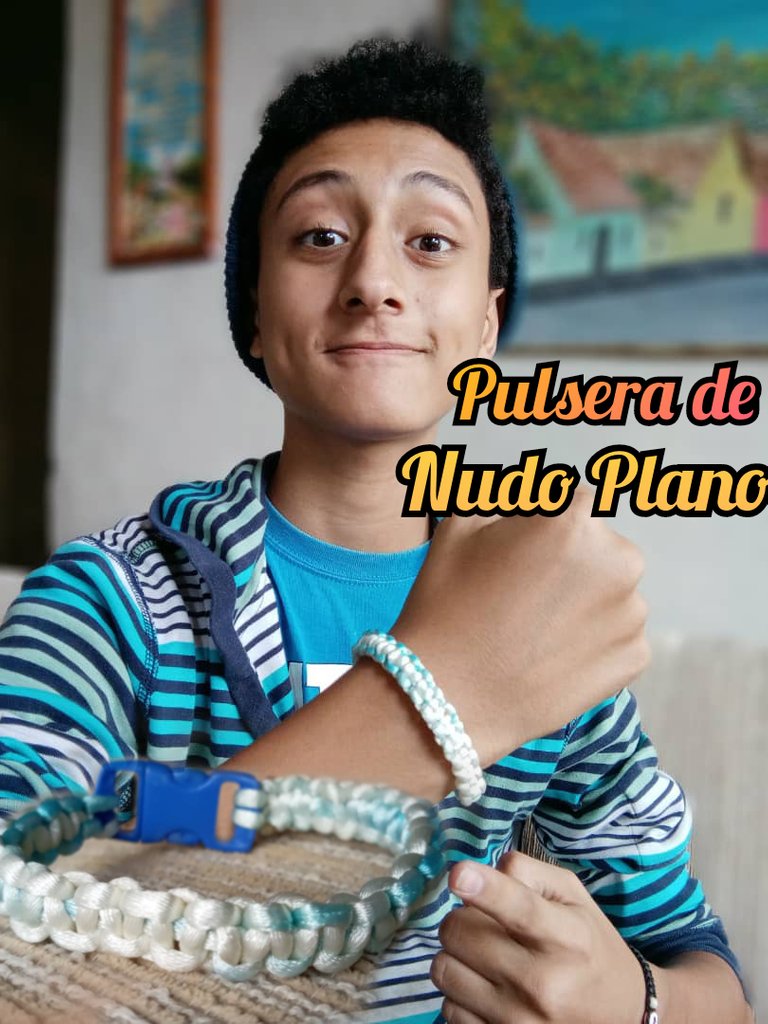
[ESP-ENG] Pulsera De Nudo Plano Paso a Paso // Flat Knot Bracelet Step by Step
Hola amigos de hive un gran saludo para cada uno de ustedes Espero se encuentre increíble.
Hello friends of hive a great greeting to each of you I hope you feel incredible.
el día de hoy Quiero compartir con ustedes este tutorial de cómo elaborar de manera fácil una pulsera de nudo plano espero les guste mucho.
Today I want to share with you this tutorial on how to easily make a flat knot bracelet. I hope you like it very much.
Los materiales que van a necesitar para elaborarla son:
The materials you will need to develop it are:
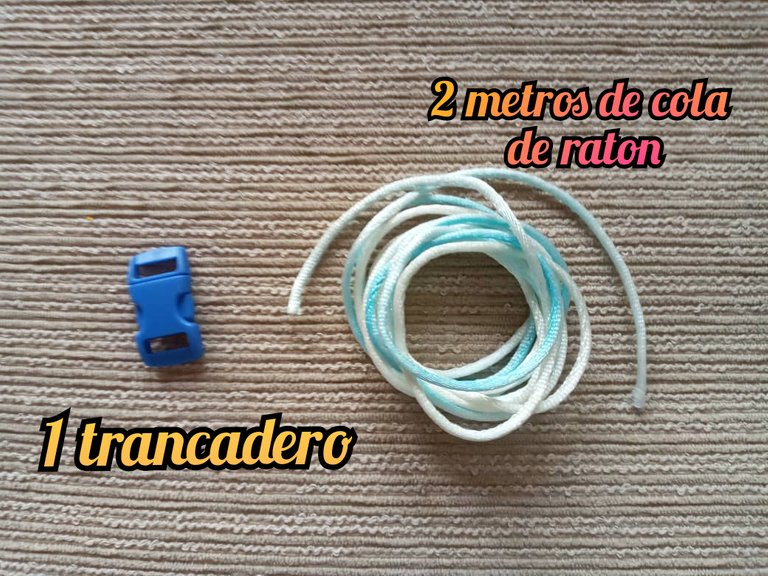
1.- 2 metros de hilo cola de ratón.
2.- un broche.
1.- 2 meters of mouse-tail thread.
2.- a brooch.
Elaboración:
elaboration:
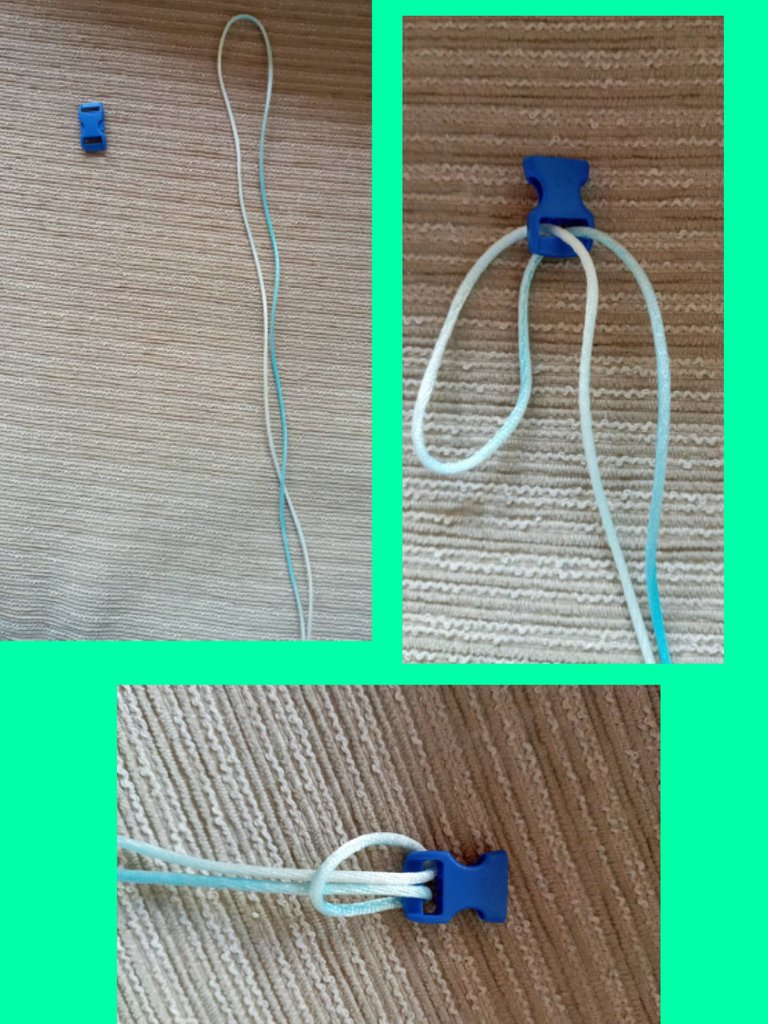
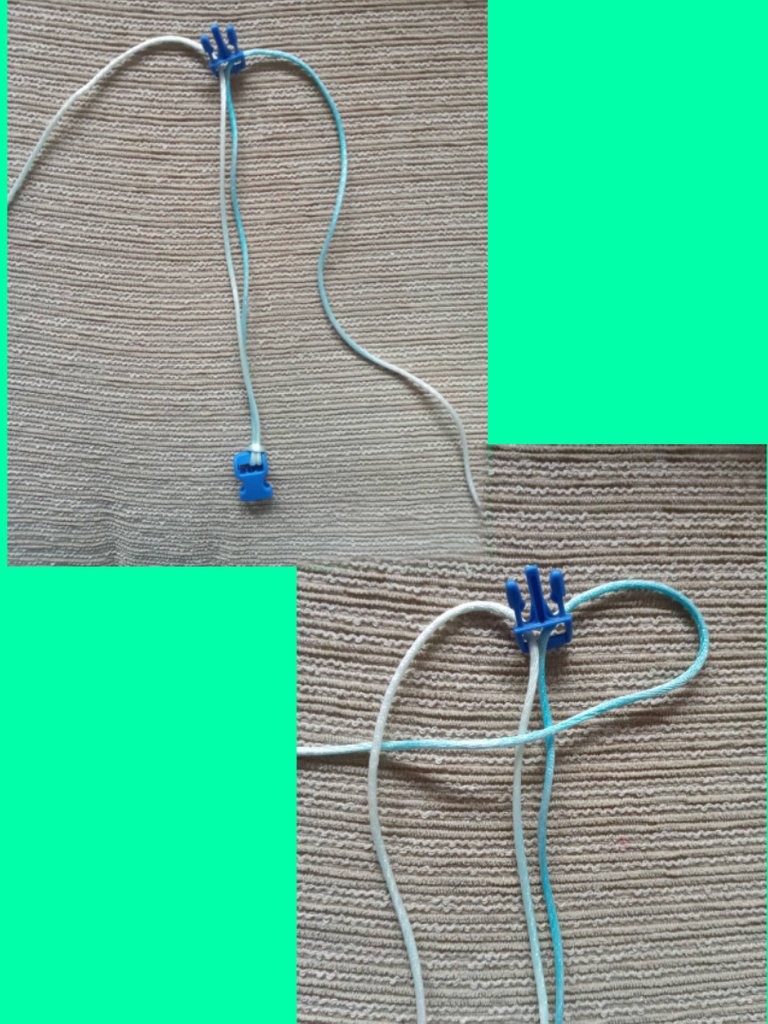
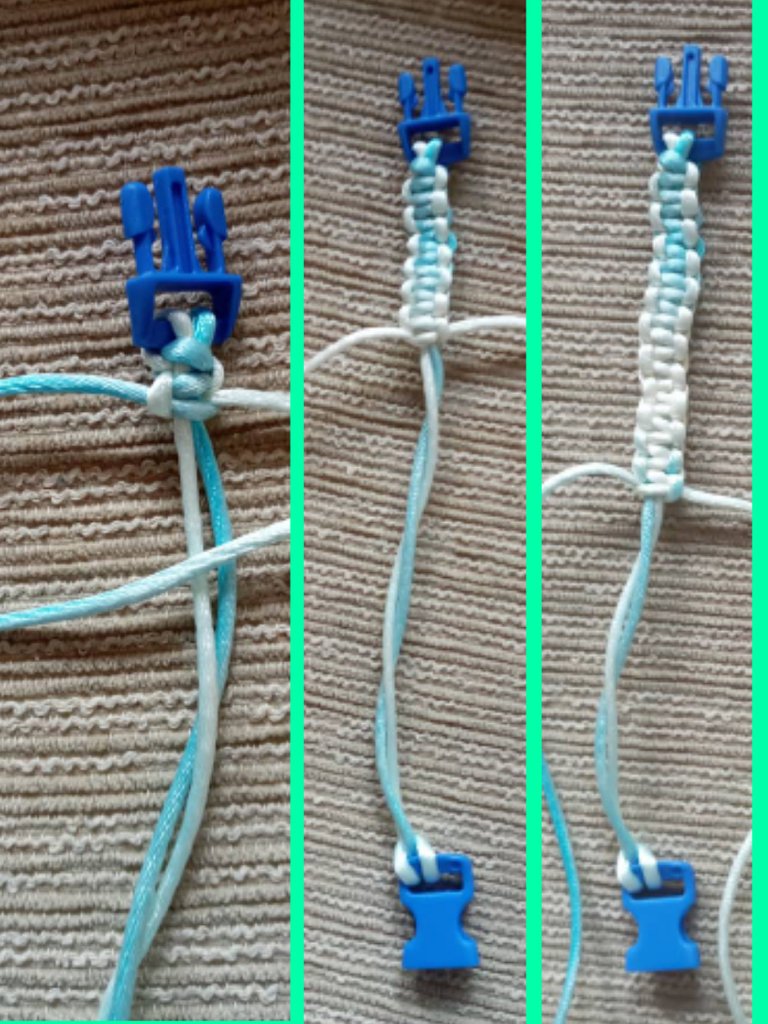
Bueno amigos lo primero que vamos hacer es estirar los dos metros de cola de ratón y los doblados por la mitad y la parte del doble es la introducimos por una de las partes del broche después que hayamos hecho esto una parte del hilo va quedar de la forma de un arco y por allí introducimos el hilo que está estirado para que nos quede un nudo corredizo Cómo pueden de apreciar en la imagen.
Well friends the first thing we are going to do is stretch the two meters of mouse tail and the folded in half and the part of the double is introduced by one of the parts of the brooch after we have done this a part of the thread will be in the form of an arc and there we introduce the thread that is stretched so that we have a slipknot as you can see in the image.
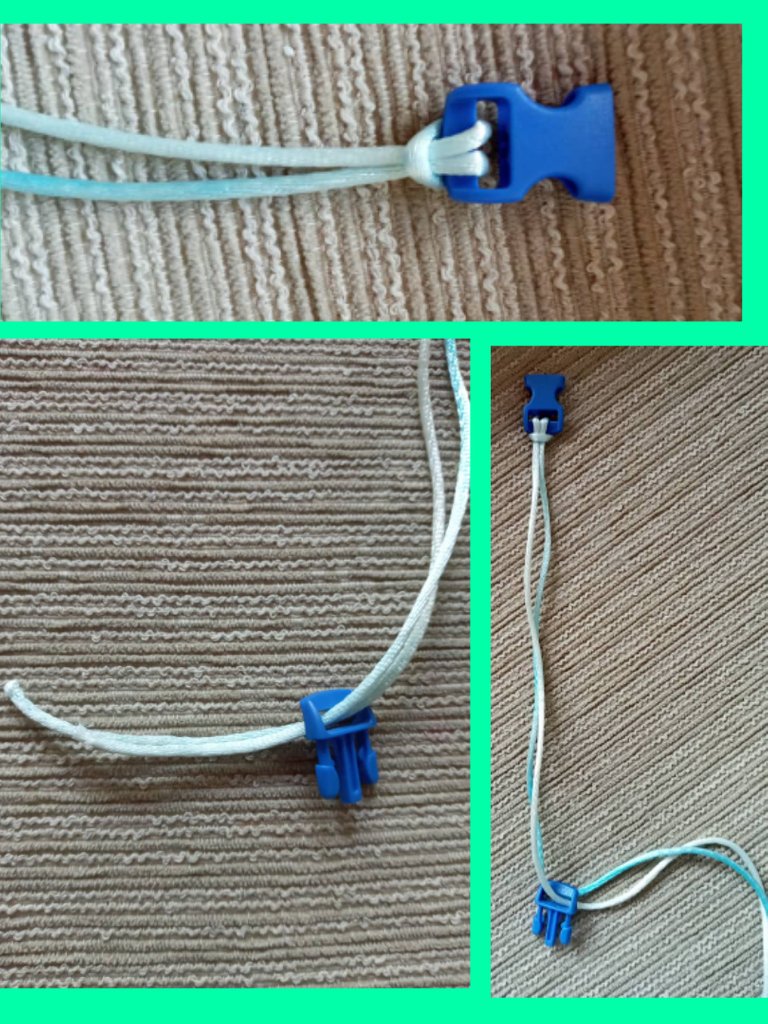
Ahora los extremos del hilo los introducimos por la otra parte del broche y lo subimos hasta que quede de largo qué queramos nuestra pulsera.
Now we introduce the ends of the thread on the other side of the brooch and raise it until it is as long as we want our bracelet.
A partir de allí empezamos a coser nuestra pulsera.
From there we started sewing our bracelet.
Tomamos el extremo del hilo que está del lado derecho y lo pasamos al lado izquierdo y que quede un pequeño arco del lado derecho y el extremo del hilo izquierdo lo pasamos por arriba del extremo del derecho Cómo pueden apreciar en las fotografías.
We take the end of the thread that is on the right side and we pass it to the left side and that there is a small arch on the right side and the end of the left thread we pass it over the end of the right.
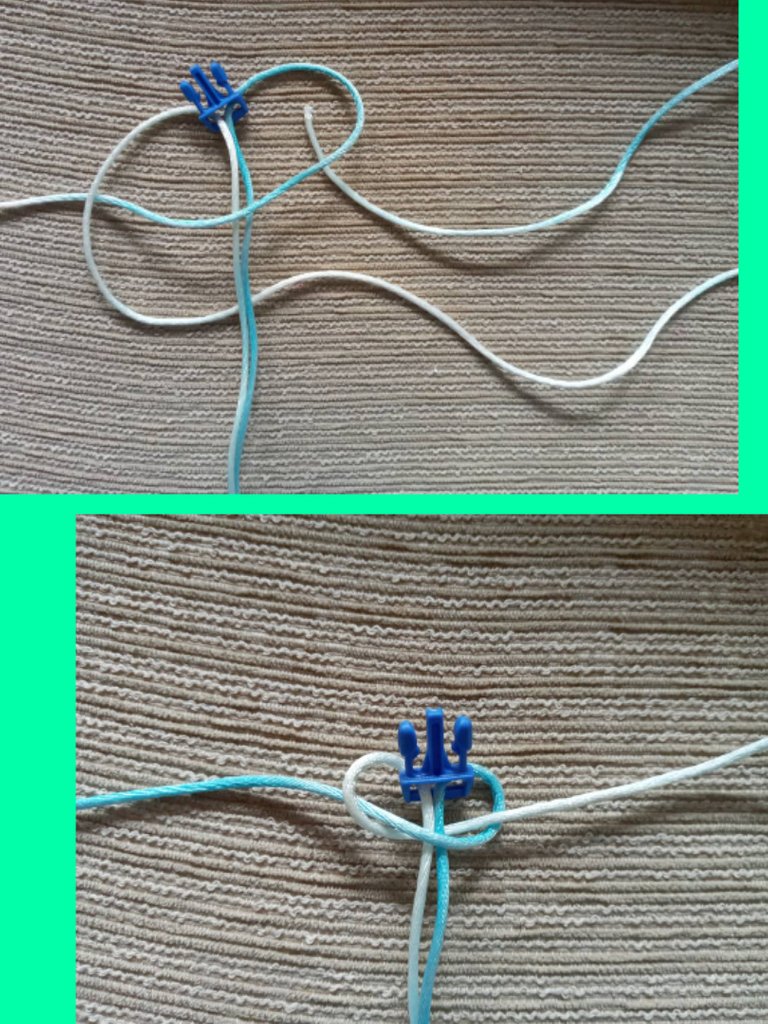
Ahora el extremo del hilo izquierdo lo llevamos al otro lado por abajo y lo introducimos por el arco y apretamos.
Now we take the end of the left thread to the other side from below and introduce it through the arch and squeeze.
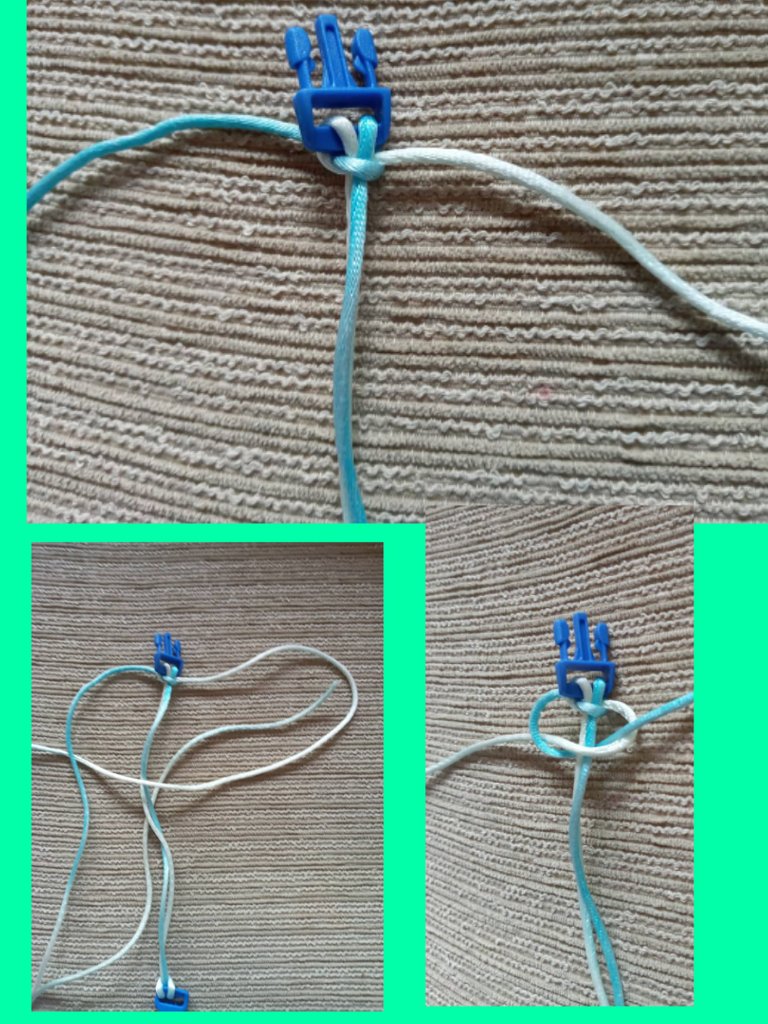
Después que apretemos volvemos a repetir los mismos pasos.
After we squeeze, we repeat the same steps.
y nos debe de quedar así como pueden apreciar en esta fotografía.
and it must be like that as you can see in this picture.
en la fotografía pueden apreciar que de lado derecho del nudo hay una pequeña curvatura para poder seguir cociendo tenemos que empezar a hacer el nudo por el lado donde esté la curvatura en este caso sería el lado derecho estando la curvatura sea del lado izquierdo comenzamos a cocer del lado izquierdo.
In the photograph you can see that on the right side of the knot there is a small curve to continue cooking we have to start making the knot on the side where the curve is in this case would be the right side being the curve is on the left side we start cooking on the left side.
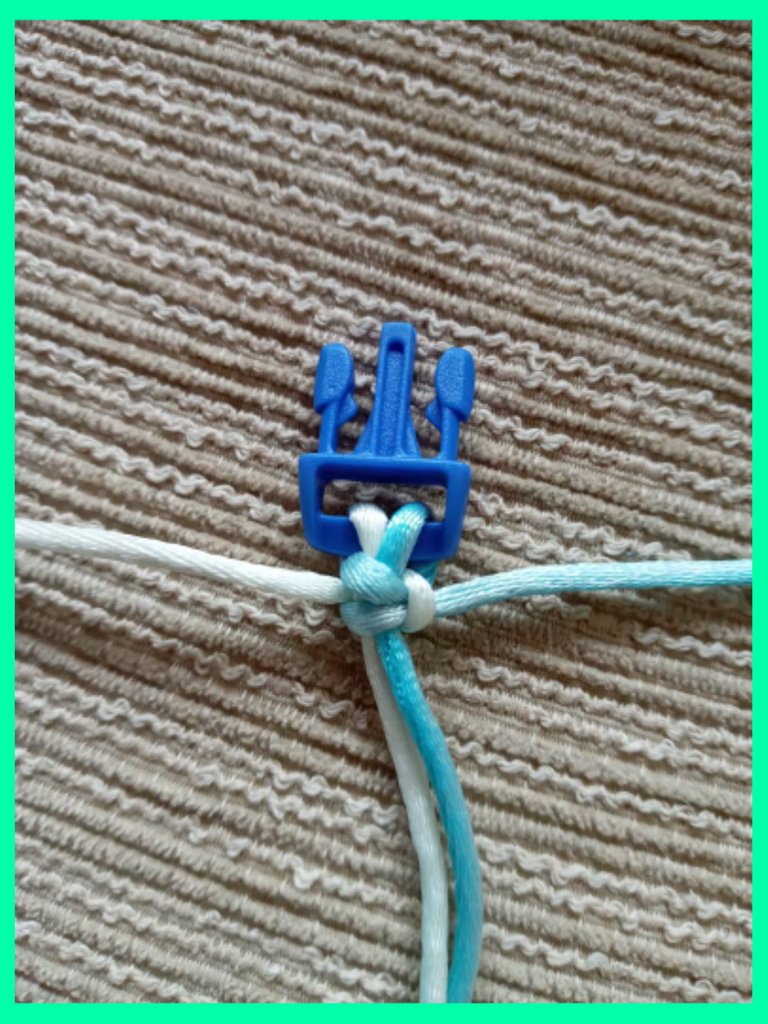
y seguimos cociendo hasta que lleguemos al final de nuestra pulsera.
and we keep on cooking until we reach the end of our bracelet.
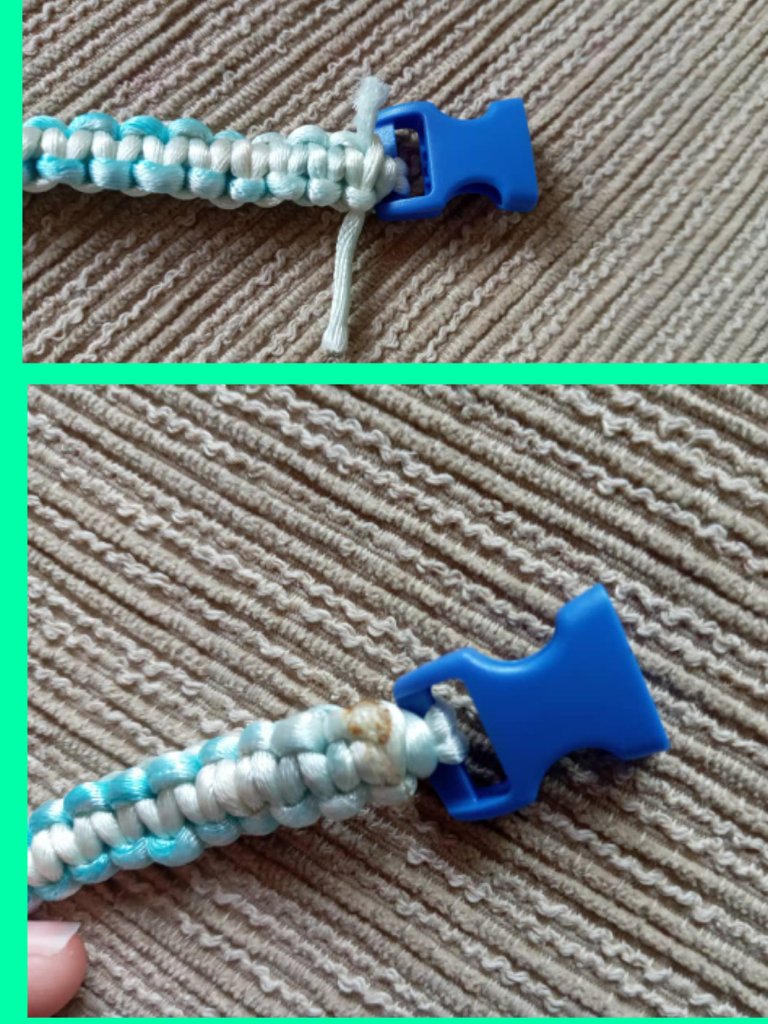
cuando terminemos de coser nos va a sobrar un poquito de hilo ese y lo cortamos los sobrantes y con la ayuda de un yesquero quemamos las puntas para que no se deshilache nuestra pulsera.
When we finish sewing, we will have a little bit of thread left over and we will cut the leftovers and with the help of a tinder, we will burn the ends so that our bracelet does not fray.
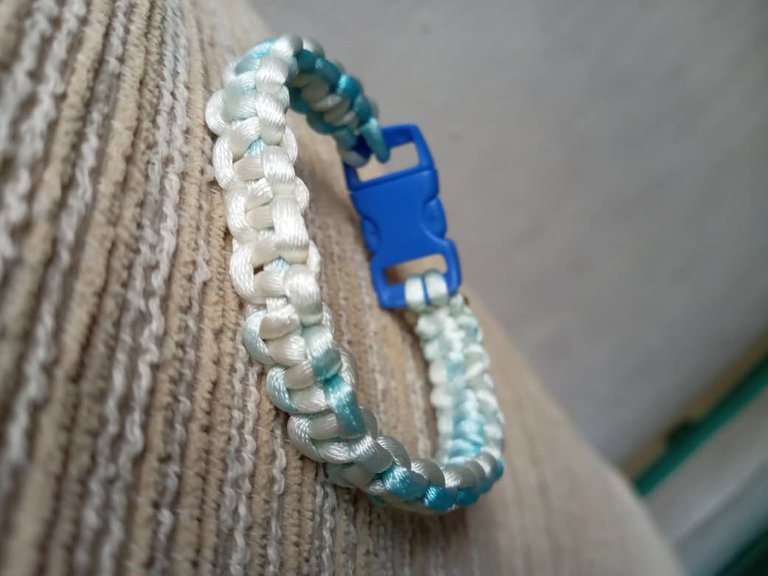
Y Bueno amigos de Hive ya tenemos lista nuestra pulsera elaborada por nosotros mismos de manera fácil y en poco tiempo lista para usar.
And Bueno friends of Hive already have ready our bracelet made by ourselves in an easy way and in a short time ready to use.
Buenos Amigos de Hive esto ha sido todo mi post del día de hoy Espero les haya súper encantado nos vemos en un próximo post adiós.
Good Friends of Hive this has been all my post today I hope you have been super pleased we see you in a next post goodbye.
Todas las fotografías fueron tomadas con mi teléfono celular.
All pictures were taken with my cell phone.