[Esp-Eng] Bricolaje: elaboración de un creativo y divertido taxi hecho con cartón. ♻️ by: @efrenjose
En este día quiero compartir con ustedes la elaboración de un creativo taxi realizado con cartón sirve para coleccionar o para que nuestros niños jueguen y se diviertan, espero les guste mi post.
Hello my friends of La Colmena, happy Thursday to all of you, I hope you have a great day.
On this day I want to share with you the development of a creative cab made with cardboard is useful for collecting or for our children to play and have fun, I hope you like my post.
Realicemos un divertido taxi con cartón
Let's make a fun cab out of cardboard
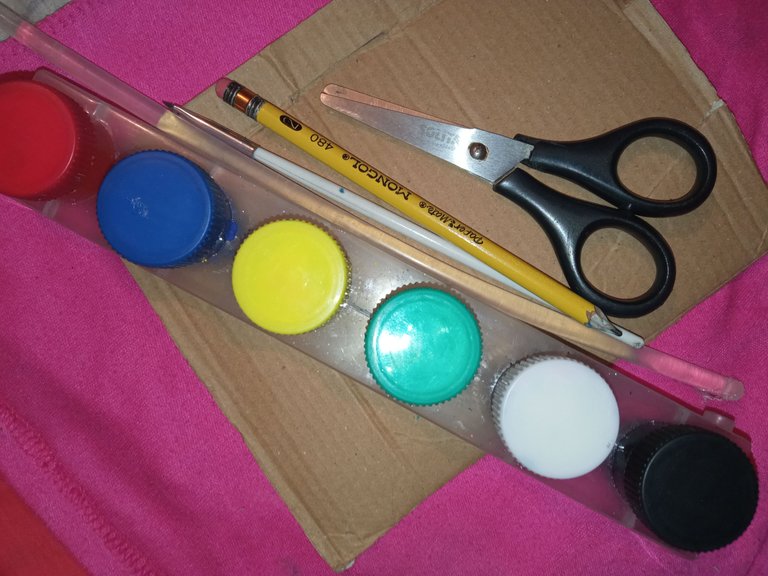
Los materiales utilizados en el proceso fueron estos:
Cartón
Pegamento
Tijera
Pinturas
Pincel
Lápiz
The materials used in the process were as follows:
Cardboard
Glue
Scissors
Paints
Brush
Pencil
Pasos a seguir | Steps to make
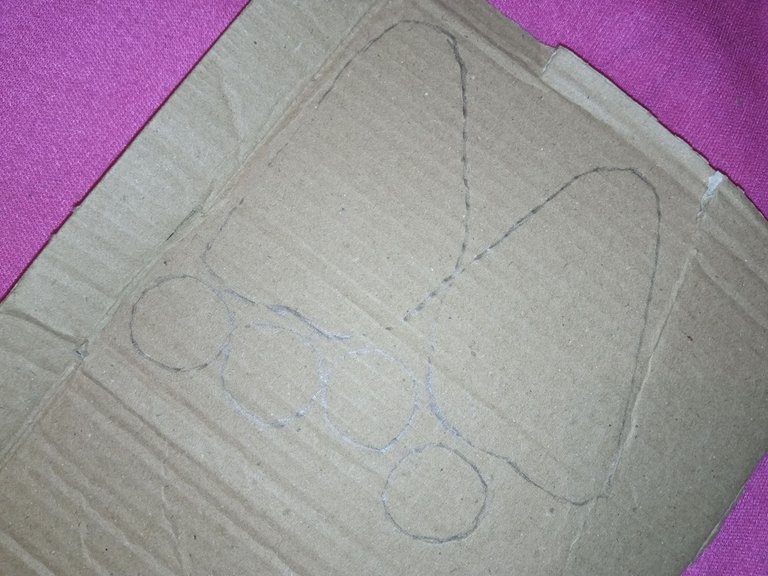
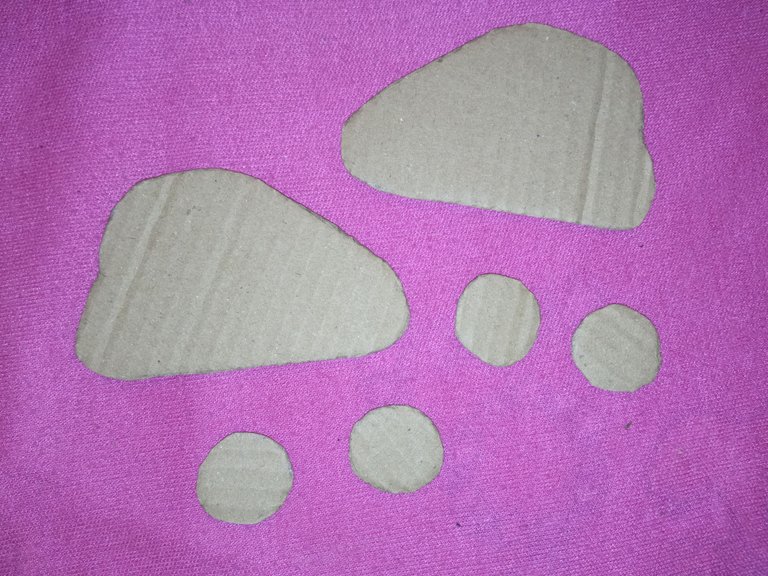
Inicialmente marcaremos los patrones en el cartón haremos el cuerpo del taxi dos veces y cuatro ruedas.
Initially we will mark the patterns on the cardboard we will make the body of the cab twice and four wheels.
Recortamos los dibujos que realizamos en el paso anterior.
We cut out the drawings we made in the previous step.
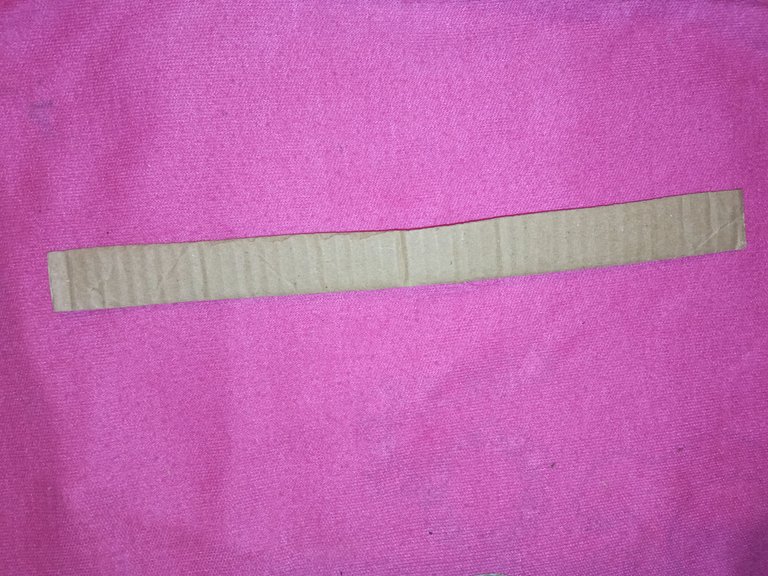
Seguidamente recortamos una tira larga de cartón del ancho de nuestra preferencia.
Then we cut a long strip of cardboard of the width of our preference.
Pegamos la tira recortada a una de las tapas que conforman el cuerpo del taxi.
We glue the cut strip to one of the covers that make up the body of the cab.
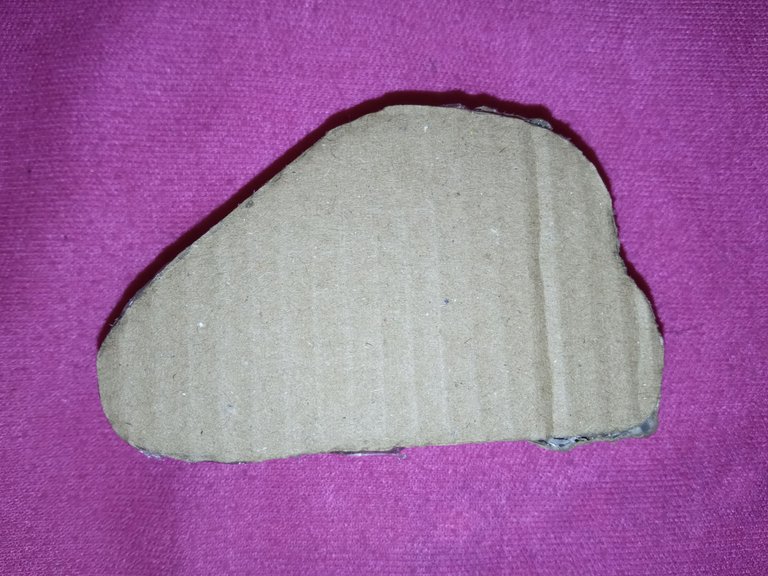
Pegamos la otra tapa a la tira pegada en el paso anterior y así formamos el cuerpo del taxi.
We glue the other cover to the strip glued in the previous step and thus form the body of the cab.
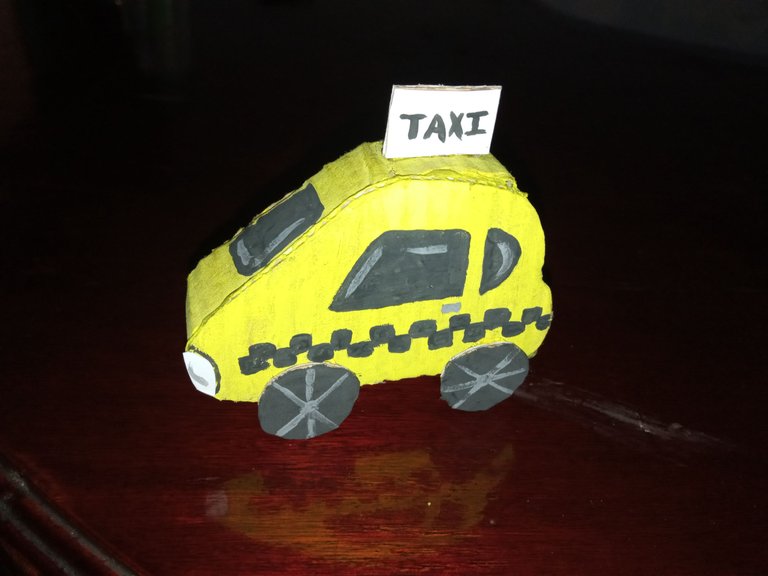
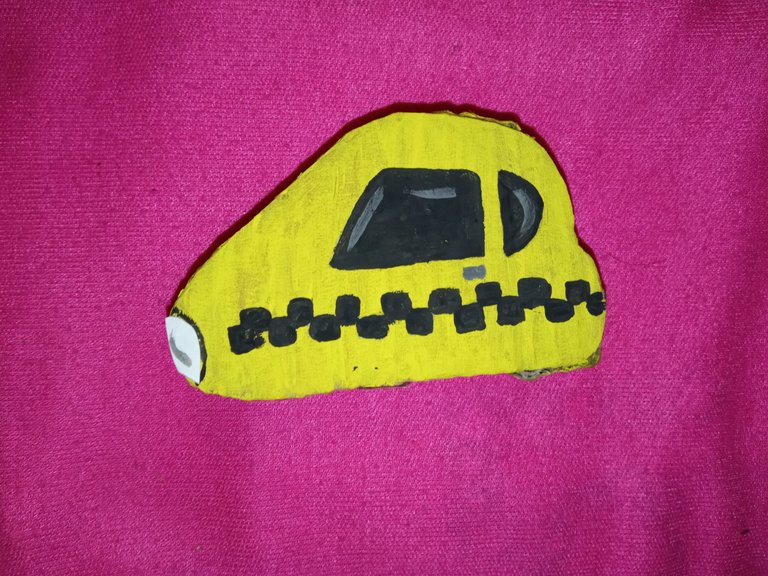
Pintamos nuestro taxi de color amarillo, los vidrios de negro sombreados con gris, el foco blanco y la línea de cuadros negra.
We painted our cab yellow, the windows black shaded with gray, the spotlight white and the checkered line black.
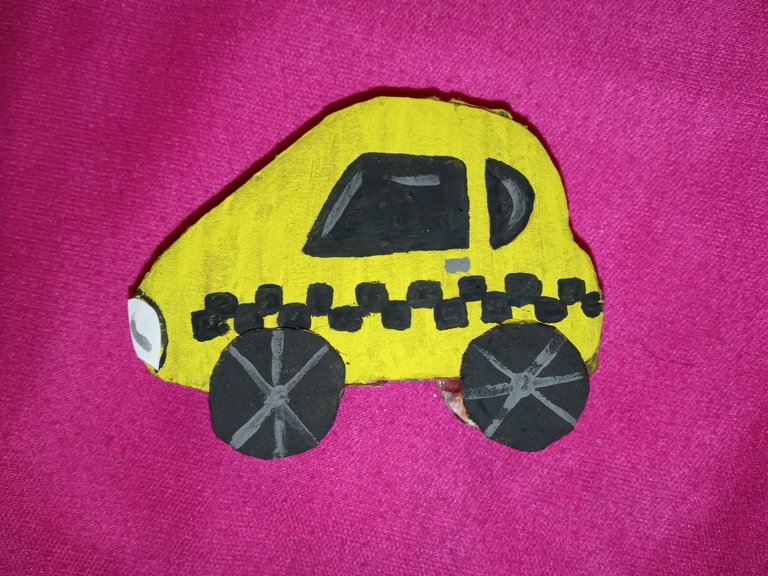
Pintamos las llantas de negro y hacemos unos rayas con gris.
We paint the rims black and make some stripes with gray.

Pegamos las llantas en el cuerpo del taxi.
We glue the tires on the body of the cab.
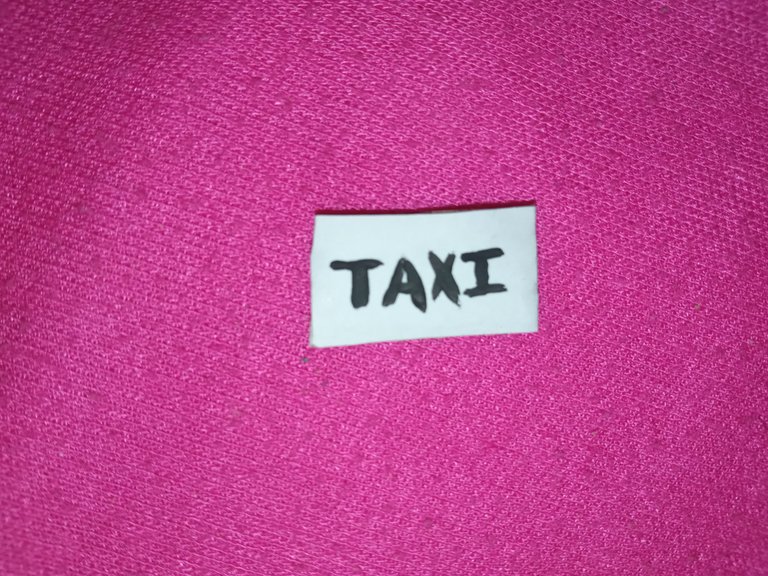
Luego recortamos un pequeño rectángulo de cartón pintamos de blanco y escribimos la palabra taxi.
Then we cut out a small rectangle of cardboard, paint it white and write the word cab.
Por último pegamos el aviso de taxi en la parte de arriba del carro.
Finally, we paste the cab sign on the top of the car.
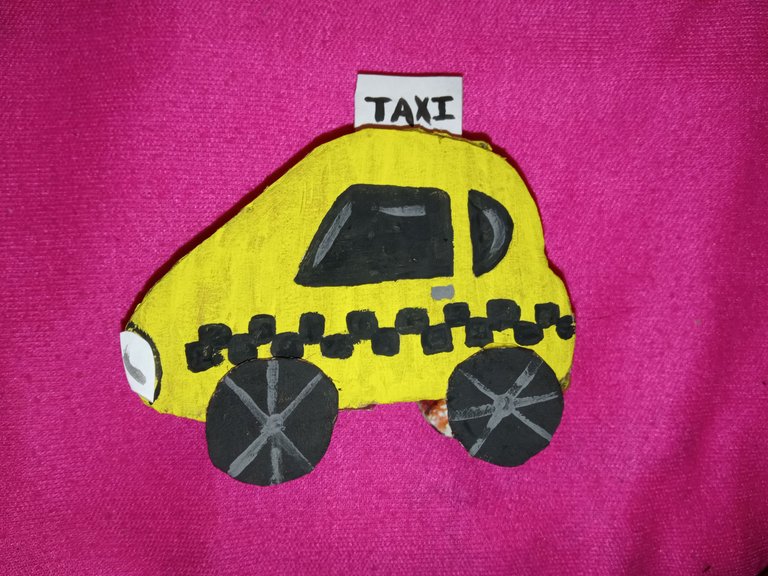
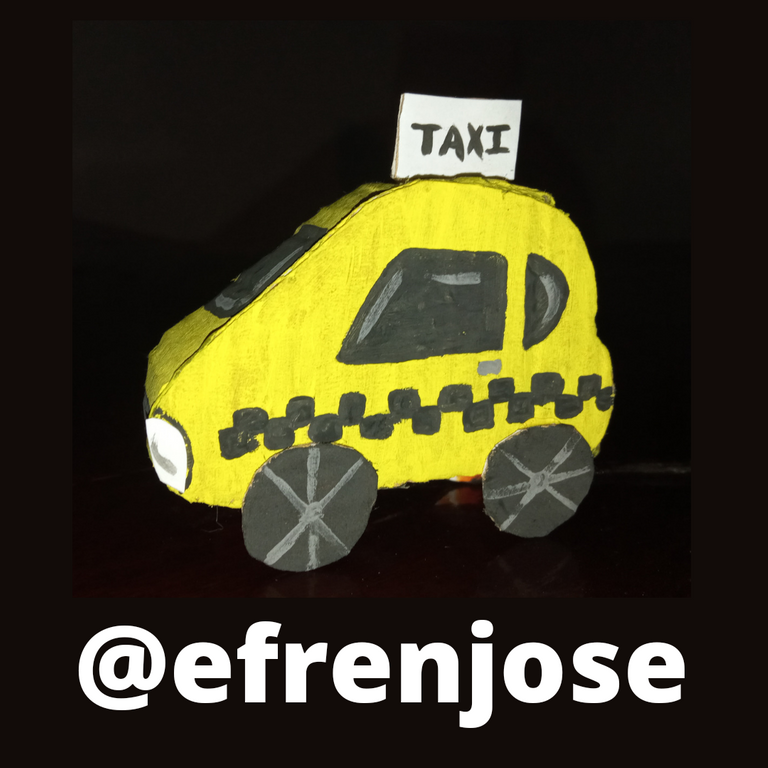
Así quedó nuestro divertido taxi realizado en pocos pasos y con cartón:
This is how our fun cab was made in just a few steps and with cardboard:
Espero le haya gustado esta idea y puedan elaborarla, gracias por leer mi post.
I hope you liked this idea and can elaborate it, thanks for reading my post.
Me despido hasta un próximo post, saludos.
I will say goodbye until a future post, greetings.
Hola @efrenjose me gustó mucho el taxi y como explicas el proceso de elaboración, intentaré hacerlo con mi hijo. Saludos!