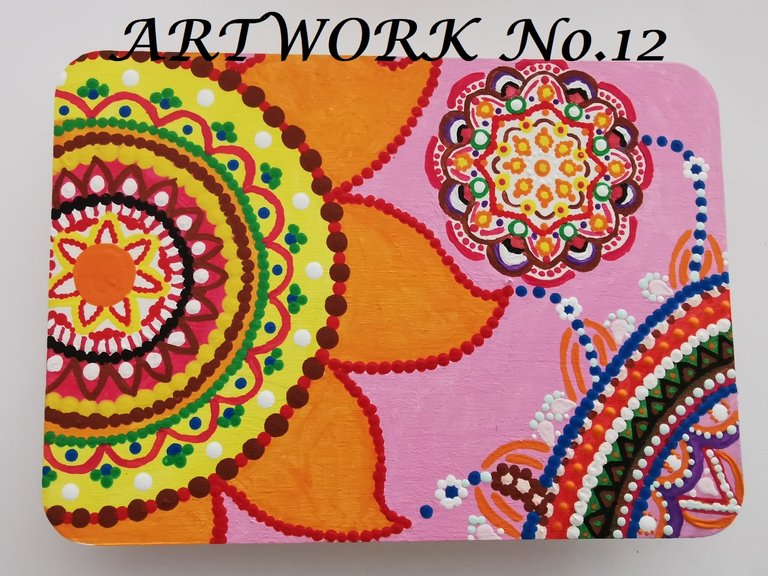
DIY Artwork No12: Decorating / dotting a wooden postcard with paint
Finally, my dotting tool set arrived!
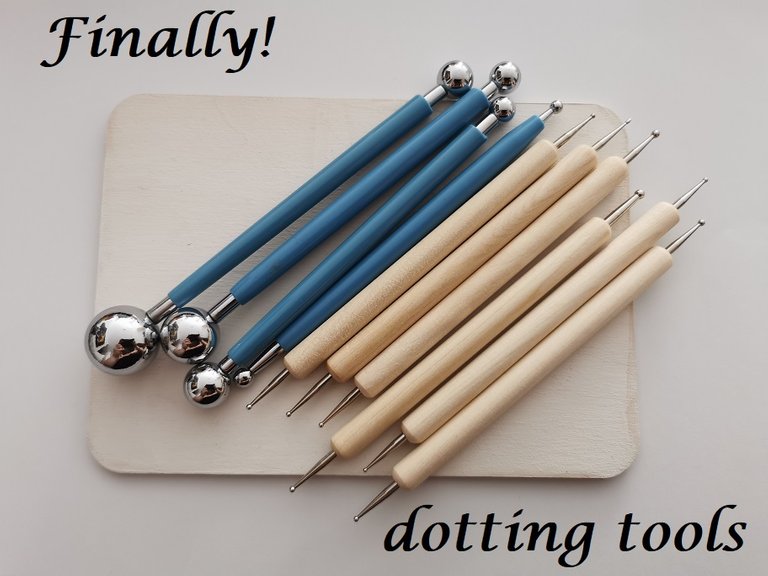
I have been waiting for this set for quite some time now and it was a bit of a bummer not receiving the set before moving apartments. Thankfully, the postman left a notice some days ago and two days ago I could pick it up. I couldn't wait to start using the different sizes of dots and decided to do something different this time. I bought a wooden postcard with the intention of decorating it and actually send it to someone in the future. I primed the wood the same evening and about a week ago, I started painting and dotting to decorate it.
I took my time to finish this work
I prefer having several different works at the same time so that I can paint every day and go with my current flow. If I focus on one project only, I sometimes don't feel the inspiration and then it just lies there waiting for me to finish it. Having several projects with a totally different feel helps me to paint every day.
I always browse the internet a bit for inspiration before I start dotting something new, once I'm in the flow I paint working from my intuiting. For some reason, I usually need to browse through some color pallets before I actually start creating my own artwork. This time I felt like creating a sunflower mandala artwork as the main topic and use bright colors combined with some brown.
The process
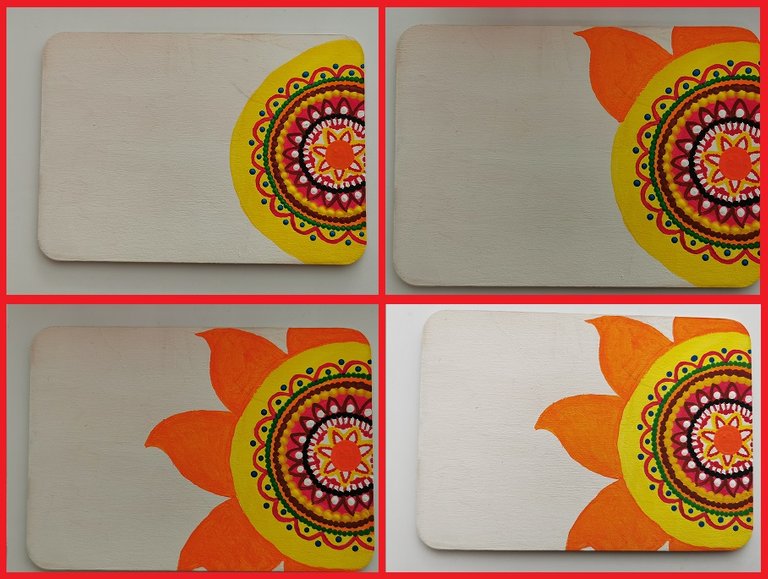
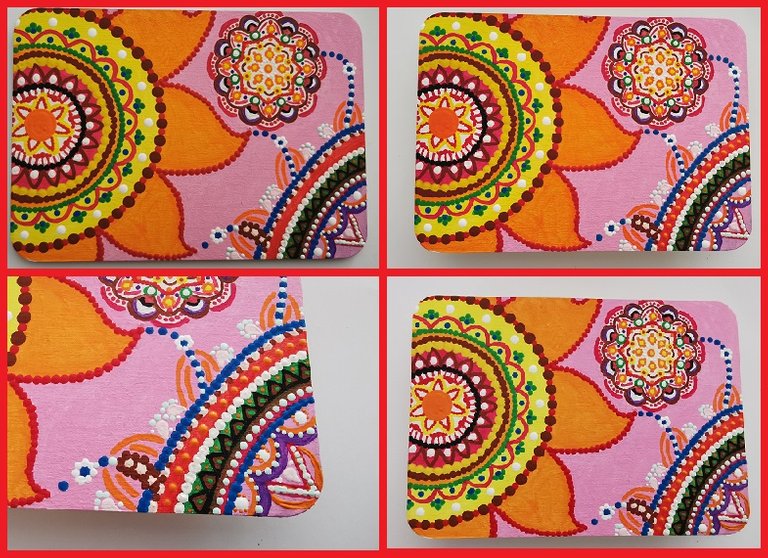
As per usual, I have made the process visible in steps of 4 each time. These are the first ones:
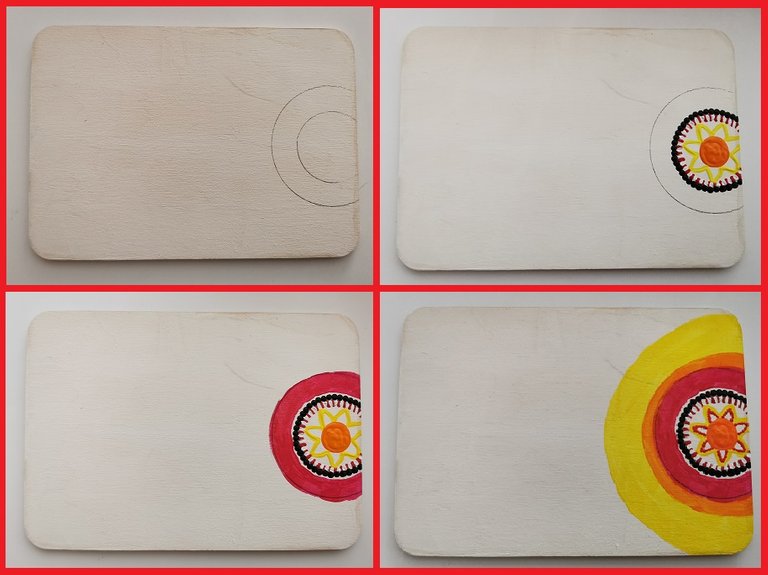
At this point, I decided to start creating something on the right side first. Probably a flower or something, This time I made some marks with a pencil, but I didn't use a compass because I didn't have a decent one until a few days ago while this project has been ongoing for at least two weeks now. I thought of giving the background some colors before starting to dot and paint, so I added orange and yellow.
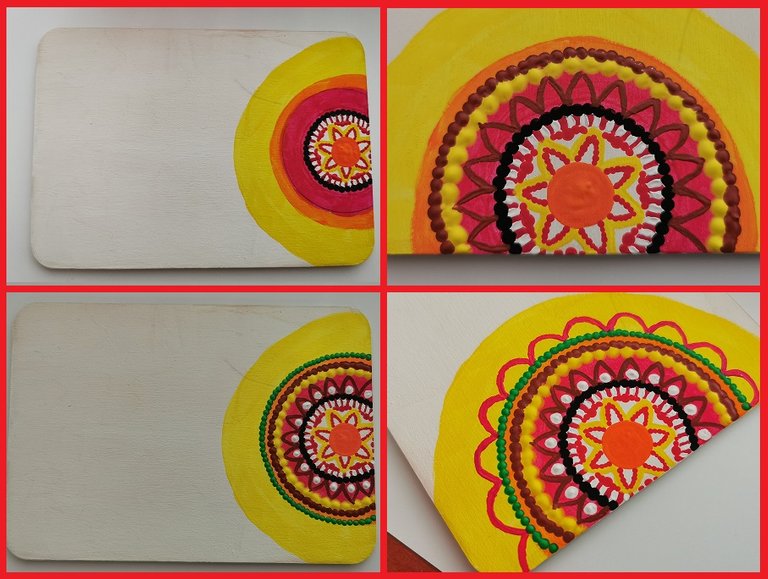
I know it's not a perfect circle in any way, thankfully, I know that I can camouflage this most of the time by dotting or adding other decoration in a later stadium. As you can see at the zoomed-in pictures, the paint is quite thin for dotting and therefore often they seem to flatten a lot. I noticed this before obviously but as I have so little closet space for my crafting supplies for the moment, I don't want to buy a lot of new paint just yet. Maybe I should start using these thinner paints for backgrounds only though, to not ruin the hours of work that I put in it to finish. :)
The left picture gives me such a happy feel to it, and I'm feeling a sort of Mexican vibe at this point due to the colors used, and I think I'm going to add something to make it look like a flower. I did that using orange and tried to make them look a bit like flames/waves. The left bottom is a picture of when it was still wet, and on the right, you see how it dried up. It also helped that this was daytime again to take a good picture.
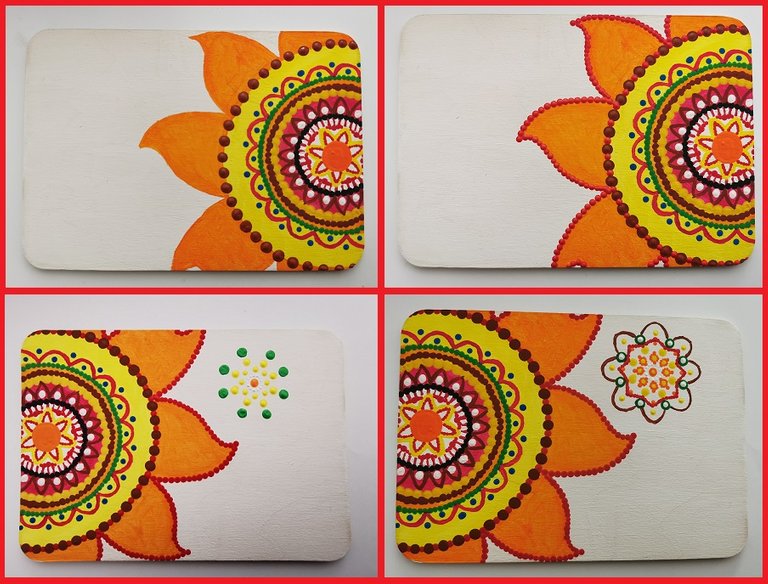
I actually love how I added more details to the flower in the first two pictures at the top. And then I got a bit lost on how to proceed, I also was in doubt (until the very last moment!) if I should leave the orange leaves as if or add decoration inside the leaves as well. I like the outer line of dots, but I felt this was enough.
Instead of focussing on the big flower, I decided to add a smaller one on the right. Yes on the right, I had to flip the painting because I found out I had the postcard upside down all along (oops!). I don't think it's very disturbing so I didn't stress about it and was happy that I found out before it was too late (who knows I might be adding something that can't be flipped later).
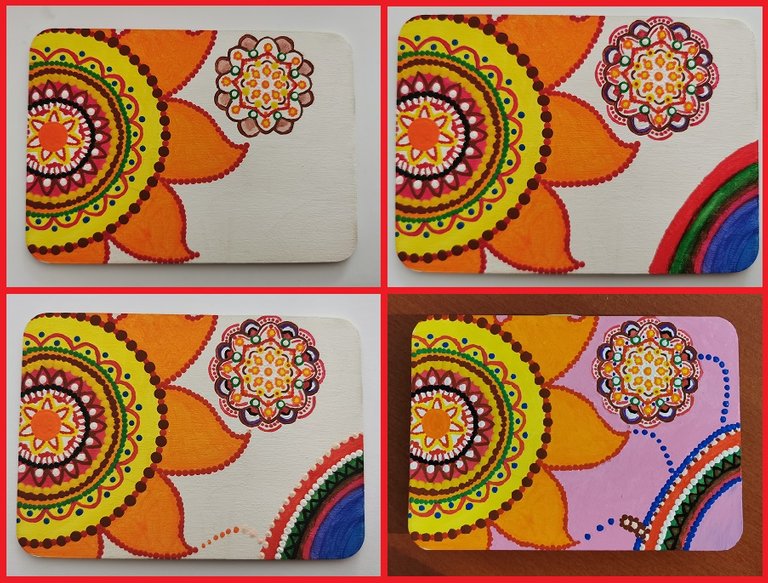
Let's be honest, the first picture is still fine, I like the shading of the brown and even what I did to the smaller flower in the right top picture, BUT then I wanted to add something at the right corner and started choosing the wrong colors and it looked like a completely messed up rainbow. I felt quite stressed and disappointed at this point and wondered how I was going to make this look less annoying.
At these moments, it's best to let that part go a bit and try adding some dots or lines at other places rather than looking at the "failed" part. I tried to connect the two parts, but then I decided this wasn't it either and painted the background pink to give it another feel hoping for a new sort of inspiration. I also covered up the corner with pink (you can see it didn't cover it 100%) and then it started to feel less annoying thankfully. At this time, I decided to just focus for a while and finish it so that I can move on to the next project. I felt that I already wasted too many hours on this one feeling annoyed because of ruining the right corner, so it was time to move on rather sooner than later.
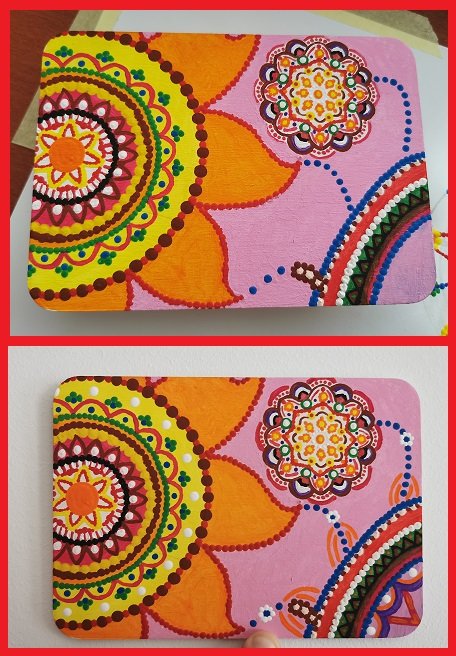
I started to decorate the blue dots a bit and try to see if I could connect the colors of the other parts a bit. I think here it already looks much better than the previous picture. I also started to correct the dots and lines of the flowers because when I added the pink background, I accidentally ruined a few lines and dots here and there.
I feel it's almost done! Have a look at the last few pictures of the process before I found it was finally done.
And there it felt done, I now know that even when a part looks super ruined, I can polish it up by giving another twist to the coloring of that part of the painting. The next time that I will use a wooden postcard, I will probably see if I can paint a scenery for a change like I tried on the stones. On stones, it was quite hard to cover up mistakes because the surface under the gesso was slippery and I noticed adding more paint would erase the gesso layer making it impossible to correct. As I've never painted scenery on a wooden surface and now have some more tools, I want to give that a try next time.
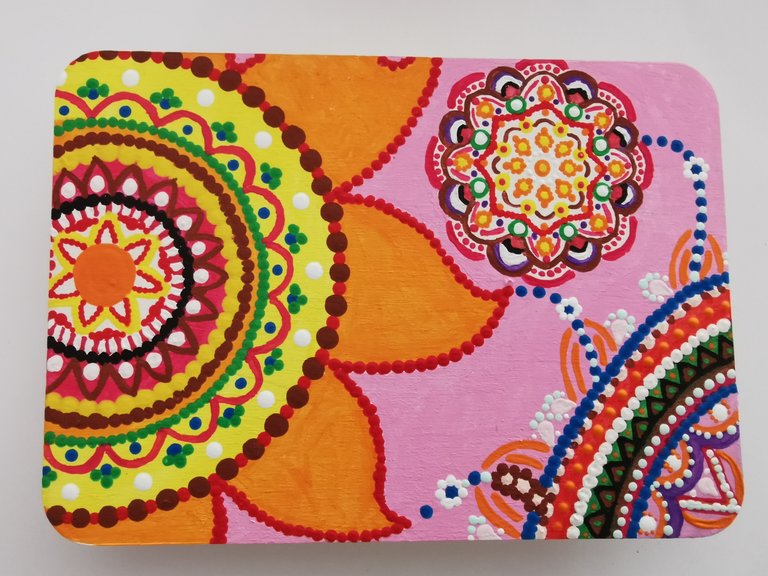
One last time, the end result of this work:
I hope you enjoyed going through the process with me, and see you next time!
<3
Shared on Twitter #oc #posh
https://twitter.com/makehivethrive/status/1297502005410385921
Fabulous, it has classic touch in it.
Thank you @mobi72, appreciate your comment!
Congratulations @thisismylife! You have completed the following achievement on the Hive blockchain and have been rewarded with new badge(s) :
You can view your badges on your board And compare to others on the Ranking
If you no longer want to receive notifications, reply to this comment with the word
STOPTo support your work, I also upvoted your post!
Do not miss the last post from @hivebuzz:
Thank you for posting via our community. This post wilhl be passed to other curation projects for more rewards.
Thanks! Much appreciated :)