Un saludo Creativos 🤗 / Best regards Creativos 🤗
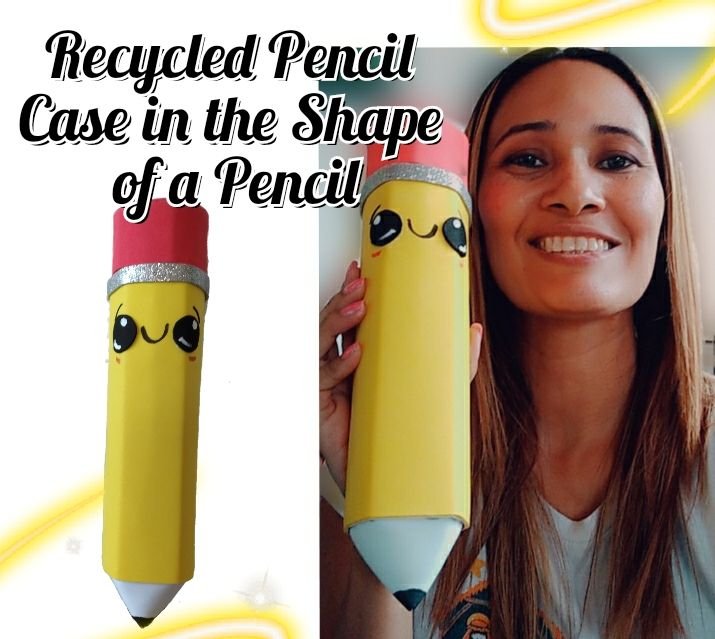

Para las niños es divertido crear manualidade, crear figuras con motivos kawaii están de moda,esto le dan como vida a la manualidad, así que hoy Les he traído una manualidad de un lápiz para guardar los colores, los lápices o simplemente también puede ser un lápiz para cotillón puede servir, solo haz volar la imaginación 🤗.
Así que si eres de los que te gustan las manualidades esta es para ti.

For children it is fun to create crafts, create figures with kawaii motifs are fashionable, this give life to the craft, so today I have brought you a craft of a pencil to keep the colors, pencils or simply can also be a pencil for cotillion can serve, just let your imagination fly 🤗.
So if you are one of those who like crafts this one is for you.
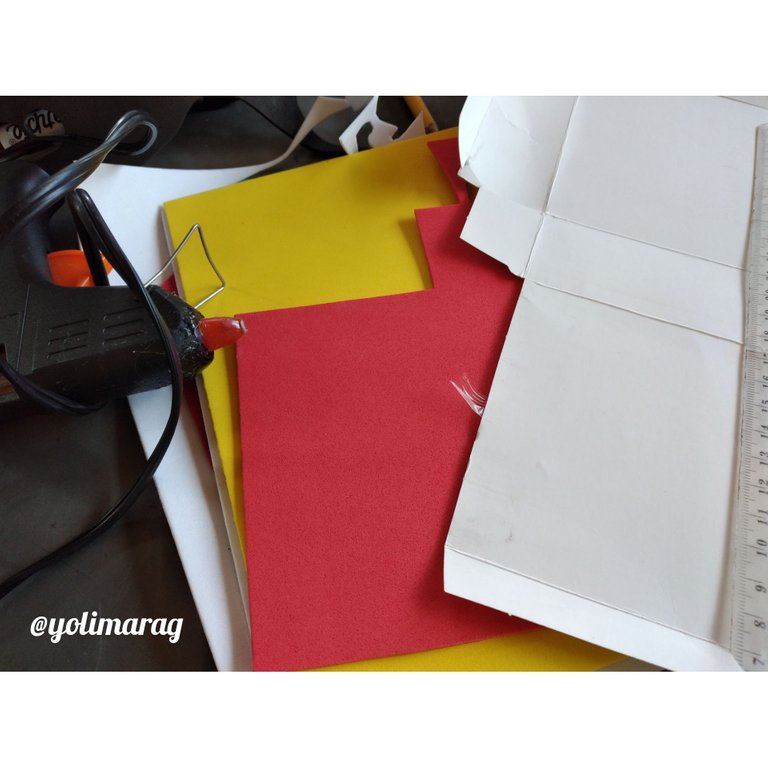
Materiales:
- Foami rojo, amarillo, bkancoby negro.
- Silicona Caliente.
- Cartón fino.
- Marcadores.
Materials:
- Foami red, yellow, black bkancoby.
- Hot Silicone.
- Thin cardboard.
- Markers.
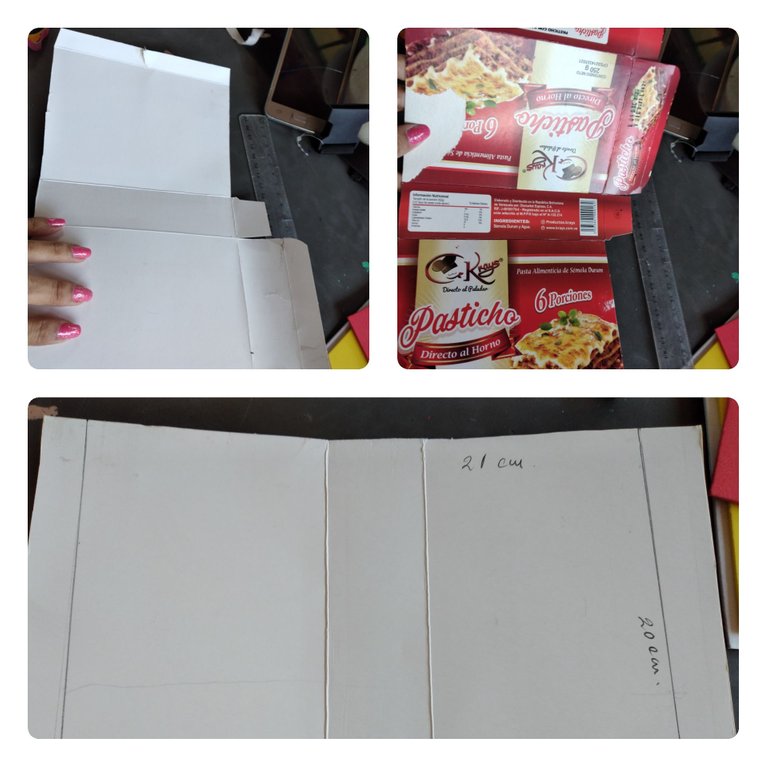
Vamos a tomar un cartón fino en este caso de vamos a reutilizar un cartón que era de una pasta para pasticho, lo voy a utilizar para hacer esta manualidad y las medidas son 21x20cm.
We are going to take a thin cardboard in this case we are going to reuse a cardboard that was from a pasticho paste, I am going to use it to make this craft and the measures are 21x20cm.
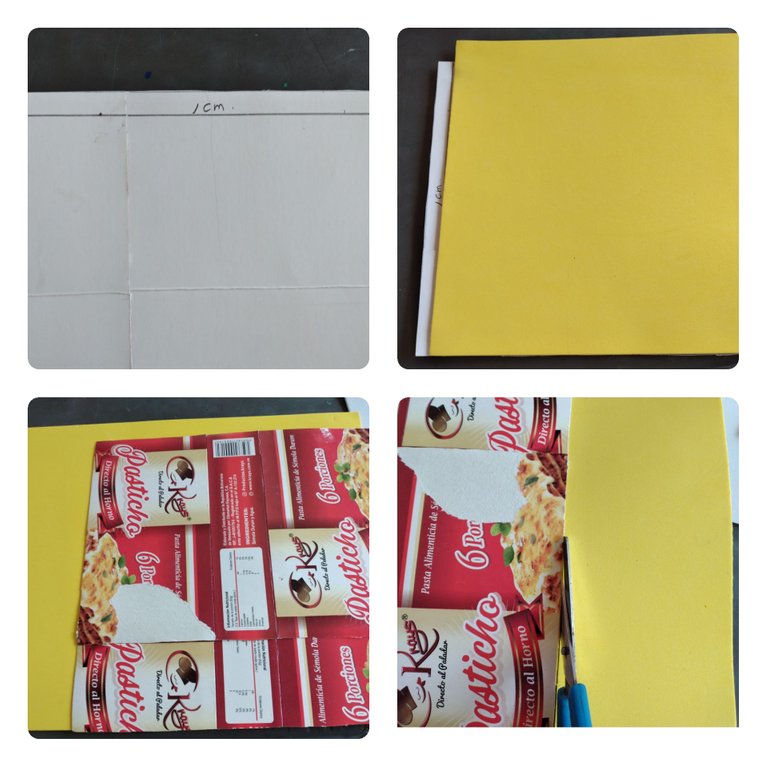
En el cuadro que ya hemos hecho de 21 * 20 cm vamos a hacer al lado un centímetro de distancia, vamos a tomar ese centímetros y le vamos a colocar pega a todos los demás menos a ese centímetro y sobre donde colocamos el silicon, vamos a colocar nuestros foami amarillo lo pegamos bien.
On the square that we have already made of 21 * 20 cm we will make a centimeter distance to the side, we will take that centimeter and we will put glue to all the others except that centimeter and on where we put the silicon, we will place our yellow foami and we will glue it well.
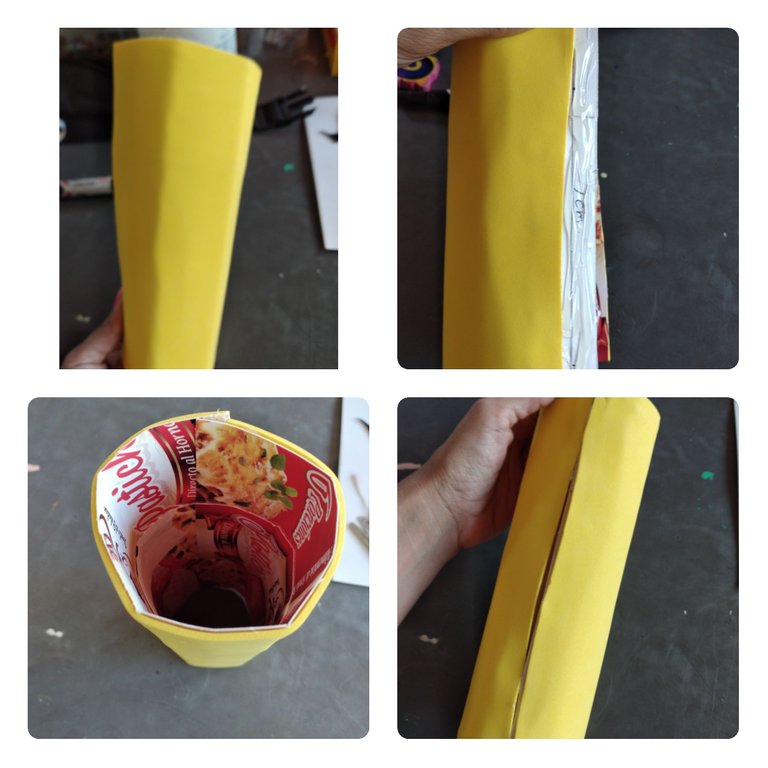
Ahora pegaremos en el centímetro que dejamos nuestra parte del lateral para convertirlo en un cilindro.
Now we will glue in the centimeter that we left our part of the side to turn it into a cylinder.
Cortaremos una línea de un centímetro en foami amarillo y se lo pegaremos en la ranura que queda de nuestro cilindro, para para que se vea mejor.
We will cut a one centimeter line in yellow foami and glue it in the remaining groove of our cylinder to make it look better.

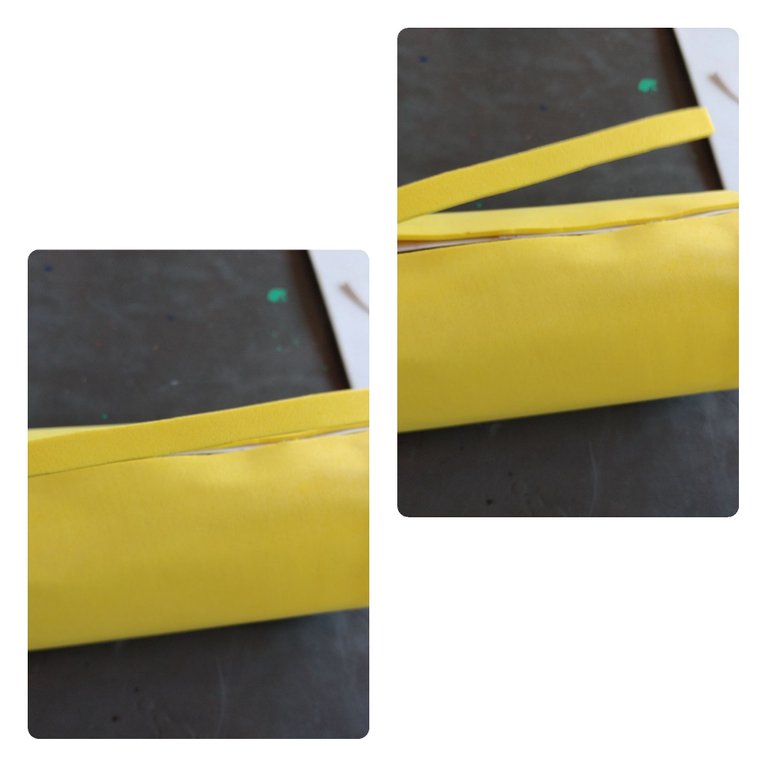
Haremos un círculo de aproximadamente 10 cm y vamos a recortar una parte como de un pastel, así se verá como un Pacman, Y eso lo vamos a unir esa parte con la parte que está recortada tal Como se muestra en la fotografía.
We will make a circle of approximately 10 cm and we will cut out a part like a cake, so it will look like a Pacman, and we will join that part with the part that is cut out as shown in the picture.
Pegaremos esta figura en alguna de las puntas de nuestro cilindro.
We will glue this figure on one of the ends of our cylinder.
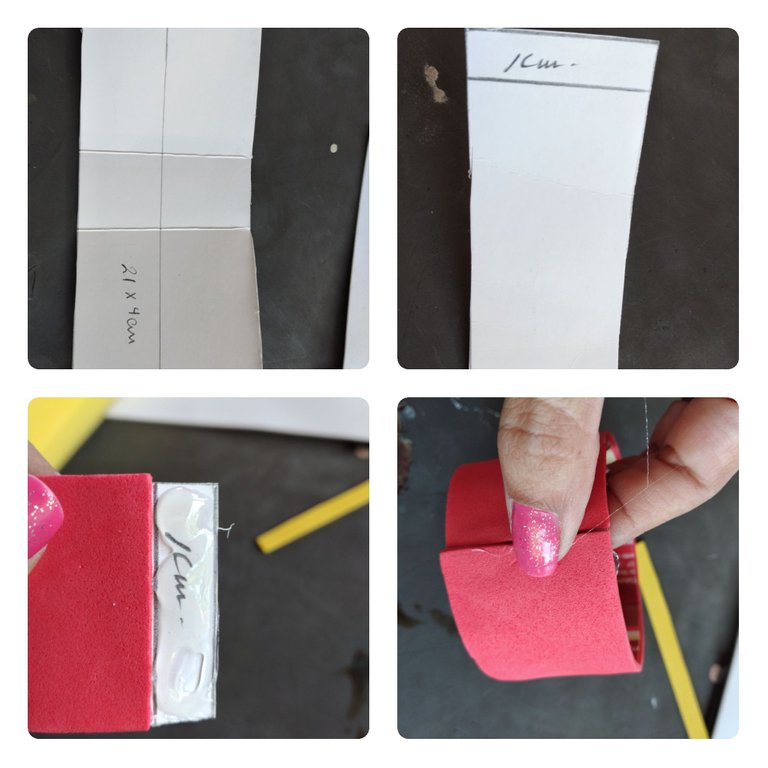
Ahora haremos un rectángulo de 21 cm por 24 cm y en una de las orillas Igual vamos a hacer un centímetro de distancia, vamos a comenzar a pegar nuestro foami rojo sobre este rectángulo de cartón dejando a un lado el centímetro que ya hicimos, como se muestra en la foto.
Now we will make a rectangle of 21 cm by 24 cm and in one of the edges we will make a centimeter distance, we will start gluing our red foami on this rectangle of cardboard leaving aside the centimeter we already made, as shown in the picture.
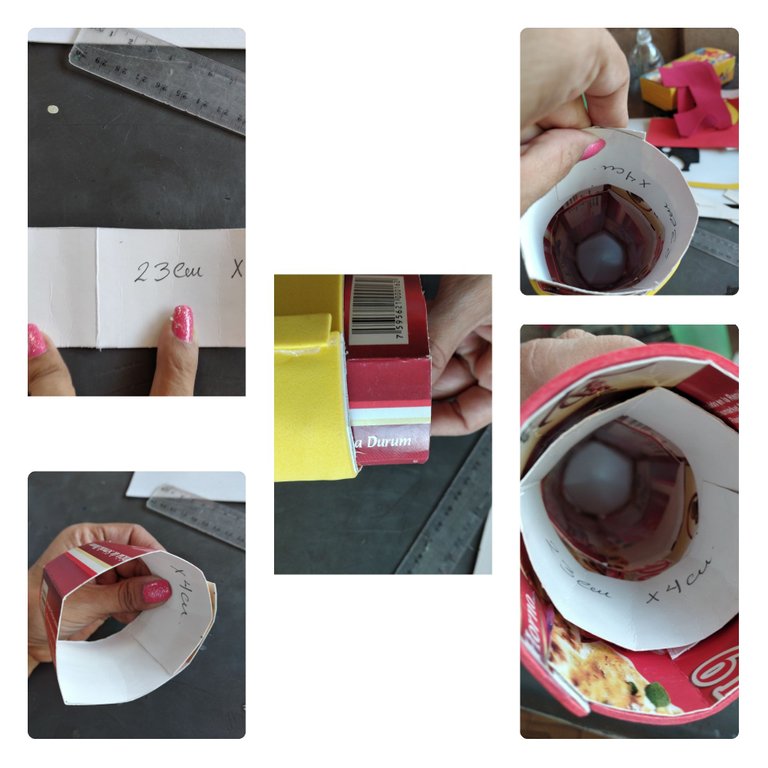
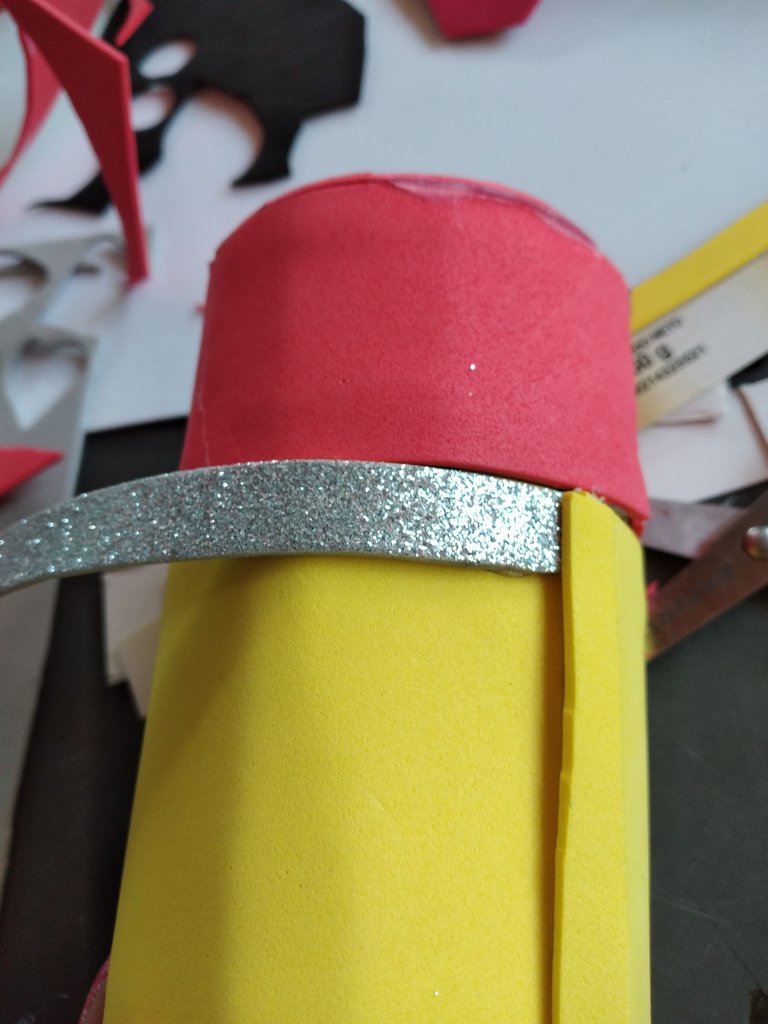
Haremos otro rectángulo de cartón de 23 cm por 4 cm y vamos a hacer un círculo e introducirlo en nuestro cilindro en la parte de arriba y también en lo nuestro foami rojo debe encajar en ambos lados, luego pegamos en lo que será nuestra tapa.
We will make another cardboard rectangle of 23 cm by 4 cm and we will make a circle and insert it into our cylinder at the top and also in what our red foami should fit on both sides, then we glue on what will be our lid.
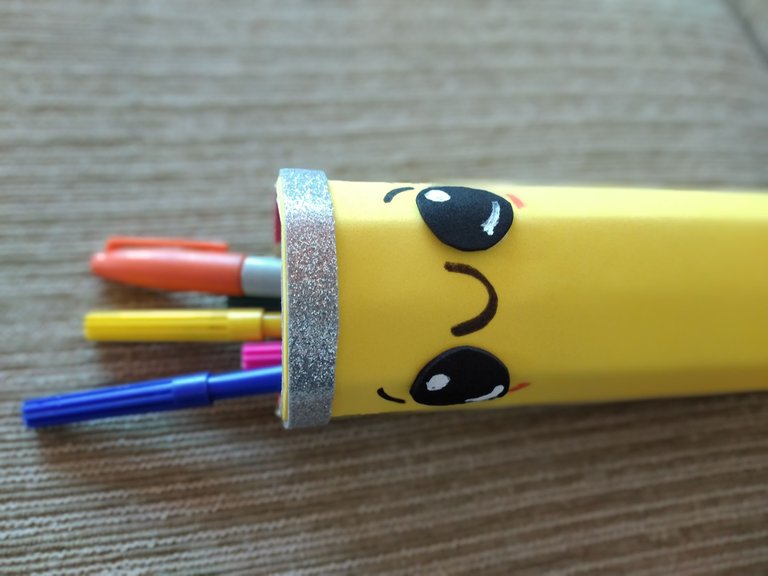
Cortaremos una tira de un centímetro en foami escarchado para darle la sensación de de hierro que tiene el lápiz y lo pegaremos.
We will cut a one centimeter strip in frosted foami to give the pencil the feeling of iron and we will glue it.

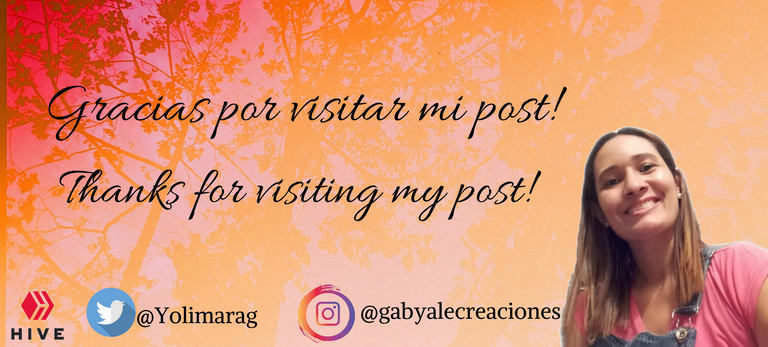
Por último recordaremos nuestros ojos los pintamos les damos una sonrisa a nuestro lápiz y así quedará listo y hermoso.
Gracias por estar aquí, nos vemos en un próximo post bendiciones.
Finally we will remember our eyes we paint them we give them a smile to our pencil and it will be ready and beautiful.
Thanks for being here, see you in the next post blessings.
Fotos principal editada con Canva.
Fotos de mi Autoría derechos reservados
Cámara: Samsung A20S
Traducido con www.DeepL.com/Translator (versión gratuita)
Photos edited with Canva
Photos by me Author's rights reserved
Quote> Camera: Samsung A20S
Translated with www.DeepL.com/Translator (free version)


https://twitter.com/yolimarag/status/1378385719413063684