(ESP-ENG) Monedero para papá
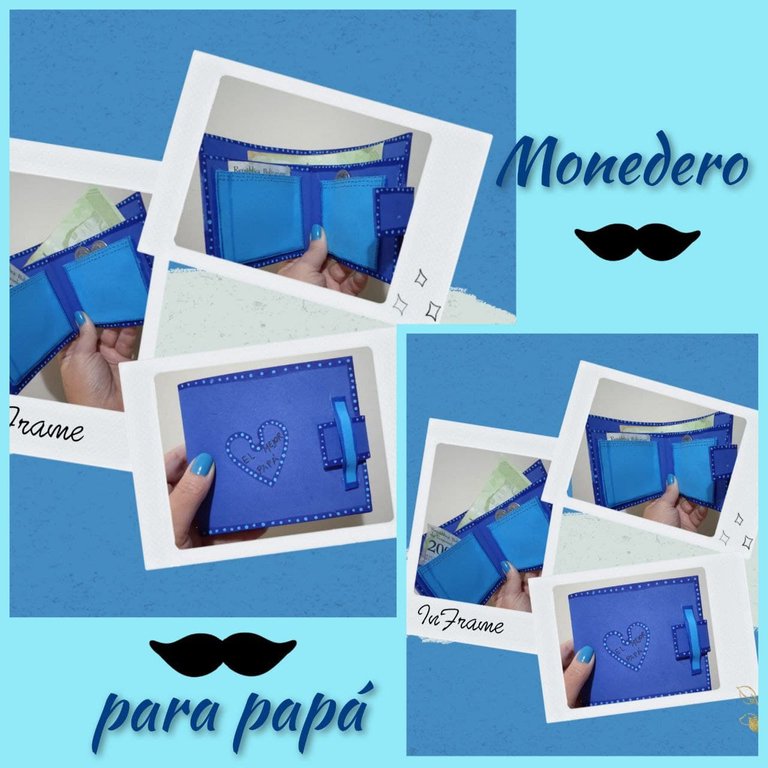

Hoy les traigo otro proyecto de mis manualidades para regalar. Esta vez elaboré un monedero hecho con foami para los papás. A mí me gusta mucho trabajar con este material, es muy versátil y los detalles que se pueden hacer son infinitos. Me gustan muchos los colores y las texturas que nos ofrecen.
Today, I bring you another project of my crafts to give as a gift. This time I made a purse made with foami for dads. I really like working with this material, it is very versatile and the details that can be made are infinite, I like the colors and textures that it offers.
Este monedero quedó muy bonito y como siempre les digo, fácil de hacer porque con un poco de creatividad, dedicación y cuidado, ustedes también pueden hacer lindas manualidades.
This purse was very nice and as I always say, easy to make because with a little creativity, dedication and care, you can also make nice crafts.
Con este proyecto, completo un regalito más para un papá muy querido en mi familia. Así que ¡manos a la obra!
With this project, I complete one more gift for a very dear dad in my family. So let's get to work!
Comparto el paso a paso en fotografías
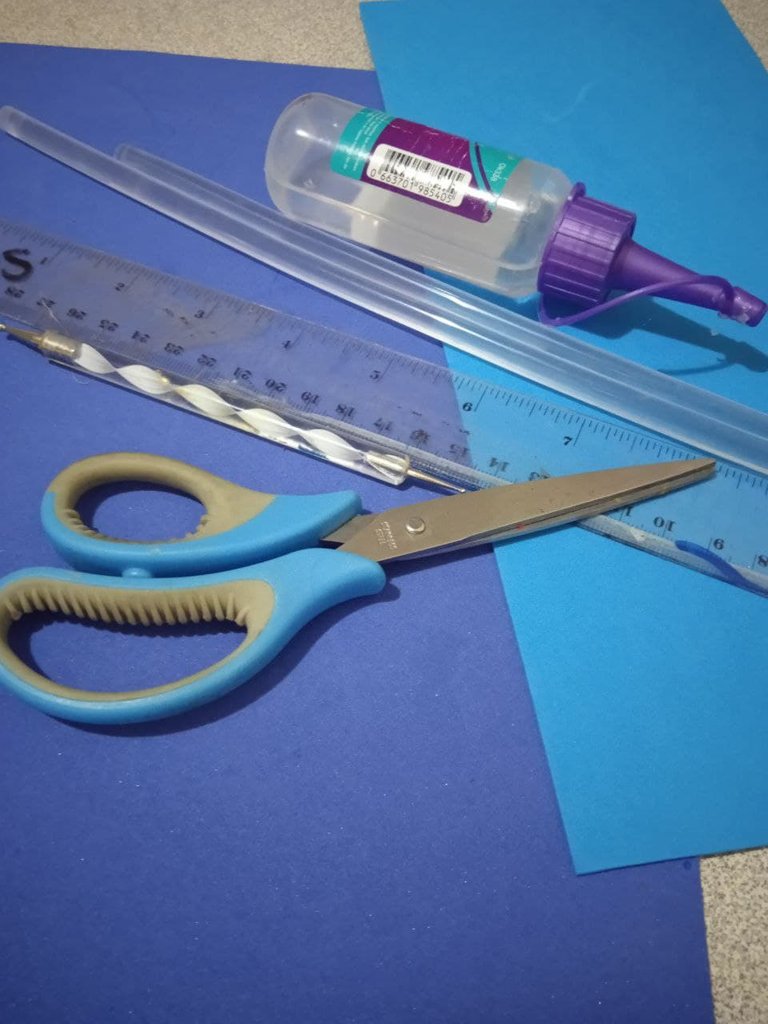
Materiales:
- Foami escarchado del color de preferencia
- Tijeras
- Pintura al frío para pintar puntos
- Regla
- Silicón frío
- Pistola de silicón
- Marcador punta fina
- Marcadores punta gruesa para sombrear
I share the step-by-step in pictures
Materials:
- Frosted Foami in the color of your choice
- Scissors
- Cold paint for spot painting
- Ruler
- Cold silicone
- Silicone gun
- Fine tip marker
- Thick tip markers for shading
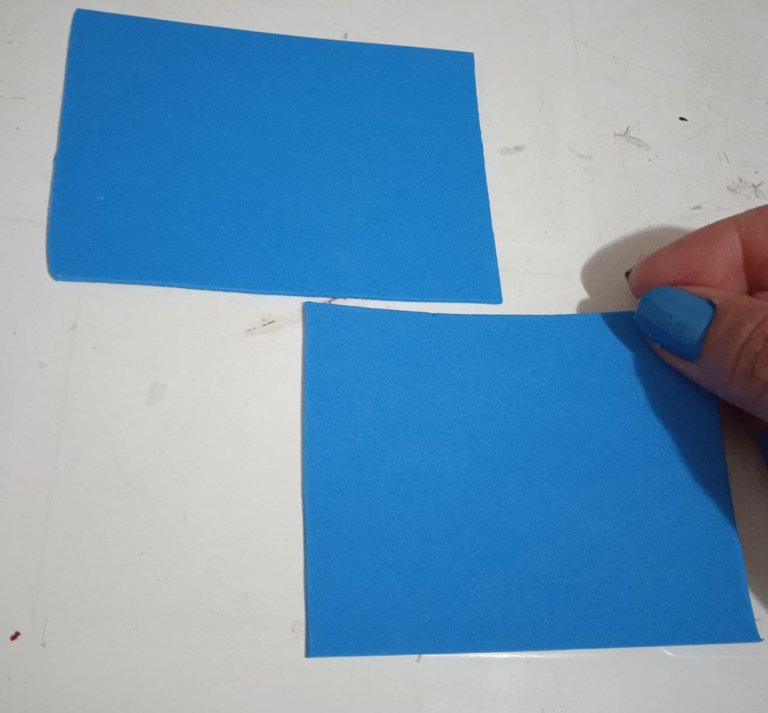
Con todo el material a mano, ya estamos listos para comenzar. Para este detalle, escogí foami de colores azul añil y azul claro.
With all the material at hand, we are ready to begin. For this detail, I chose indigo blue and light blue foami.
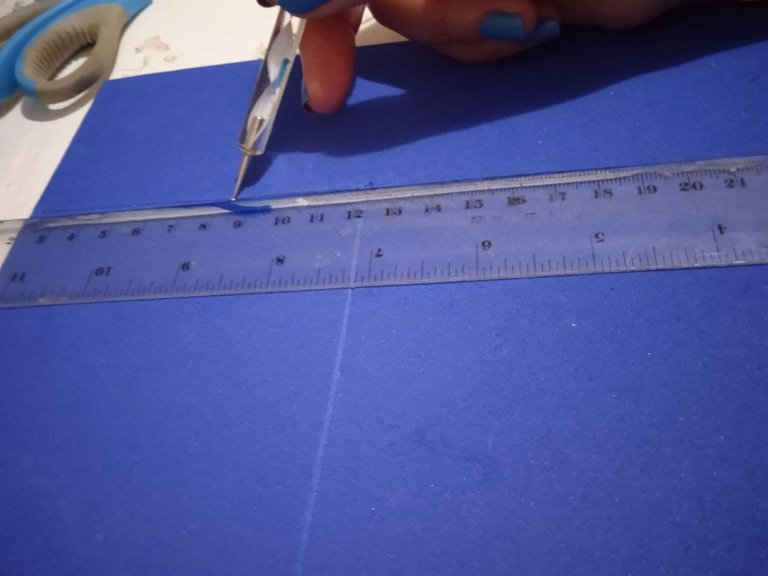
Debemos marcar en el foami dos rectángulos. Uno de 24cms de largo por 10cms de ancho. Y otros igual de 24cms de largo por 8.5cms que serán la base y el espacio para guardar los billetes en el monedero.
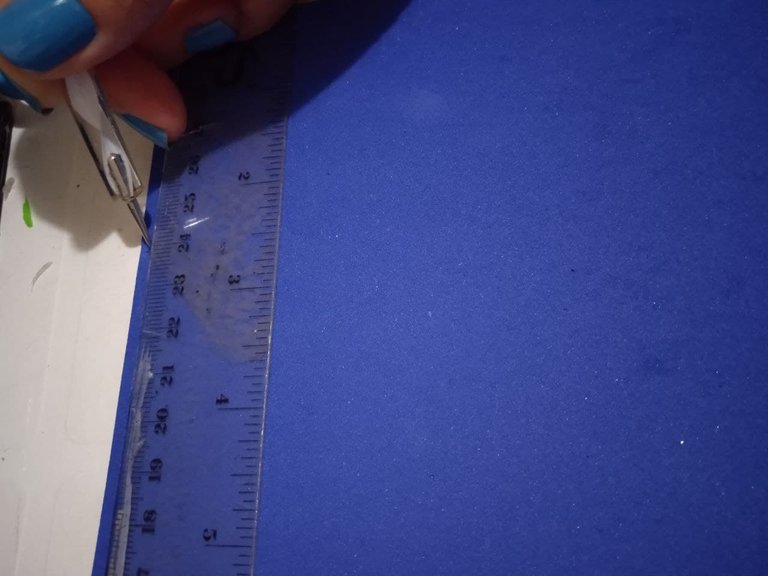
We must mark on the foami two rectangles. One of 24cms long by 10cms wide. And other equal of 24cms long by 8.5cms that will be the base and the space to keep the bills in the purse.
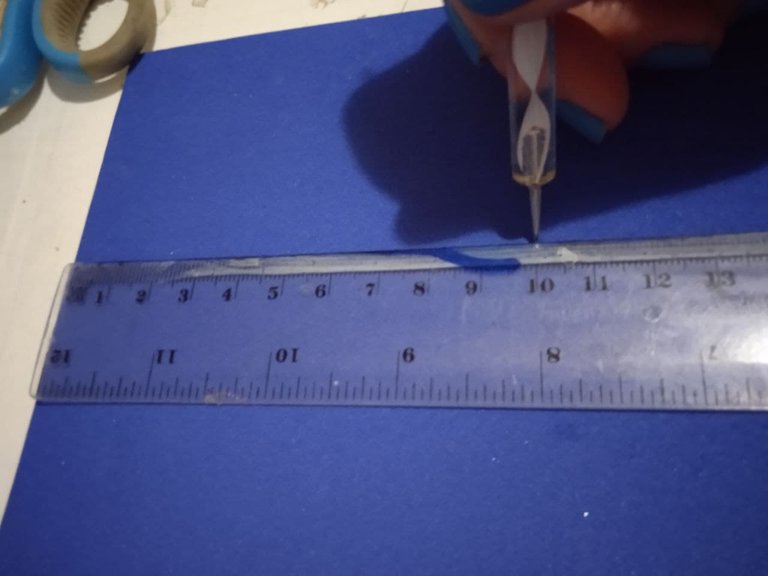
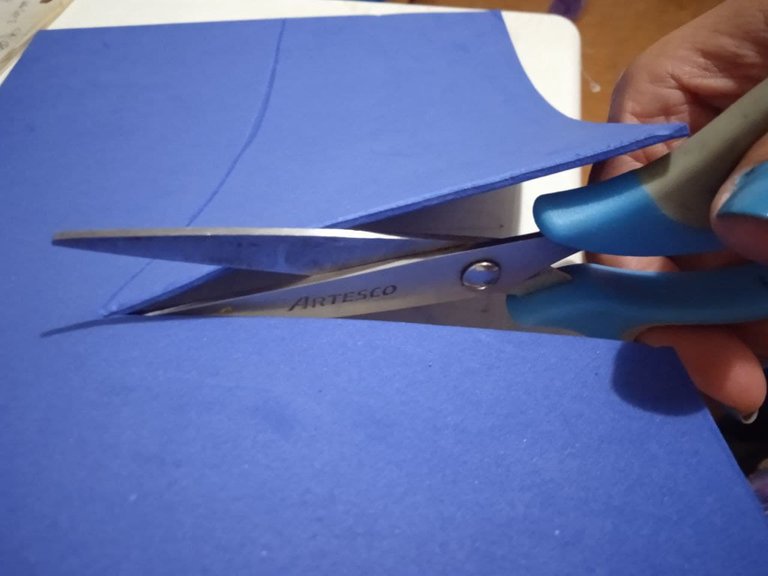
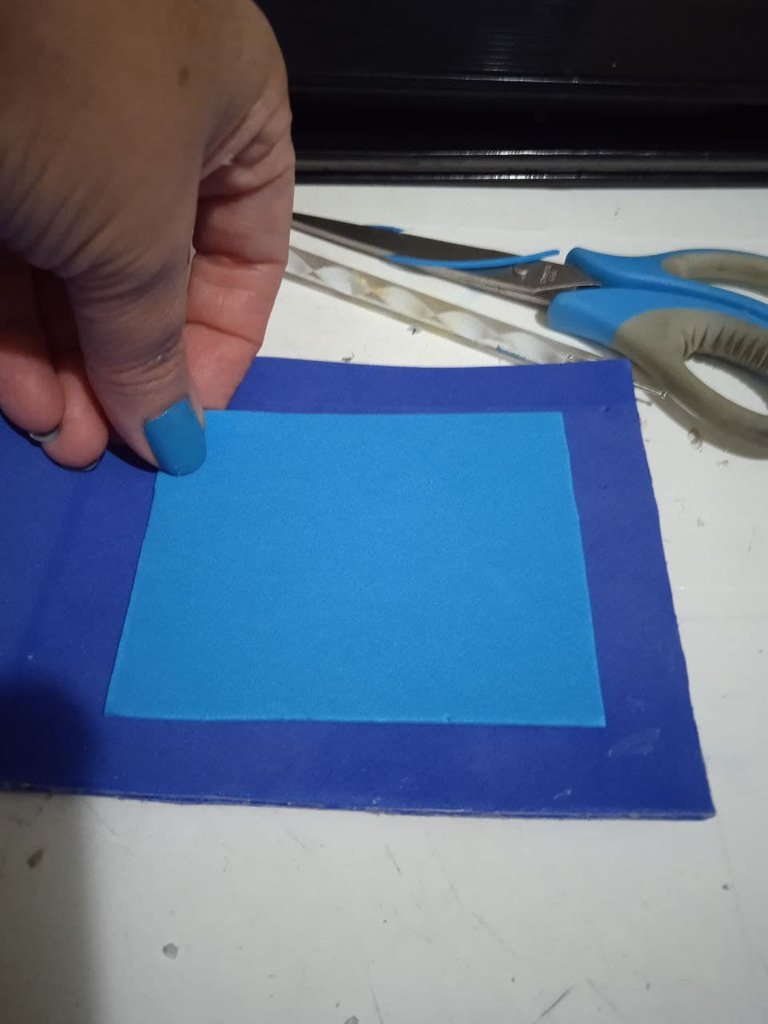
Marcamos esos rectángulos, los recortamos y los pegamos con el silicón caliente.
We mark those rectangles, cut them out and glue them with hot silicone.
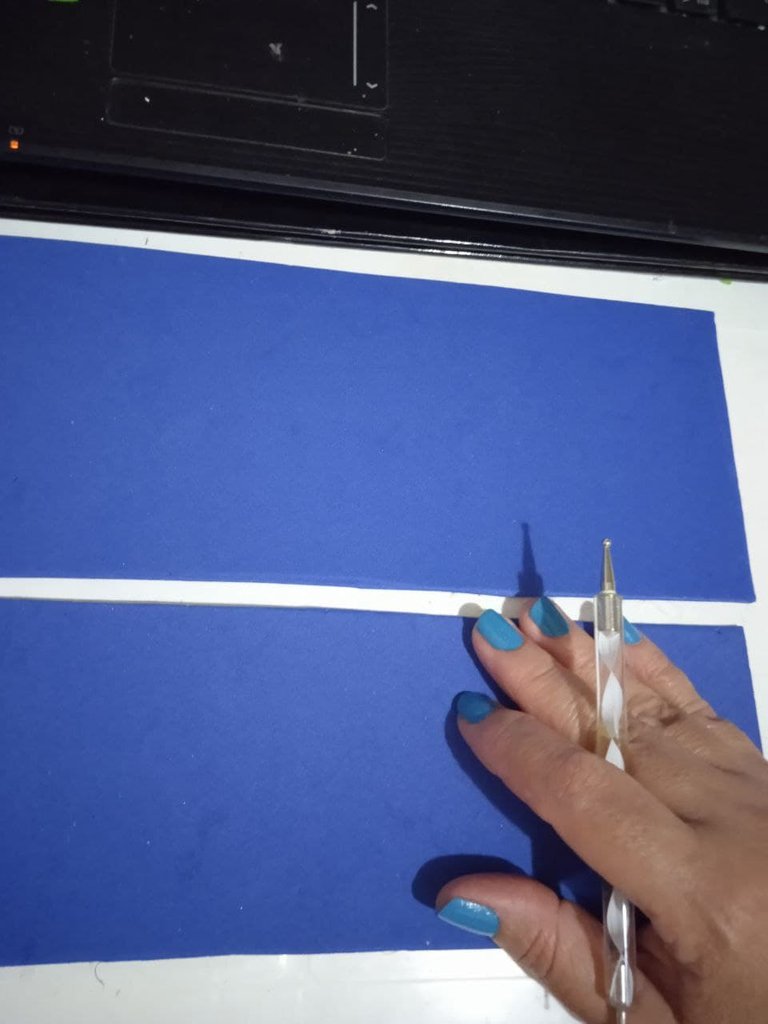
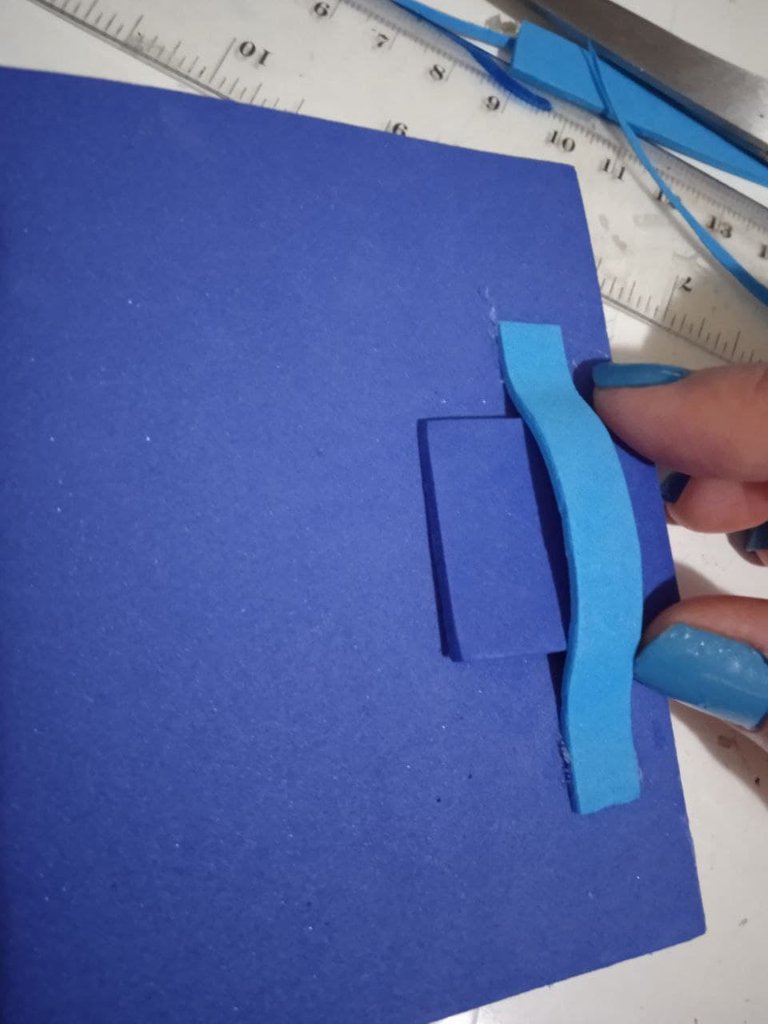
Después de pegar los dos rectángulos, recortamos en el foami azul claro dos cuadrados de 9cms de largo por 6.5cms de ancho.
After gluing the two rectangles together, we cut out two 9 cm long by 6.5 cm wide squares out of the light blue foami.
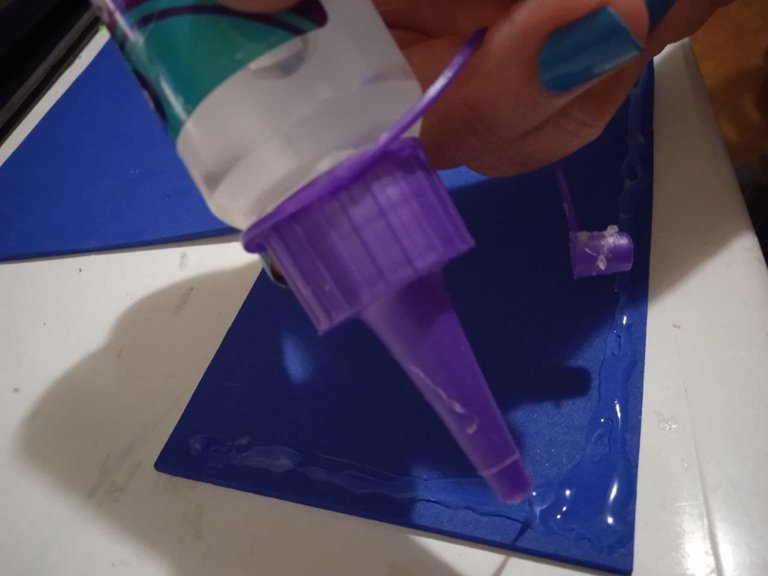
Pegamos estos cuadrados que serán los bolsillos internos del monedero.
We glue these squares, which will be the internal pockets of the purse.
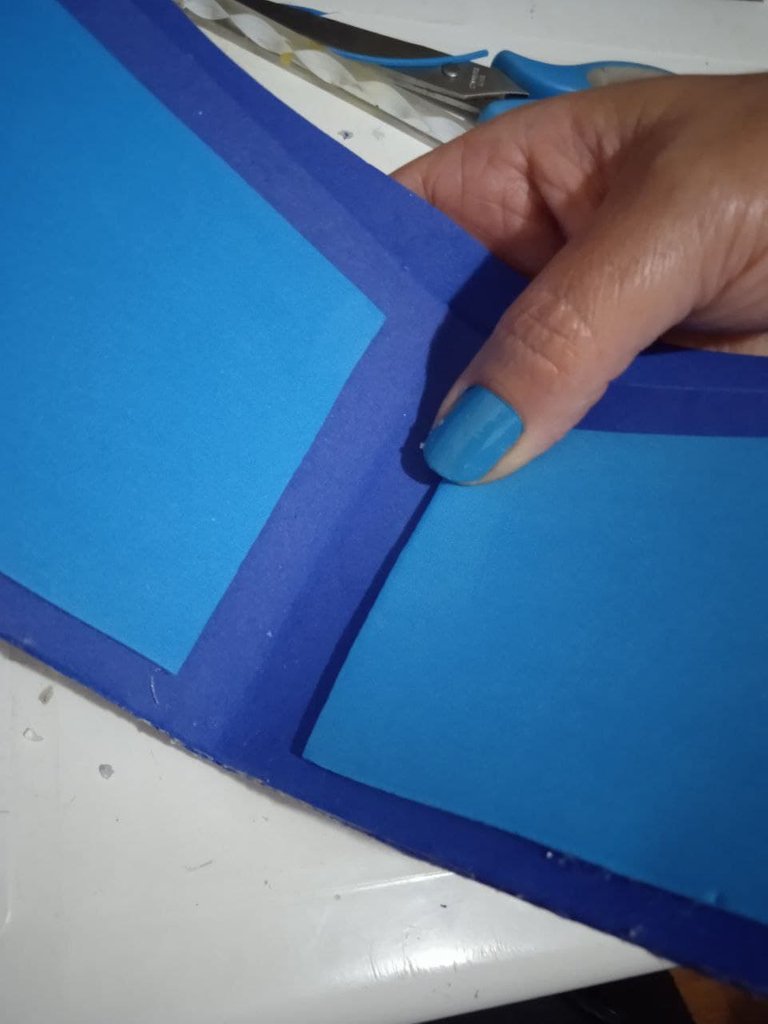
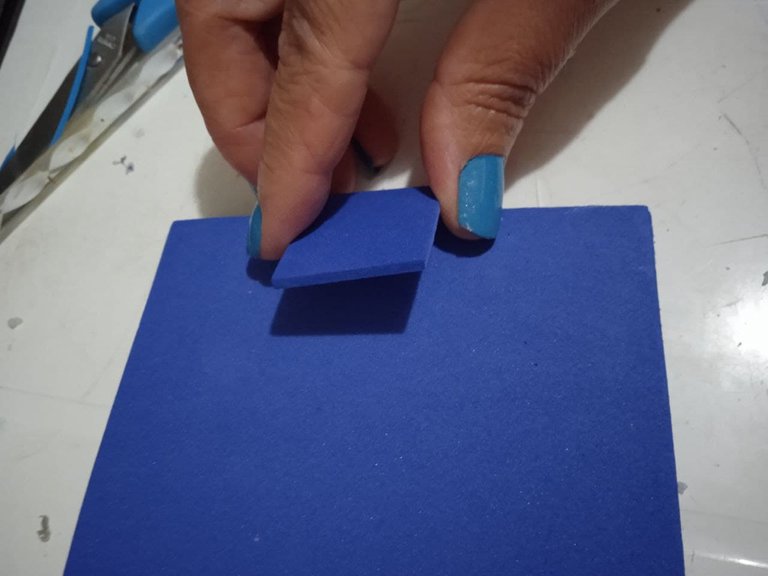
Recortamos un pedazo de foami pequeño, ustedes pueden hacerlo de las medidas que prefieran si lo quieren más corto o más largo, o más angosto o más ancho, este pedazo será el cierre del monedero y se pega por detrás.
We cut out a small piece of foami, you can make it in any size you prefer, if you want it shorter or longer, narrower or wider, this piece will be the closure of the purse and is glued on the back.
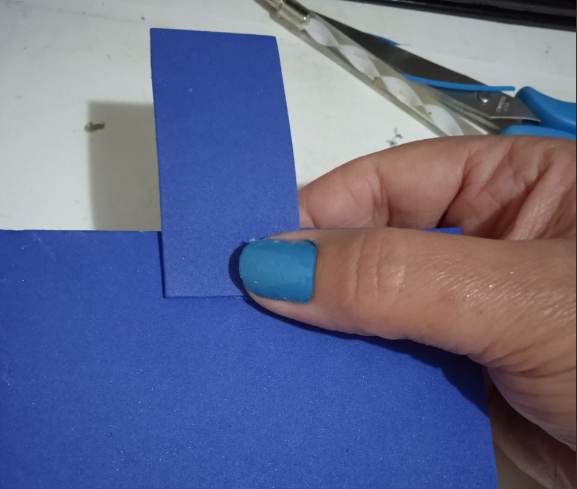
Y para completar el cierre, recortamos otro pedacito de foami y lo pegamos en la parte posterior para que podamos meter el listoncito que pegamos por detrás del monedero.
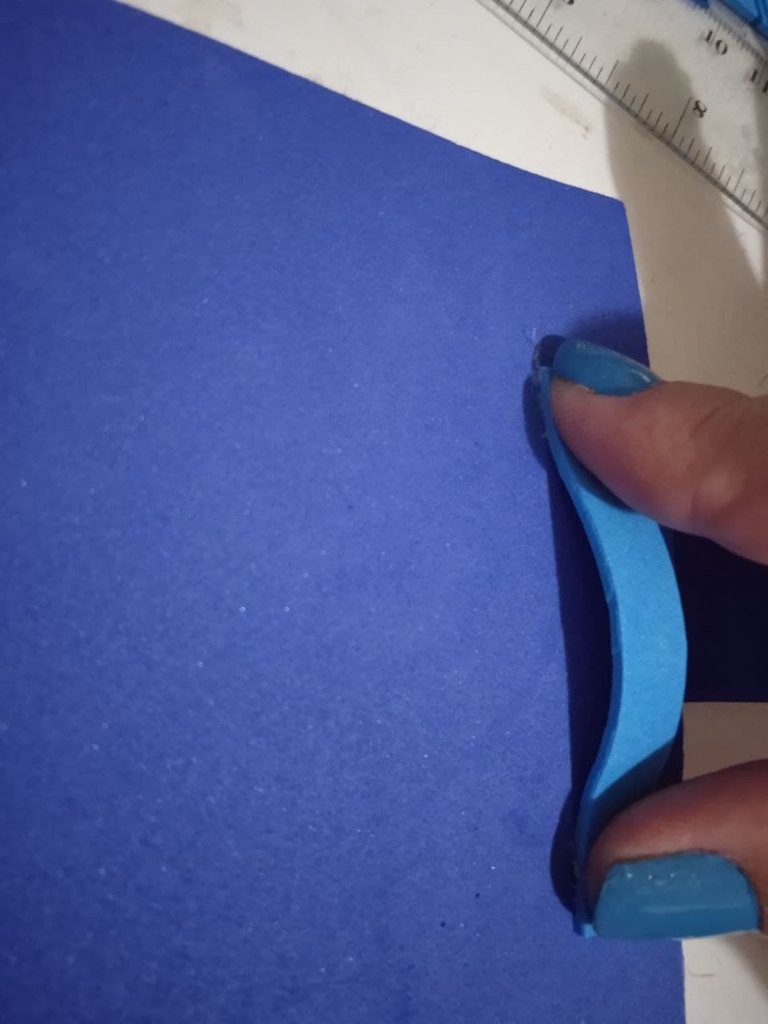
And to complete the closure, we cut out another piece of foami and glue it on the back so that we can put the little ribbon that we glued on the back of the purse.
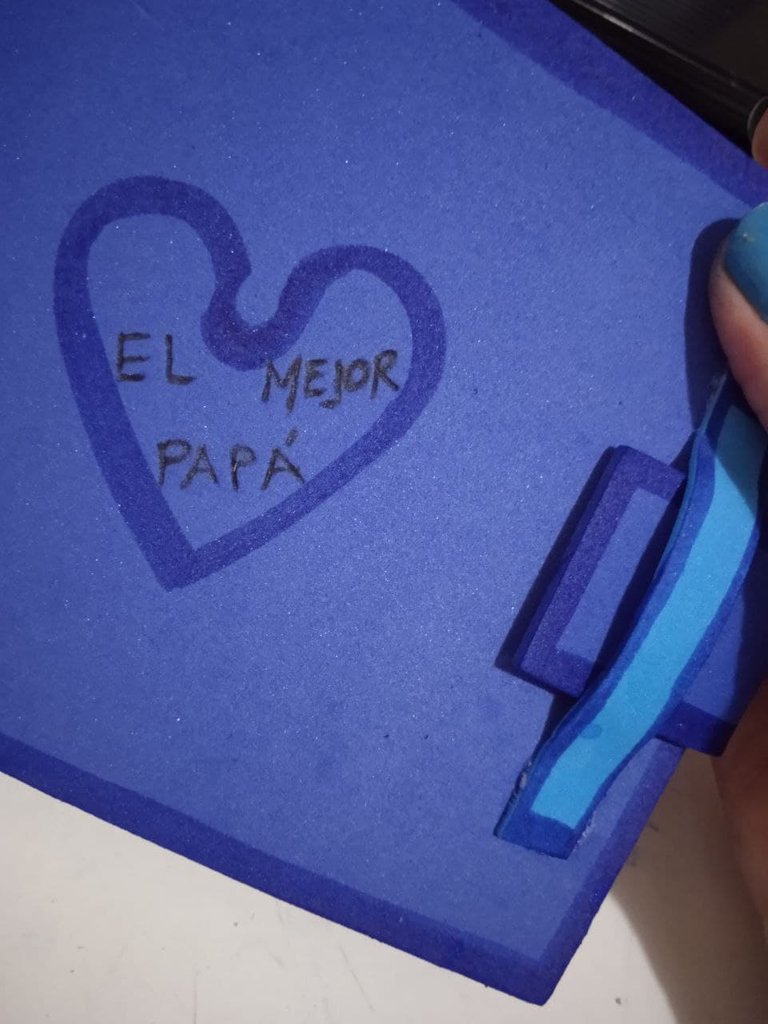
Para los acabados finales, bordeamos con el marcador de punta fina haciendo puntos y rayitas en los bolsillos internos. Adornamos la parte frontal, yo marqué un corazón y escribí dentro El mejor papá.
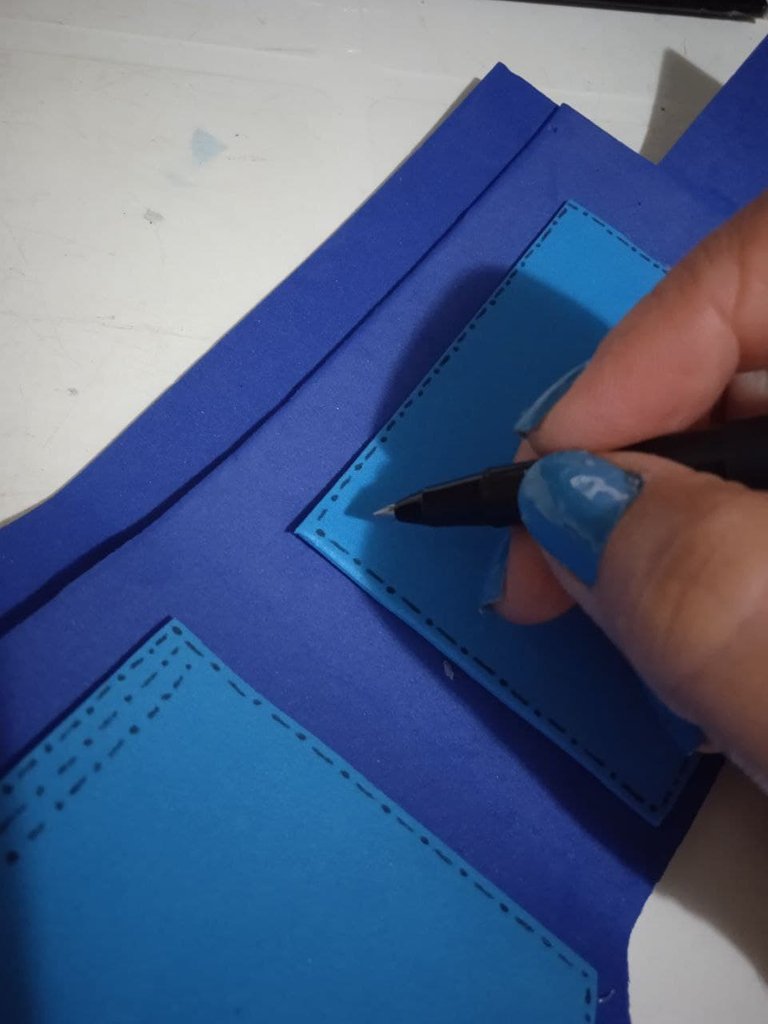
For the final finishing touches, we used the fine tip marker to make dots and stripes on the inside pockets. We embellished the front, I marked a heart and wrote inside The best daddy.

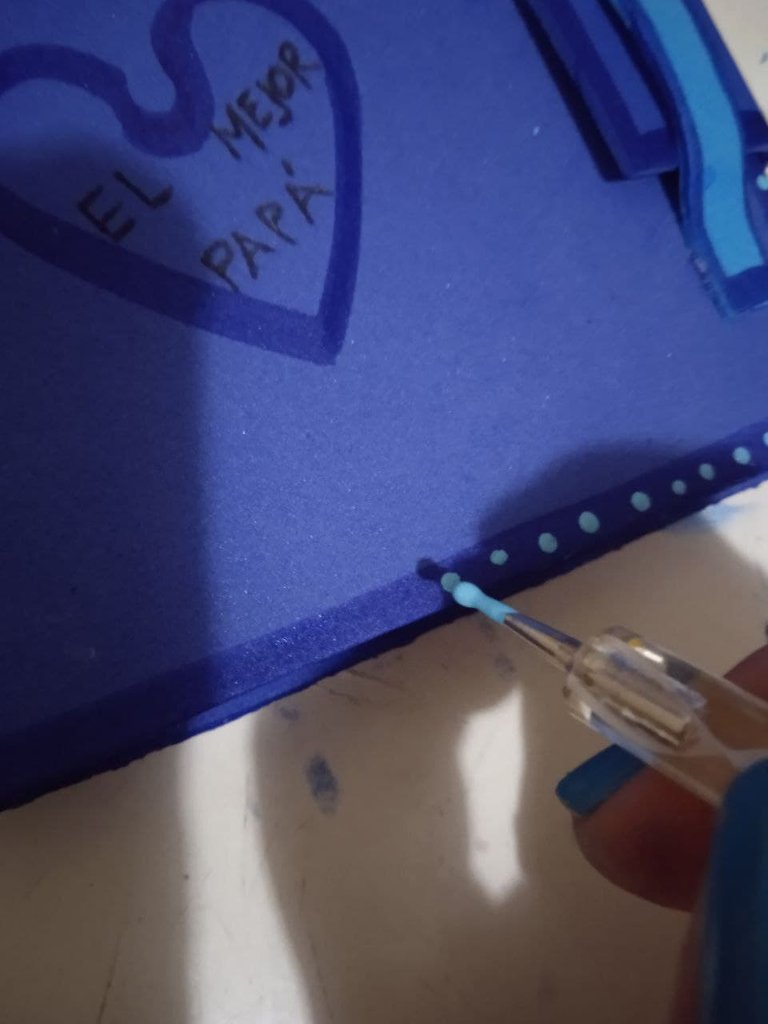
Bordeamos con el marcador azul punta gruesa todo el borde del monedero y con el pintapuntos y la pintura al frío azul hacemos puntitos por todo el borde para terminar.
With the blue thick tip marker, we border the entire edge of the purse and with the stippler and the blue cold paint we make little dots all around the edge to finish.
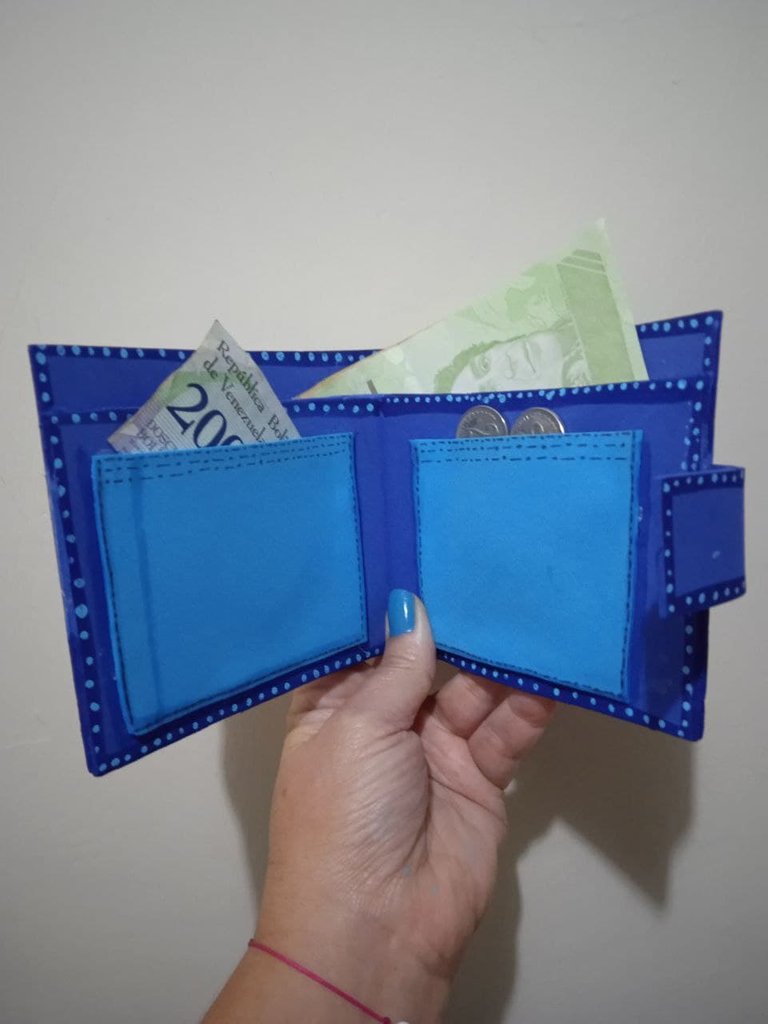
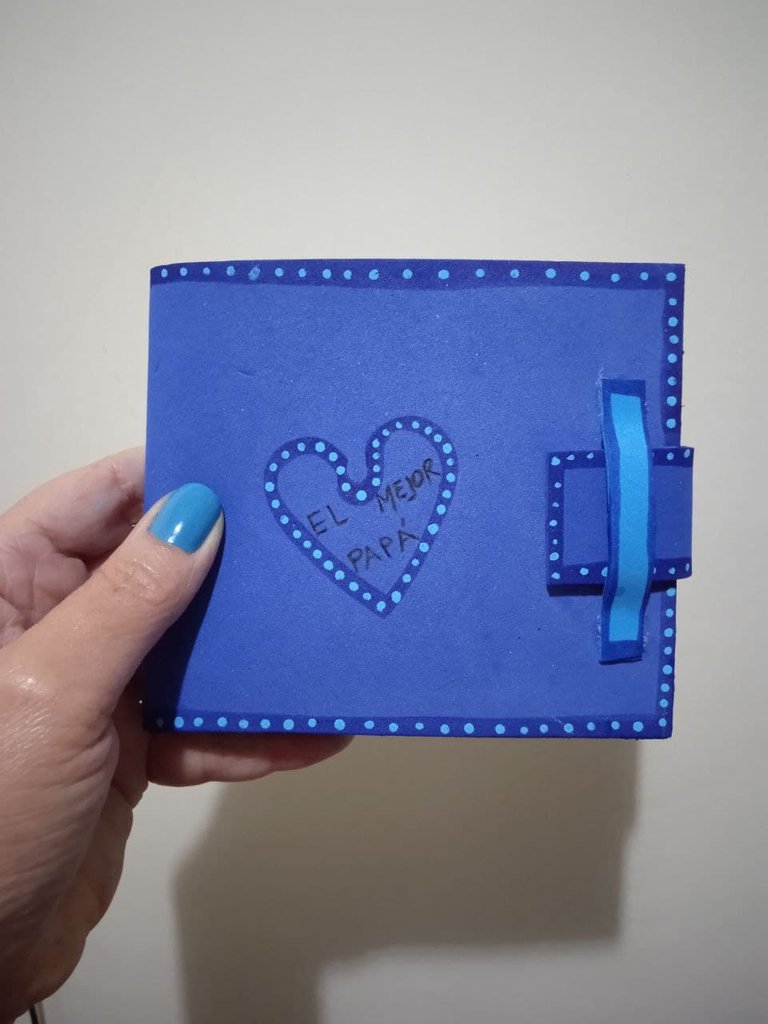
Así quedó listo este monedero para regalar a papá.
Para estas fotos usé billetes devaluados, pero lo mejor es darle a los papás de esos billetes que sí tienen valor.
This is how this coin purse was ready to give to dad as a gift.
For these photos I used devalued bills, but the best thing to do is to give to the dads of those bills that do have value.
¿Les gustó? Pues, entonces anímense a hacer uno de estos monederos o alguno de los detalles que he hecho para regalar a papá en su día especial.
Les dejo las publicaciones anteriores para que puedan revisar los pasos a seguir.
Did you like it? Well, then get excited to make one of these purses or any of the details that I have made to give to dad on his special day.
I leave you the previous publications so you can review the steps to follow.
Todo el contenido de esta publicación es contenido original y trabajo creativo personal. La foto de portada, los separadores y banners son mis diseños en Canva.
All content in this publication is original content and personal creative work. The cover photo, dividers and banners are my designs on Canva.

Your content has been voted as a part of Encouragement program. Keep up the good work!
Use Ecency daily to boost your growth on platform!
Support Ecency
Vote for Proposal
Delegate HP and earn more
Tus proyectos para el día del padre están estupendos, Papá va a estar muy consentido <3
Gracias por compartirnos tus ideas.
Holaaa, amiga. Síí estuvieron muy contentos con esos regalitos. ¿Cómo te sientes? Un abrazote para ti.
Que linda idea amiga me gusto mucho
Me alegra mucho que te gustara, amiga. Es un lindo detalle, el papá que lo recibió, lo va a usar para guardar documentos en el carro para tenerlos siempre a mano. Saludos, un abrazo.