[ESP-ENG] Atrapasueños, qué son y cómo se realizan con material de desechos // Dream catchers, what they are and how they are made with waste material
BIENVENIDOS A MI BLOG
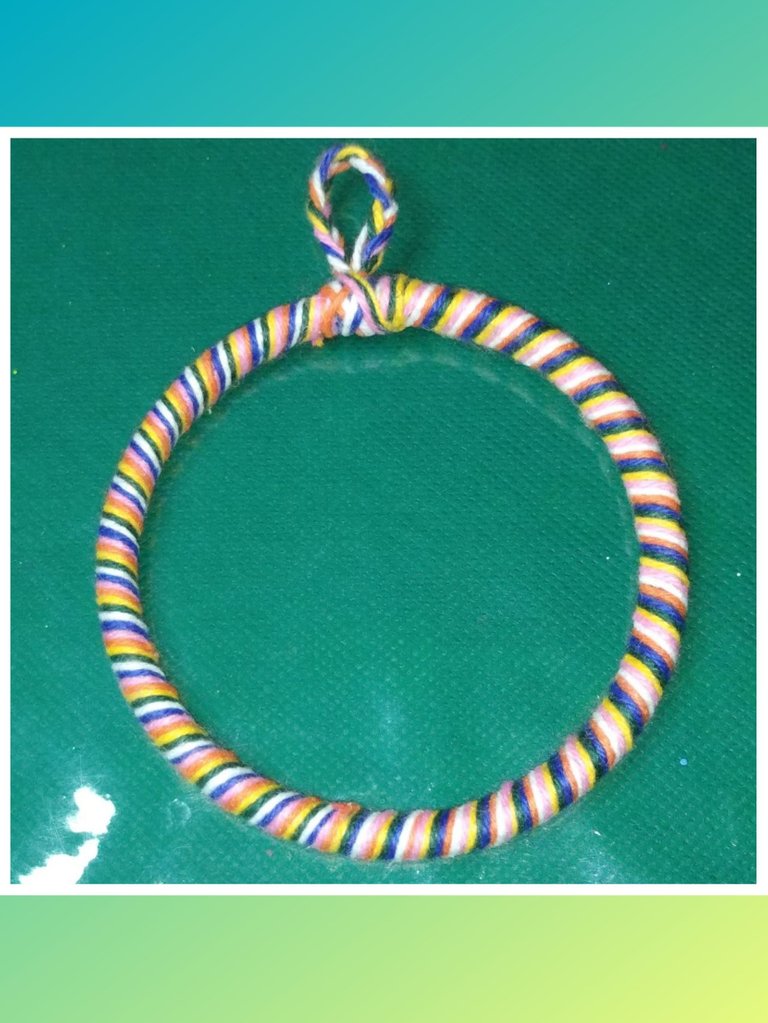
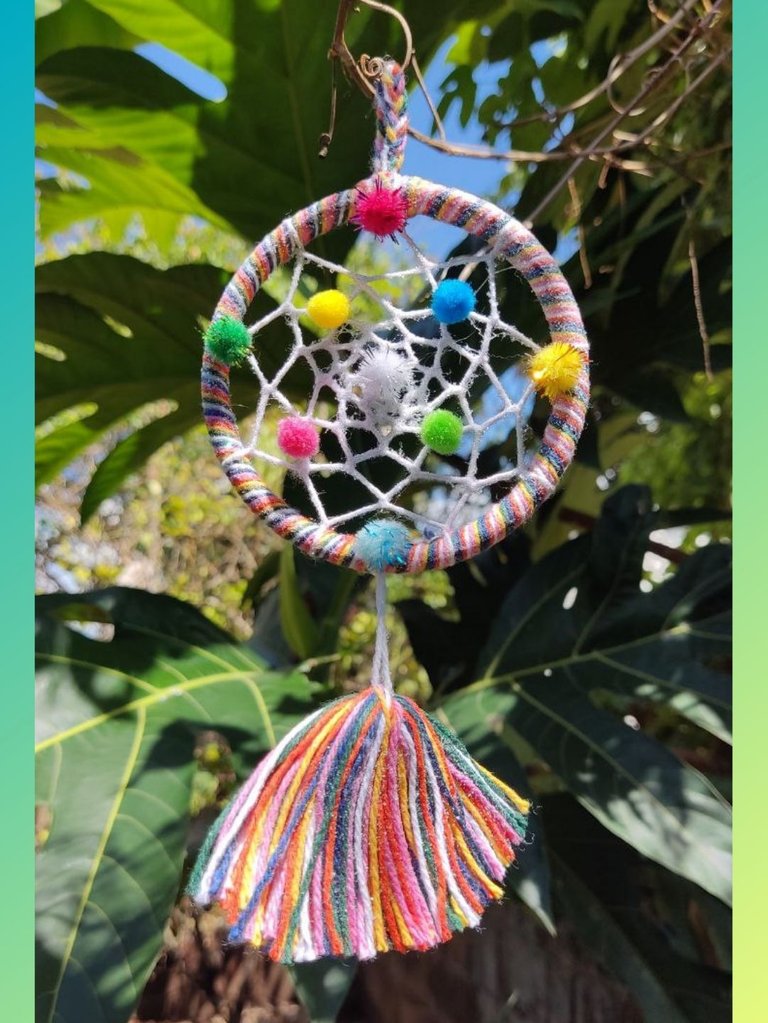
Holaaaaaa, holaaaaaaa. Mis más cordiales saludos. Cuando escucho decir "atrapasueños" lo primero que viene a mi mente son todos esos sueños que tenemos despiertos y que quisiéramos hacer realidad. Sé que como yo, son muchos los que soñamos despiertos y vemos que esos sueños nos cuesta llevarlos a la realidad, Soy una soñadora empedernida y aunque no me dejo llevar por ellos, si gustaría tener un atrapasueños para que se quede en ellos y que de alguna manera, mística y misteriosa, se llegaran a ser realidad. Quisiera pensar que es así como funciona, pero lo que estuve leyendo, estos atrapasueños funciona de forma diferente. Mas que todo funcionan como un filtro, eso es lo que entendí. Cada parte del objeto cumple una función, pero la más importante es esa malla o tela de araña que está formada dentro del círculo. Esa malla representan tus sueños, unos dicen que cada línea, son cada unos de tus mejores sueños y los malos son desechados por el agujero que queda en el centro. Otros opinan, que los atrapasueños evitan que esos sueños malignos no perturben tu descanso y te protegen de los malos espíritus. Son muchos los mitos y las leyendas que se rumorean en cuanto a este objeto. Cierto o no, sólo les puedo decir que son hermosos y muy decorativos y si me tengo que quedar con algo de estos mitos, me quedo con la que yo misma me he formado. Este atrapasueños me permitirá atrapar todos esos sueños que tengo despierta, esperando que algún día se hagan realidad.
Y si eres igual o más soñador (a) que yo o te gustan de forma decorativa. Te enseño cómo hacerlos. Sin más, comencemos.
WELCOME TO MY BLOG
Heyyyyyyyyyyyyyyyyyyyyyyyyy Warm Regards. When I hear the word "dream catcher" the first thing that comes to my mind are all those dreams that we have awake and that we would like to make come true. I know that like me, there are many of us who daydream and see that those dreams are difficult for us to bring them to reality, I am an inveterate dreamer and although I do not get carried away by them, if I would like to have a dreamcatcher so that it stays in them and that somehow, mystical and mysterious, will become reality. I'd like to think that's how it works, but from what I've been reading, these dreamcatchers work differently. More than anything they work as a filter, that's what I understood. Each part of the object has a function, but the most important is that mesh or spider web that is formed inside the circle. That mesh represents your dreams, some say that each line is one of your best dreams and the bad ones are discarded through the hole that remains in the center. Others believe that dream catchers prevent those evil dreams from disturbing your rest and protect you from evil spirits. There are many myths and legends that are rumored regarding this object. True or not, I can only tell you that they are beautiful and very decorative and if I have to keep something of these myths, I will keep the one that I have created myself. This dream catcher will allow me to catch all those dreams that I have awake, hoping that one day they will come true.
And if you are the same or more dreamy than me or you like them decoratively. I teach you how to make them. Without further ado, let's begin.
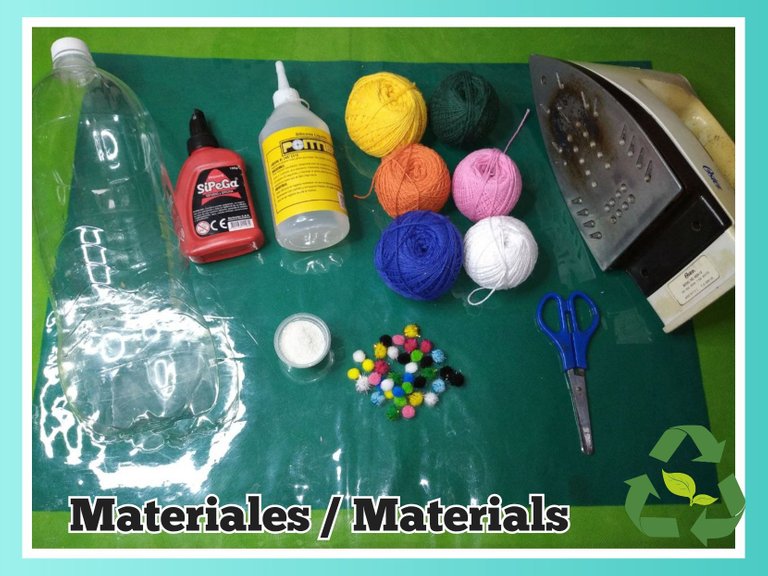
MATERIALES
- Envase transparente de plástico
- Plancha para ropa
- Hilos de algodón (colores variados)
- Pompones pequeños de colores variados
- Pega de silicón
- Escarcha
- Pega blanca
- Tijera
MATERIALS
- Transparent plastic container
- Clothes iron
- Cotton threads (assorted colors)
- Small pom-poms in assorted colors
- silicone glue
- Frost
- White glue
- Scissors
STEP BY STEP // PASO A PASO
ARO PLÁSTICO
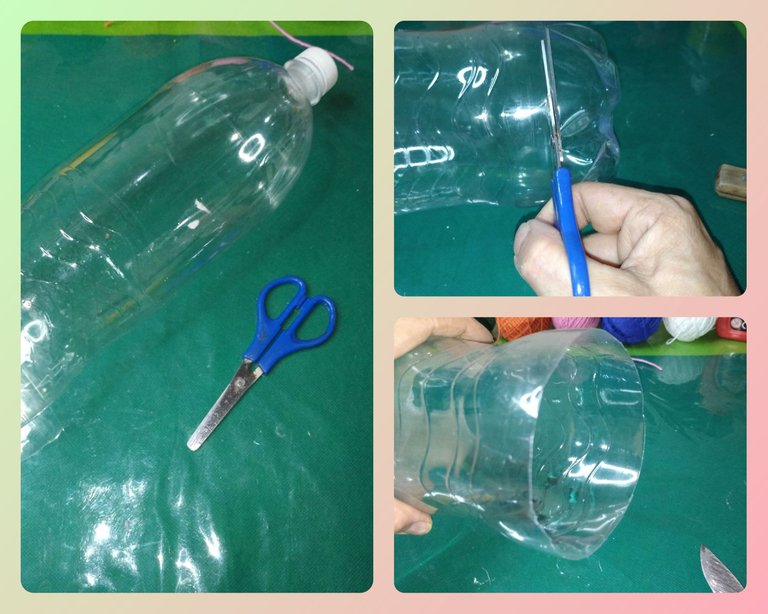
La mayoría de nosotros tenemos en casa una botella plástica de jugos, refrescos, aguas, estos envases son ideales para realizar unos aros espectaculares que podemos utilizar para varios fines y usos. Esta técnica la aprendí hace algún tiempo en casa de una amiga que hace arreglos florales y los usa muy a menudo.
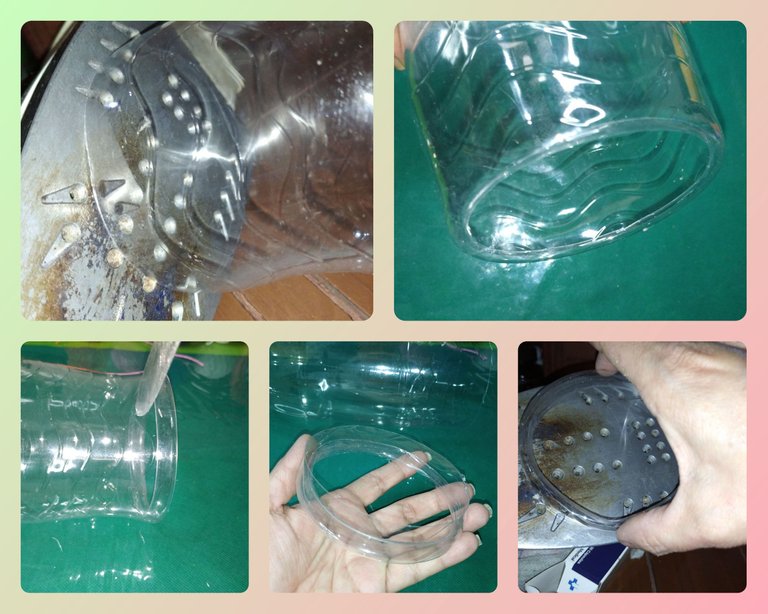
Lo primero que hacemos es lavar bien el envase y eliminar los residuos, si son de alguna bebida que contenga azúcar, ya que si no lo hacemos podemos ensuciar nuestra plancha o derretir el plástico de forma desigual.
Una vez que esta limpio y seco, cortamos el fondo del envase.
PLASTIC RING
Most of us have at home a plastic bottle of juices, soft drinks, water, these containers are ideal for making spectacular rings that we can use for various purposes and uses. I learned this technique some time ago at a friend's house who makes flower arrangements and uses them very often.
The first thing we do is wash the container well and remove the residue, if it is from a drink that contains sugar, because if we don't we can dirty our iron or melt the plastic unevenly.
Once it is clean and dry, we cut the bottom of the container.
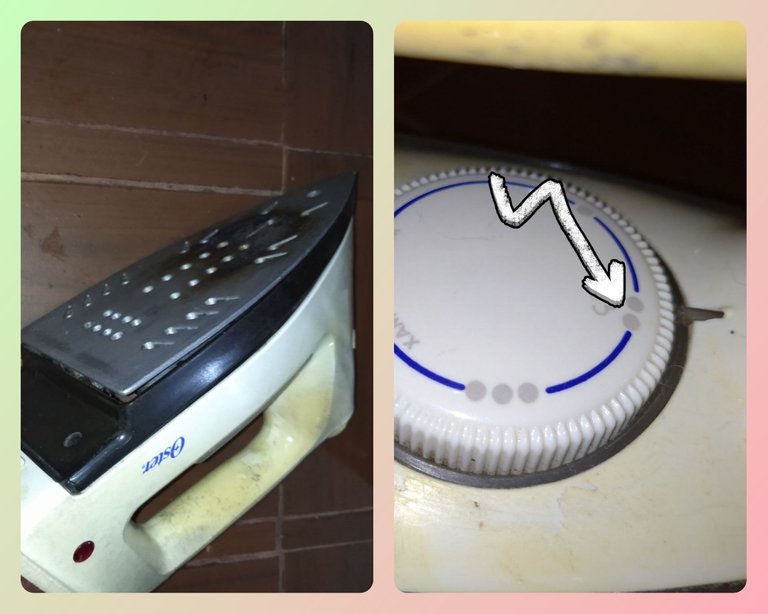
Calentamos la plancha a temperatura media. Si tienes una plancha que calienta demasiado, entonces hazlo a temperatura baja para que el plástico vaya agarrando forma redondeada sin deformarse por el calor.
We heat the iron to medium temperature. If you have an iron that gets too hot, then do it at a low temperature so that the plastic takes on a rounded shape without being deformed by the heat.
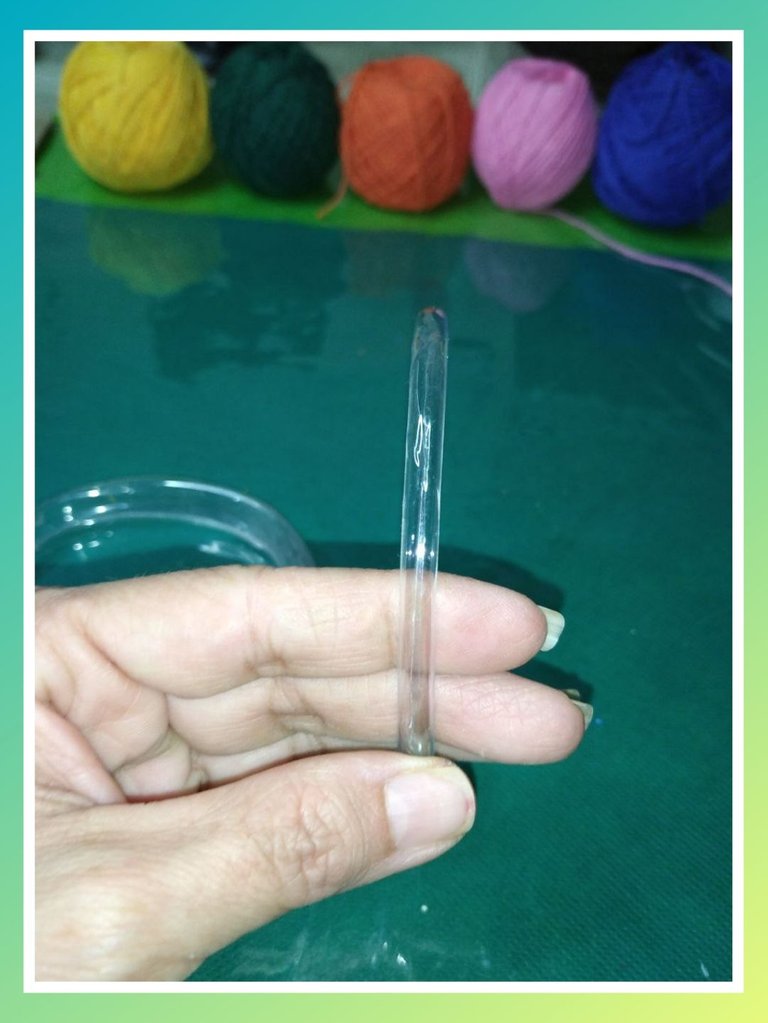
Colocamos el envase en la plancha y comenzamos a girar de forma circular sin despegarla de la plancha. Podemos hacer giros de 180º, adelante y atrás, o giros completos, como se te haga más fácil. Cuando observas que comienza a doblar hacia dentro del envase, decides el grosor que deseas tu aro. Como el que yo necesitaría no es muy grueso, sólo dejé que se doblara un poco.
Dejamos enfriar y cortamos nuevamente el envase dejando aproximadamente 1 cm.
Colocamos nuevamente en la plancha y realizamos el mismo procedimiento, esta vez on mucho cuidado de no quemarnos, hasta lograr formar el aro.
Mientras más sea la cantidad de plástico que dejemos, dependerá el grosor del aro.
We place the container on the plate and begin to rotate in a circular way without detaching it from the plate. We can make 180º turns, forwards and backwards, or complete turns, as it is easier for you. When you see that it begins to fold into the container, you decide how thick you want your ring to be. Since the one I would need is not very thick, I just let it bend a bit.
Let cool and cut the container again leaving approximately 1 cm.
We place it on the iron again and carry out the same procedure, this time with great care not to burn ourselves, until we manage to form the ring.
The more the amount of plastic we leave, the thickness of the hoop will depend.

CÍRCULO ATRAPASUEÑOS
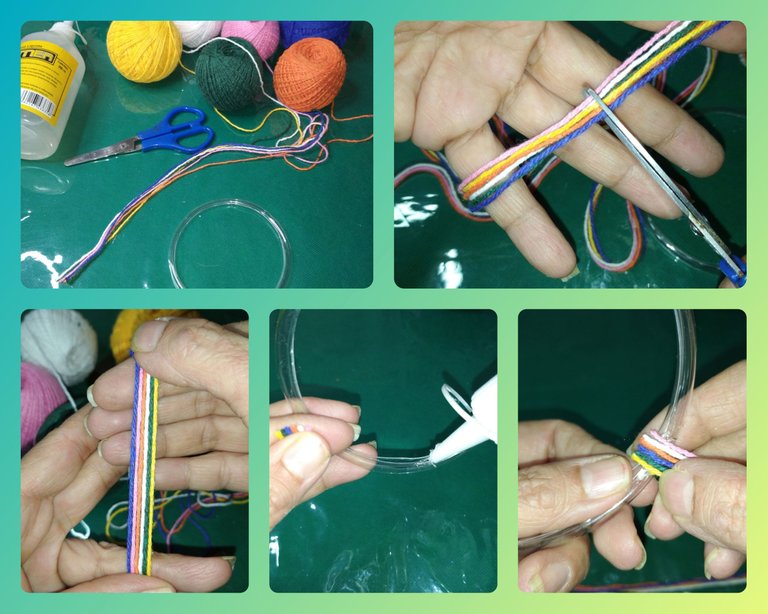
Tomé hebras de hilo de algodón de diferentes colores para cubrir este círculo de mi atrapasueños.
- Tomé 6 hebras de cada uno de los colores, aproximadamente 1m.
- Junté las hebras y coloqué un poco de silicón en el aro para evitar que se despeguen al comenzar a enrollar.
- Vamos introduciendo las hebras y dando forma por todo el alrededor del aro hasta finalizar y al igual que al comienzo, aseguramos con un poco de silicón. Dejamos secar.
DREAMCATCHER CIRCLE
I took strands of different colored cotton yarn to cover this circle of my dream catcher.
- I took 6 strands of each of the colors, approximately 1m.
- I gathered the strands and put a bit of silicone on the ring to prevent them from coming off when I started to wind them.
- We are introducing the strands and shaping all around the ring until finished and as at the beginning, we secure with a little silicone. We let dry.
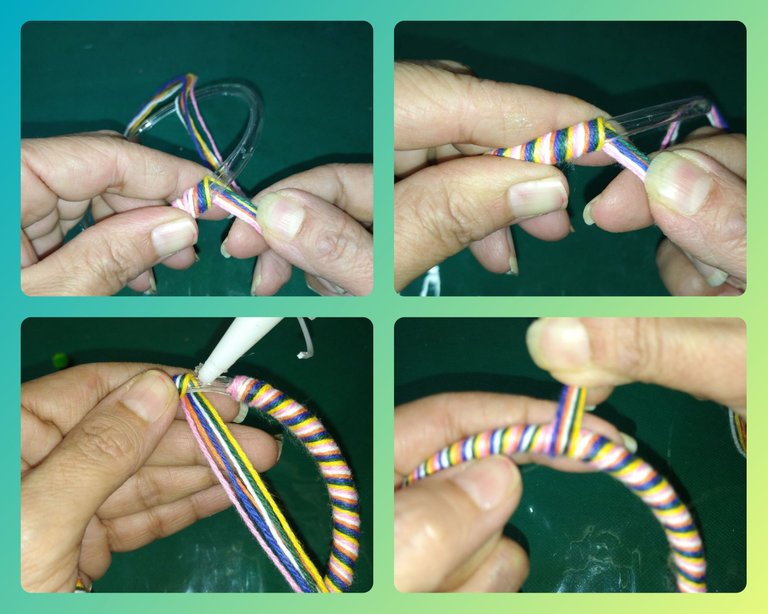
Con el sobrante de los hilos, dividimos en tres partes y tejemos una trenza para formar el agarradero o colgante. Luego lo amarramos al aro.
With the excess of the threads, we divide into three parts and weave a braid to form the handle or pendant. Then we tied it to the hoop.

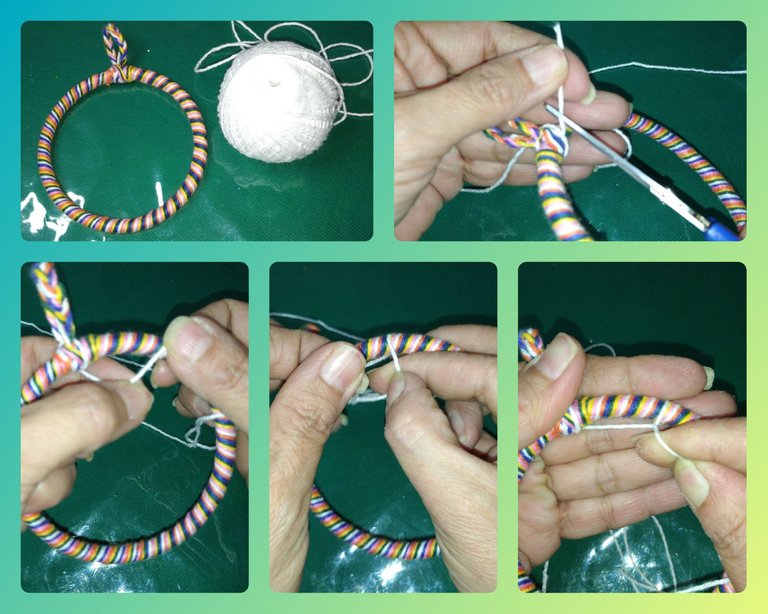
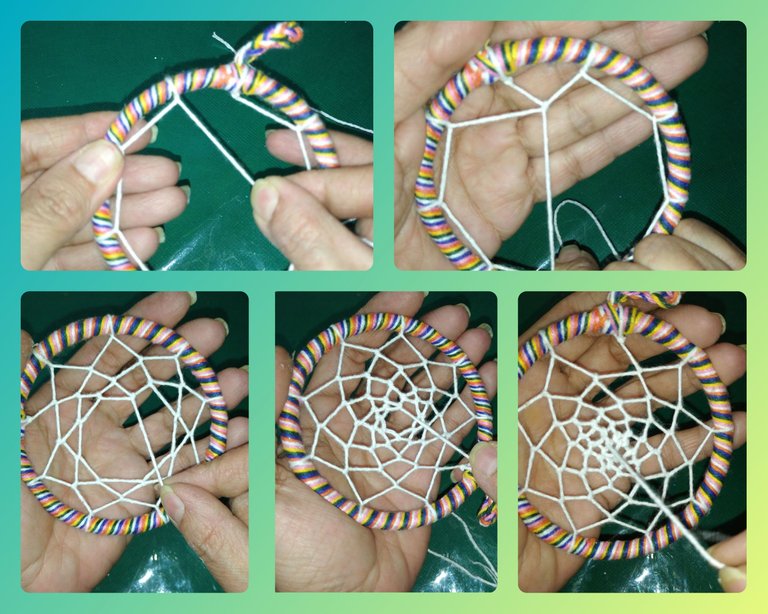
MALLA O TELA DE ARAÑA
Para esta parte utilicé hilo de color blanco, 60 cm aproximadamente.
Realizas un nudo en la parte superior del circulo, por debajo del colgante y comienzas a enlazarlo alrededor del aro dejando 3 cm de distancia entre cada bucle. Pasamos el hilo por detrás del aro y lo sacamos por dentro del bucle y repetimos hasta formar 9 bucles.
En la siguientes vueltas, realizaremos lo mismo. pero realizaremos el enlace en el centro de los bucles de la vuelta anterior. Y así sucesivamente hasta formar por completo la tela de araña. Finalizamos con un nudo cerrado al final del último bucle.
MESH OR SPIDER WEB
For this part I used white thread, approximately 60 cm.
You make a knot in the upper part of the circle, below the pendant and begin to link it around the ring, leaving 3 cm of distance between each loop. We pass the thread behind the ring and take it out inside the loop and repeat until we form 9 loops.
In the following laps, we will do the same. but we will make the link in the center of the loops of the previous round. And so on until the spider web is completely formed. We finish with a closed knot at the end of the last loop.
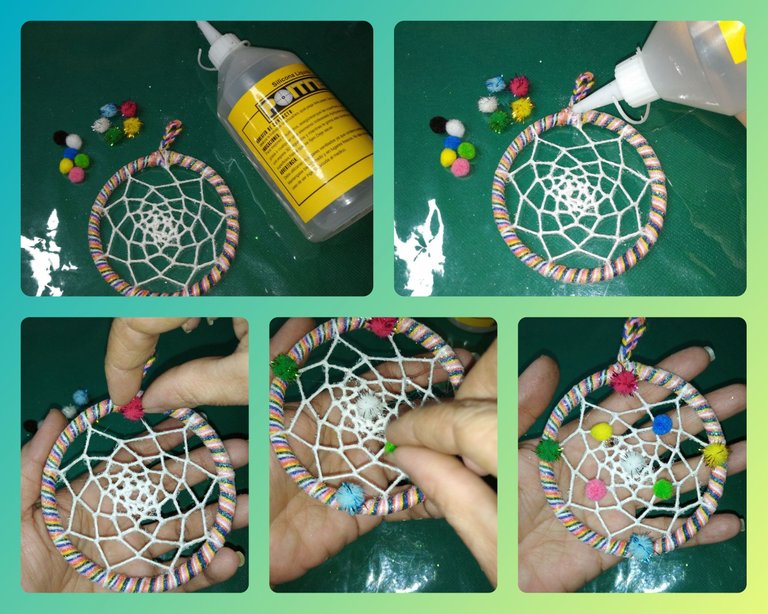
Con un pincel aplicamos una capa de pega blanca muy fina y rociamos un poco de escarcha para darle un poco de brillo a el atrapasueños.
With a brush we apply a very thin layer of white glue and sprinkle a little glitter to give the dream catcher a little shine.
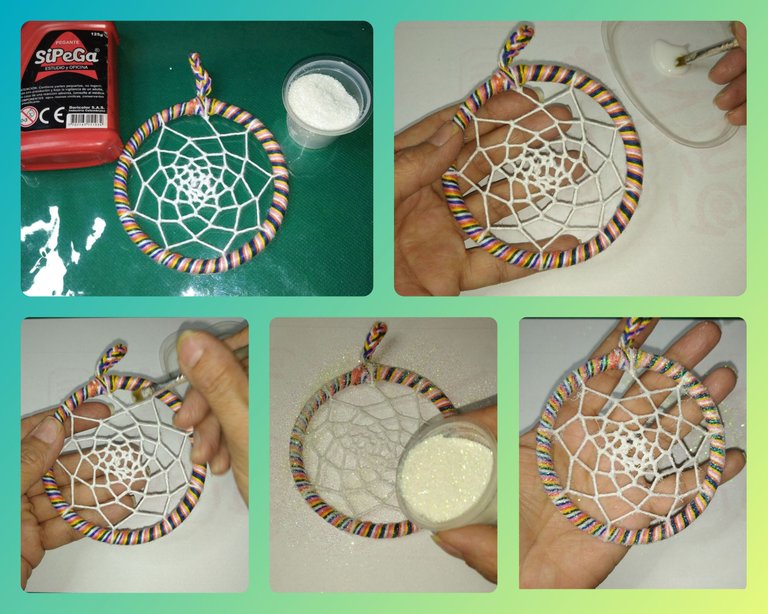
Colocamos puntos de silicón haciendo forma de cruz en el círculo y colocamos pompones de colores variados, luego hacemos lo mismo dentro de la tela de araña.
We place silicone dots in the shape of a cross in the circle and place pompoms of various colors, then we do the same inside the spider web.
BORLA DE HILOS
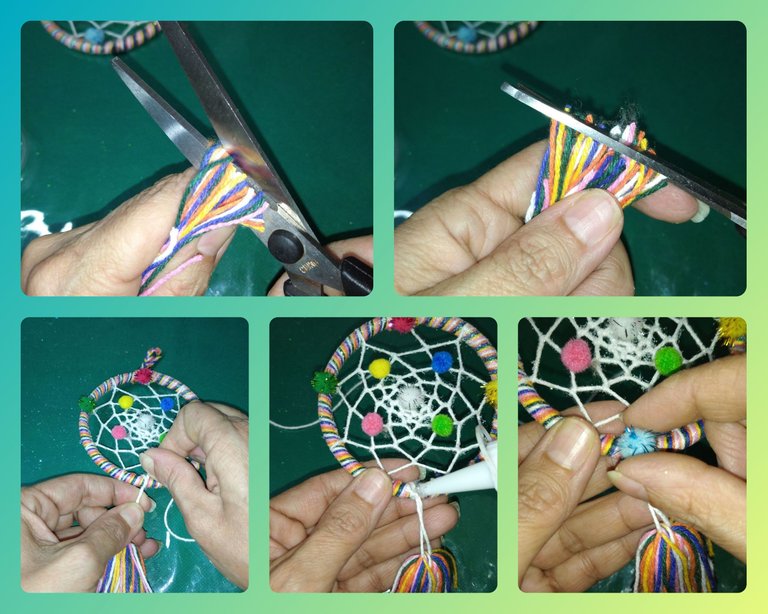
Para realizar la borla utilizamos un trozo de cartón de 7 cm de ancho, en él realizaremos varias vueltas con las hebras de hilo de colores hasta alcanzar el grosor deseado de la borla. Yo realicé 5 vueltas. Cortas los hilos, extraes del cartón y con dos hebras de hilos amarras fuerte por la mitad. Luego realizamos un corte en medio, recortamos los excesos del hilo y le damos forma a la borla.
Atamos en la parte inferior del círculo, barnizamos con pega blanca y escarchamos.
YARN TASSEL
To make the tassel we use a piece of cardboard 7 cm wide, in it we will make several turns with the colored thread strands until reaching the desired thickness of the tassel. I did 5 laps. You cut the threads, extract from the cardboard and with two strands of threads, tie tightly in half. Then we make a cut in the middle, trim the excess thread and shape the tassel.
We tie at the bottom of the circle, varnish with white glue and frost.

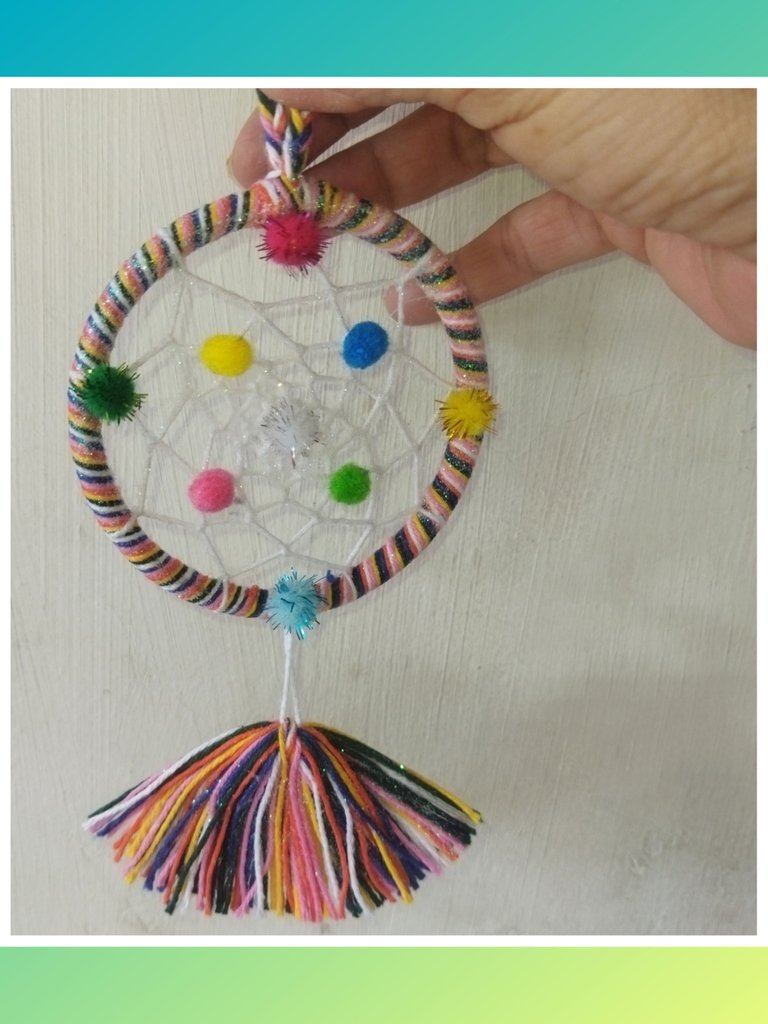
No todos tenemos creencias en este tipo de leyendas, pero como me decía mi abuelito: "mi amor lindo, yo no creo mucho en esas cosas pero la vida tiene sus misterios y de que vuelan, vuelan...". Así que hay que protegerse y proteger a los nuestros de todas las forma posibles. Éste es el mío y si te gustó aquí tienes ya cómo hacerlo, espero te guste. Nos vemos en la próxima.
Not all of us have beliefs in these types of legends, but as my grandfather used to tell me: "my beautiful love, I don't believe much in those things but life has its mysteries and they fly, they fly...". So we have to protect ourselves and protect our own in every possible way. This is mine and if you liked it here you have how to do it, I hope you like it. See you next time.
This post has been manually curated by @steemflow from Indiaunited community. Join us on our Discord Server.
Do you know that you can earn a passive income by delegating to @indiaunited. We share 100 % of the curation rewards with the delegators.
Here are some handy links for delegations: 100HP, 250HP, 500HP, 1000HP.
Read our latest announcement post to get more information.
Please contribute to the community by upvoting this comment and posts made by @indiaunited.
Que precioso y colorido quedó, me encanta. Gracias por compartirnos este lindo tutorial @linita, un abrazo.
Your content has been voted as a part of Encouragement program. Keep up the good work!
Use Ecency daily to boost your growth on platform!
Support Ecency
Vote for new Proposal
Delegate HP and earn more
Es demasiado bonito, me gustaron los colores que utilizaste y la forma del tejido es hermoso.
Es un lindo accesorio.
Me alegro que te haya gustado. Me encanta realizar cosas coloridas, son muy alegres y llama la atención.
Thank you for sharing this amazing post on HIVE!
Your content got selected by our fellow curator @priyanarc & you just received a little thank you via an upvote from our non-profit curation initiative!
You will be featured in one of our recurring curation compilations and on our pinterest boards! Both are aiming to offer you a stage to widen your audience within and outside of the DIY scene of hive.
Join the official DIYHub community on HIVE and show us more of your amazing work and feel free to connect with us and other DIYers via our discord server: https://discord.gg/mY5uCfQ !
If you want to support our goal to motivate other DIY/art/music/homesteading/... creators just delegate to us and earn 100% of your curation rewards!
Stay creative & hive on!
Es una excelente idea para reusar de una manera creativa los retazos de hilos. De verdad te quedó muy bonito y es fácil de hacer, gracias por compartir. Saludos.