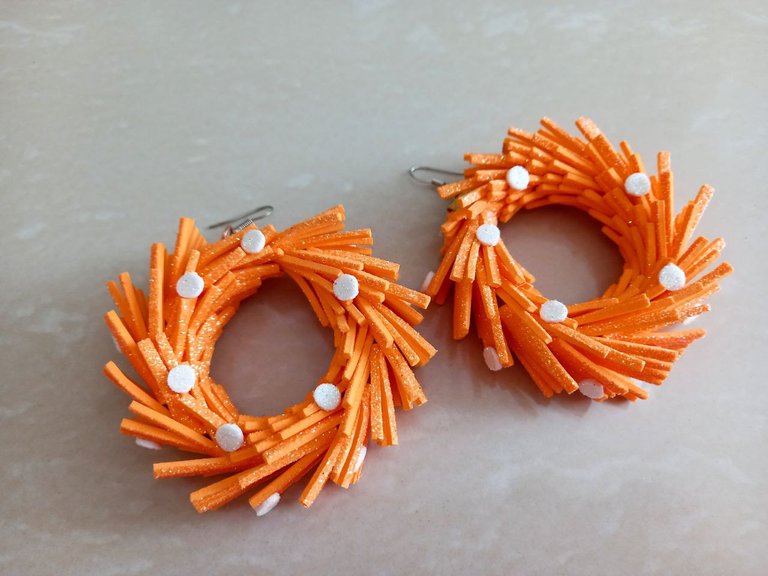
Aretes de foami con flecos •• Tutorial | Foami earrings with fringes •• Tutorial


¡Feliz día amigos creativos de Hive Diy! Espero que estén teniendo un buen fin de semana. Por acá he tenido muchas fallas con la electricidad así que he tenido mucho tiempo libre, el cual he aprovechado para hacer manualidades (mientras haya algo de luz natural) y lo más reciente que he hecho fue una idea que tenía en mente desde hace tiempo y finalmente pude llevar a cabo. Siempre he querido hacer accesorios pero por falta de material no lo he hecho hasta ahora, sin embargo, se me ocurrió crear accesorios con el material con el que más trabajo, es decir, el foami, así que me las he estado ingeniando para idear como serían y el día de hoy les traigo uno de ellos, unas bellas argollas de foami con flecos, espero que les guste, ahora sin más, ¡vamos a crear!
¡Happy day creative friends from Hive Diy! I hope you are having a good weekend. Around here I have had many failures with the electricity so I have had a lot of free time, which I have taken advantage of to do crafts (as long as there is some natural light) and the most recent thing I have done was an idea that I had in mind for a long time and I was finally able to carry out. I have always wanted to make accessories but due to lack of material I have not done so until now, however, it occurred to me to create accessories with the material I work with the most, that is, foam, so I have been managing to come up with how they would be and today I bring you one of them, some beautiful foami rings with fringes, I hope you like them, now without further ado, let's create!

• Rollo de cartón.
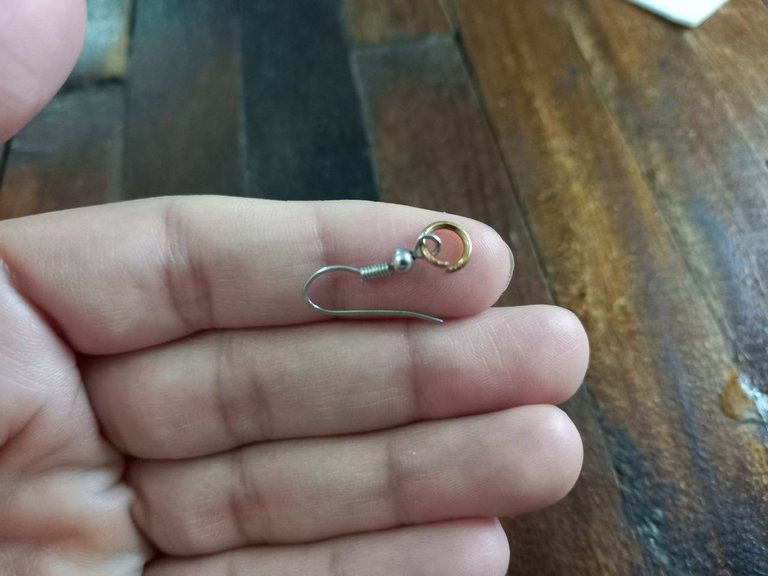
• 2 Aros de bisutería.
• 2 Ganchos tipo anzuelo.
• 2 Terminales tipo grapa.
• Abrehuecos.
• Pinzas.
• Tijera.
• Cutter.
• Silicón.
• Lápiz.
• Regla.
• Cardboard roll.
• 2 jewelry rings.
• 2 hook type hooks.
• 2 staple type terminals.
• Open holes.
• Tweezers.
• Scissors.
• Cutter.
• Silicone.
• Pencil.
• Ruler.


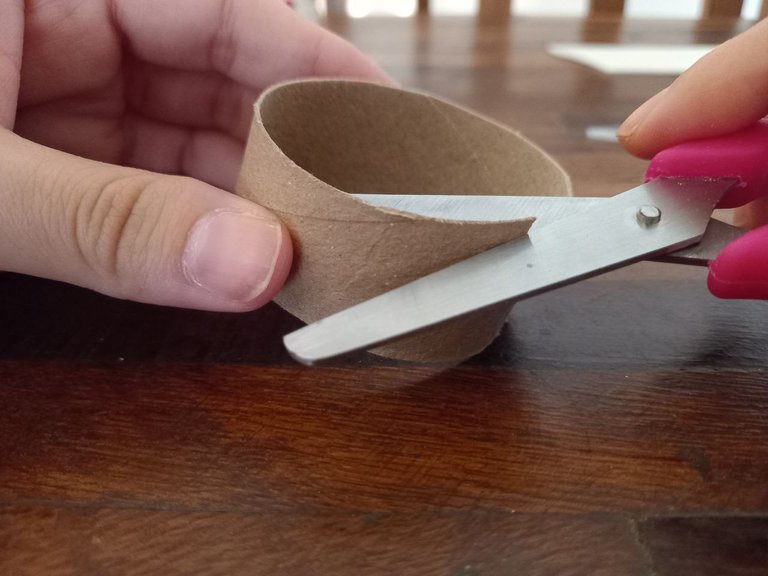
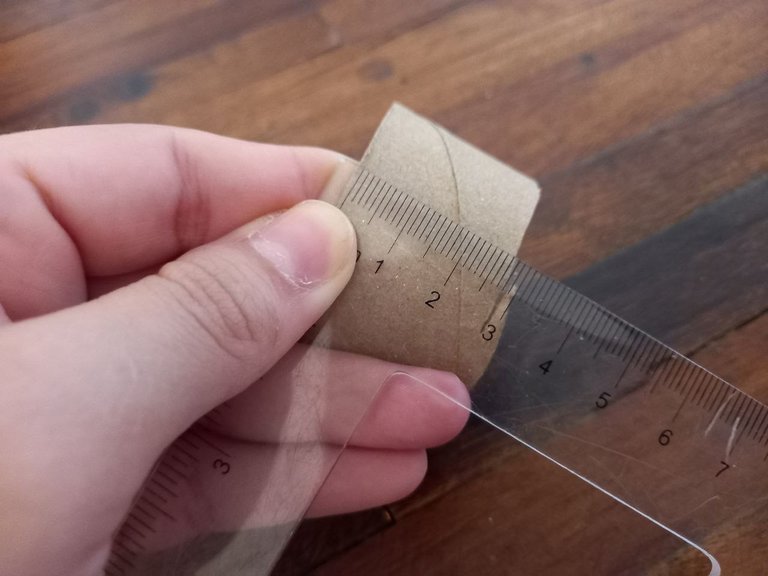
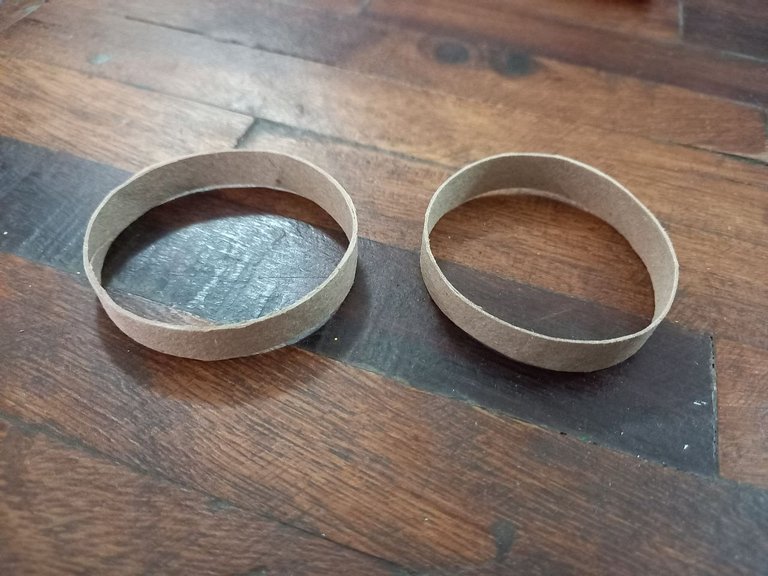
✦ PASO 1. Lo primero que hice fue recortar 2 piezas del tubo de cartón con el cutter, luego con ayuda de la regla medí 1 cm e hice una marca para luego recortar con la tijera poco a poco los bordes hasta que cada pieza de cartón tenga el mismo tamaño y sus bordes estén parejos.
✦ STEP 1. The first thing I did was cut out 2 pieces of the cardboard tube with the cutter, then with the help of the ruler I measured 1 cm and made a mark and then cut the edges little by little with the scissors until each piece of cardboard is the same size and its edges are even.


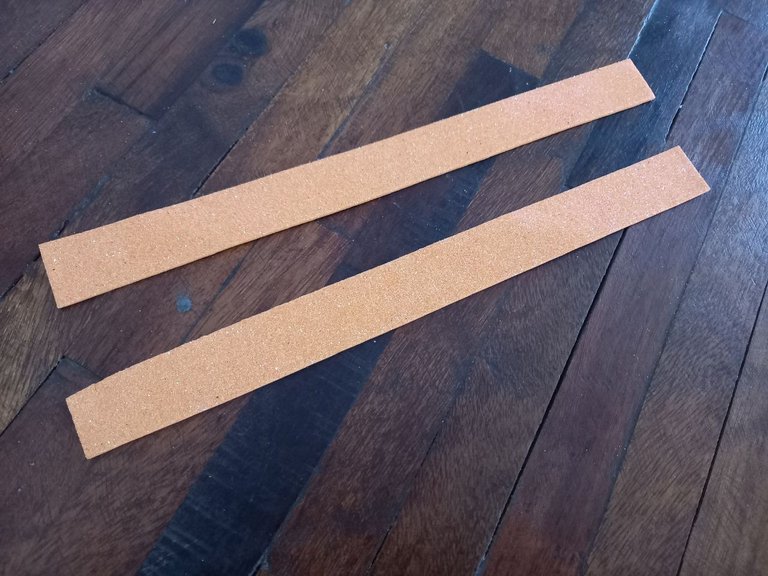
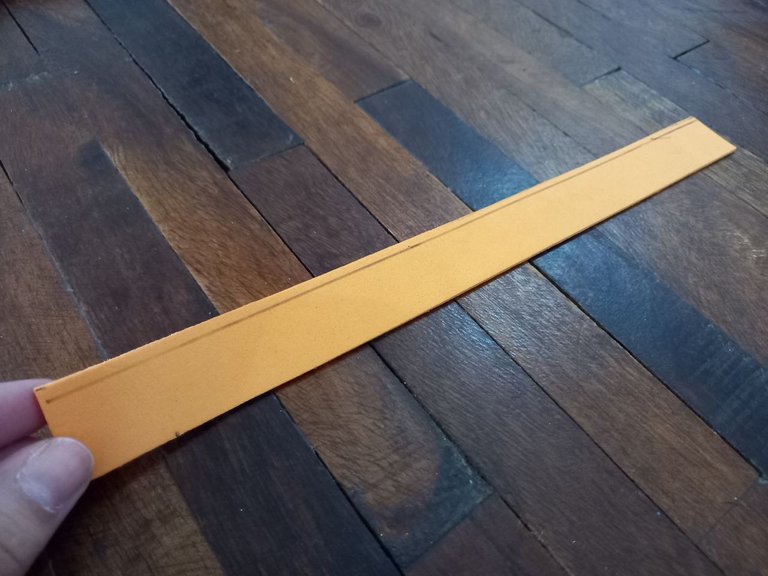
✦ PASO 2. Con la regla medí 2 piezas largas de foami escarchado naranja con un ancho de unos 2 cm y recorté cada una, luego a cada una le hice una marca a lo largo con el lápiz un poco por debajo de la orilla.
✦ STEP 2. With the ruler I measured 2 long pieces of orange frosted foam with a width of about 2 cm and cut out each one, then I made a mark along each one with the pencil a little below the shore.
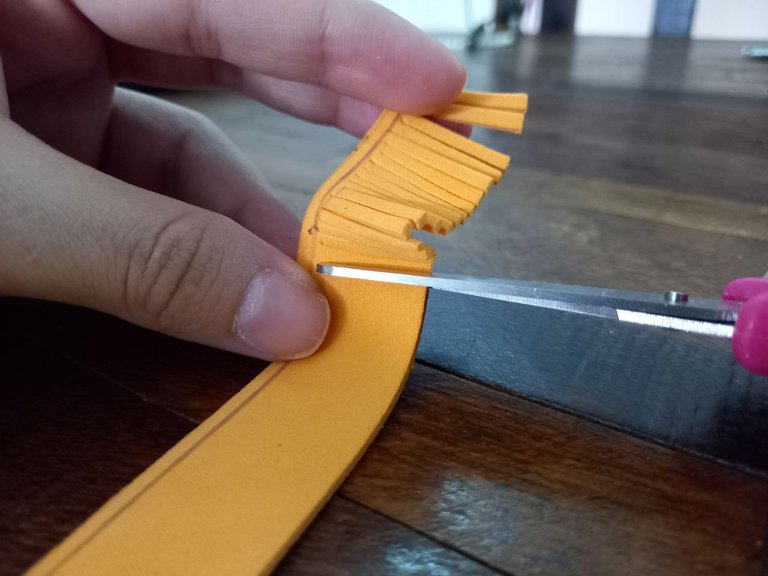
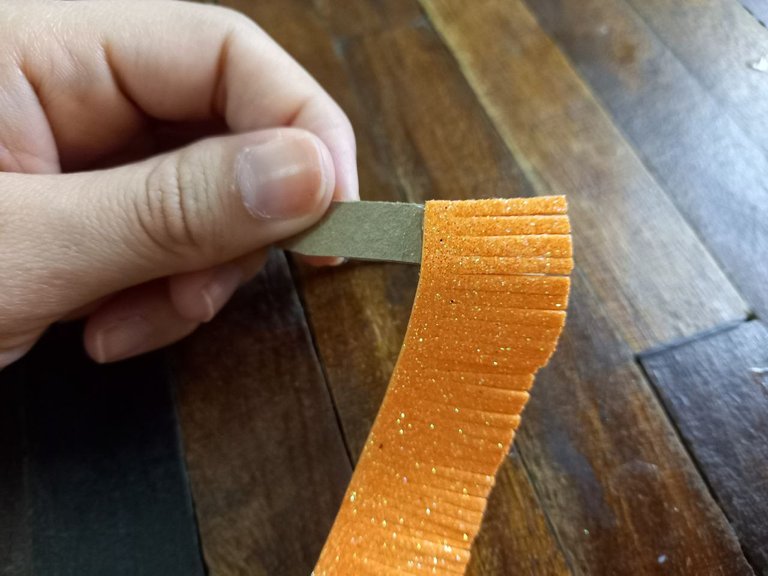
✦ PASO 3. Comencé a hacerle cortes verticales a las piezas de foami desde un extremo al otro hasta llegar al final teniendo como tope la marca que hice anteriormente en la parte superior obteniendo como resultado unos flecos de foami.
✦ STEP 3. I began to make vertical cuts to the foam pieces from one end to the other until I reached the end, having as a stop the mark that I made previously at the top, resulting in some foam fringes.

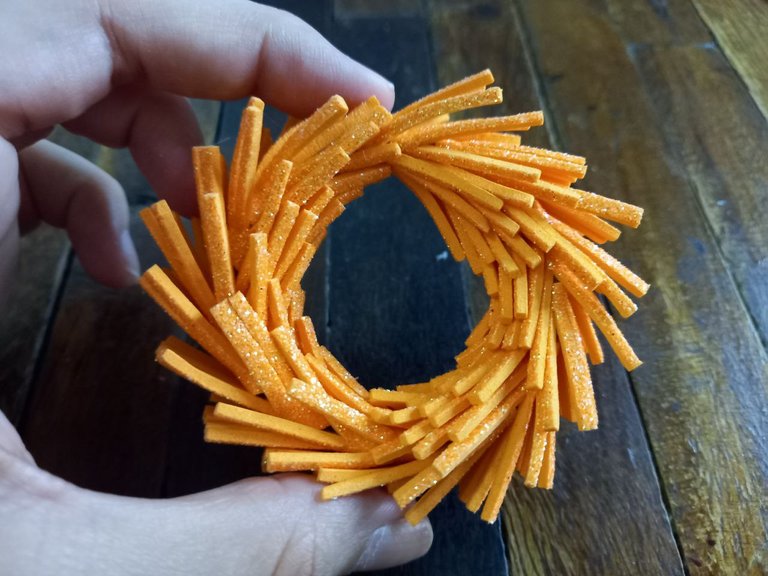
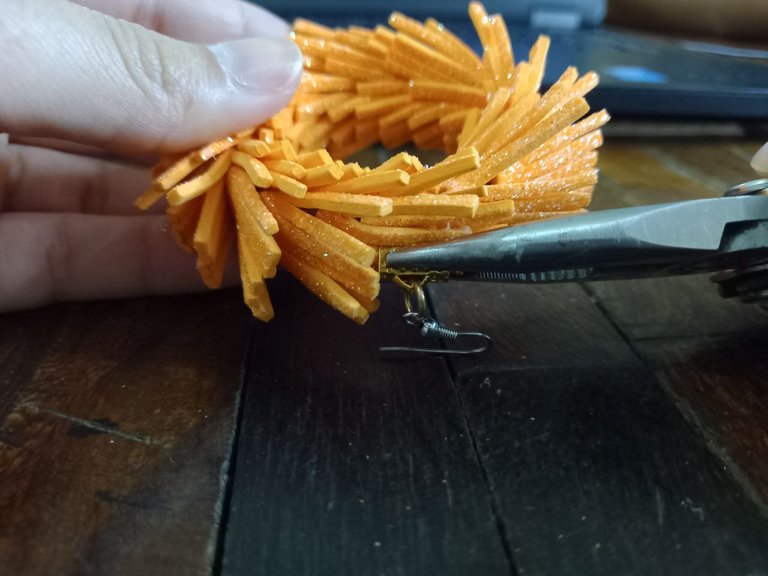
✦ PASO 4. Teniendo las piezas de foami listas con los flecos procedí a formar los aretes, apliqué silicón sobre una de las piezas de cartón y pegué uno de los extremos de la pieza de foami y comencé a envolverla hasta cubrir el cartón con esta procurando dejar los flecos libres.
✦ STEP 4. Having the foam pieces ready with the fringes, I proceeded to form the earrings, I applied silicone on one of the cardboard pieces and glued one of the ends of the foam piece and began to wrap it until it covered the cardboard with this trying to leave the fringes free.

✦ PASO 5. Uní los aritos de bisutería a los ganchos tipo anzuelo, luego inserté en el arito los terminales, con ayuda de una pinza cerré bien los aritos haciendo presión para que no se salieran.
✦ STEP 5. I attached the jewelry earrings to the hook type hooks, then I inserted the terminals into the ring, with the help of a tweezer I closed the earrings tightly, applying pressure so that they would not come out.

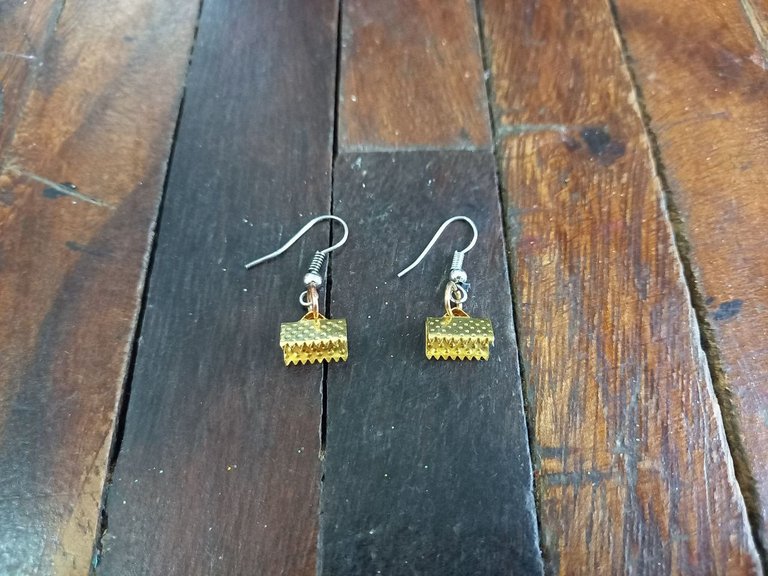
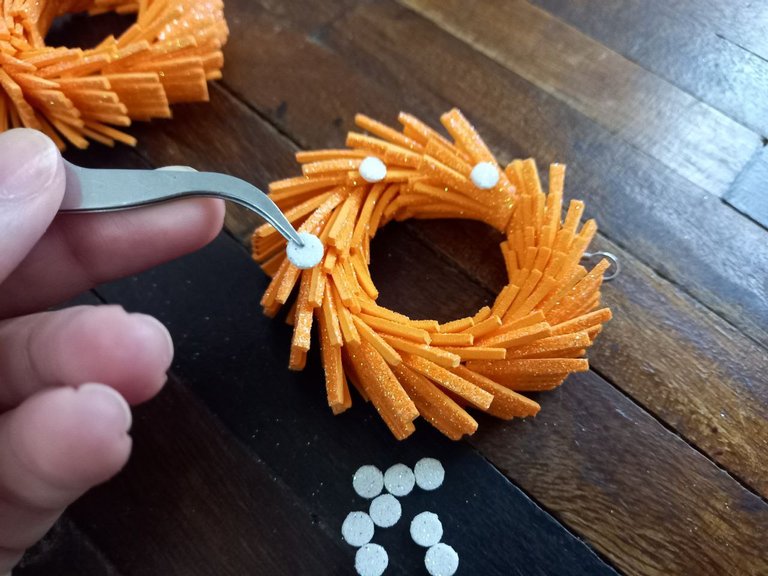
✦ PASO 6. Ubiqué cada uno de los terminales en la parte superior de los aretes y con ayuda de la pinza hice presión para fijarlos.
✦ STEP 6. I placed each of the terminals on the upper part of the earrings and with the help of the tweezers I applied pressure to fix them.
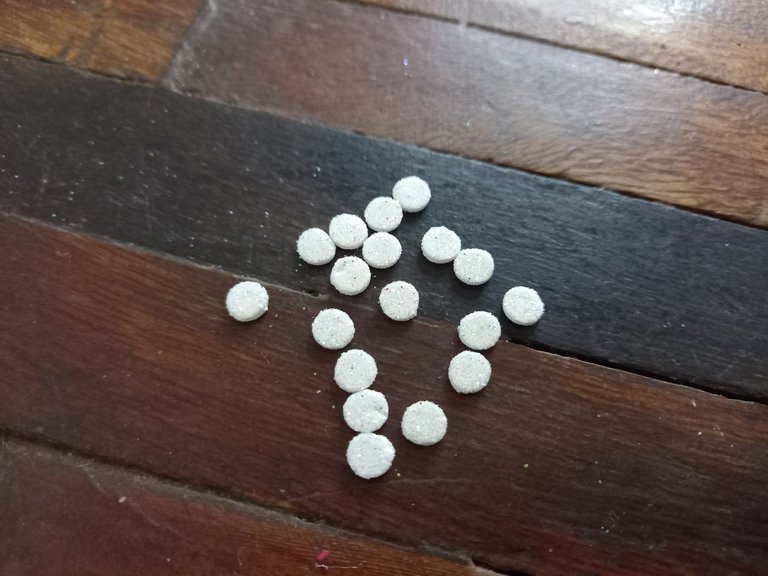
✦ PASO 7. Con ayuda dela abrehuecos hice varios círculos de foami escarchado blanco y los pegué en la parte frontal de los aretes y a los lados para decorarlos.
✦ STEP 7. With the help of the hole opener I made several circles of white frosted foam and glued them to the front of the earrings and to the sides to decorate them.
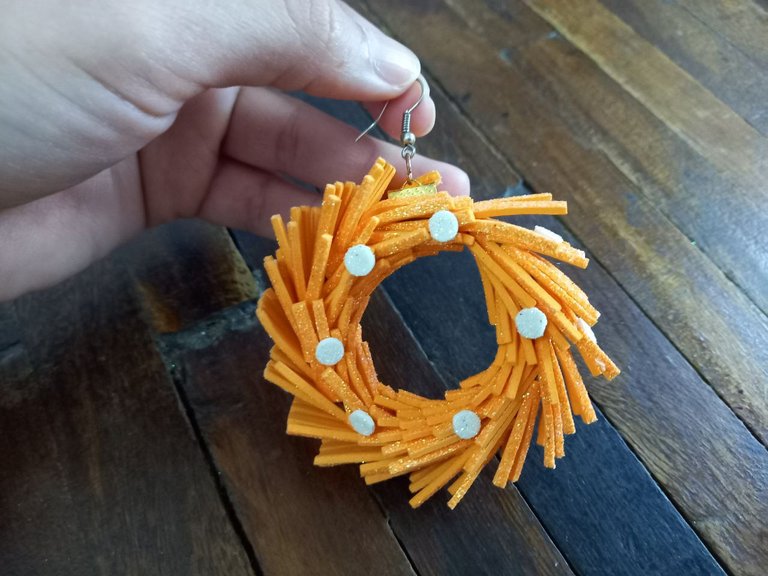
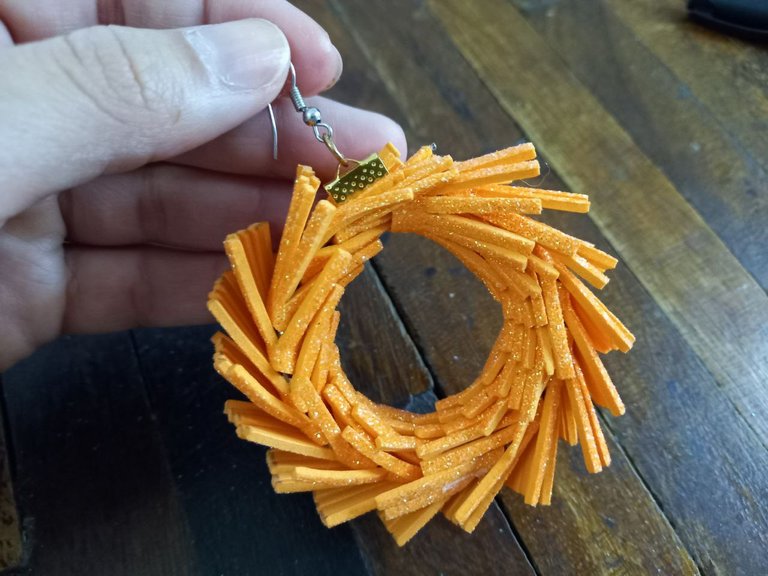
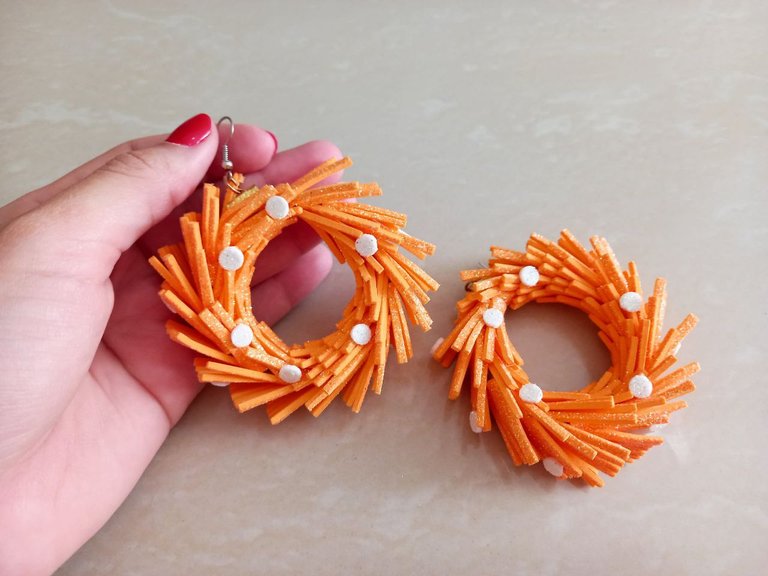
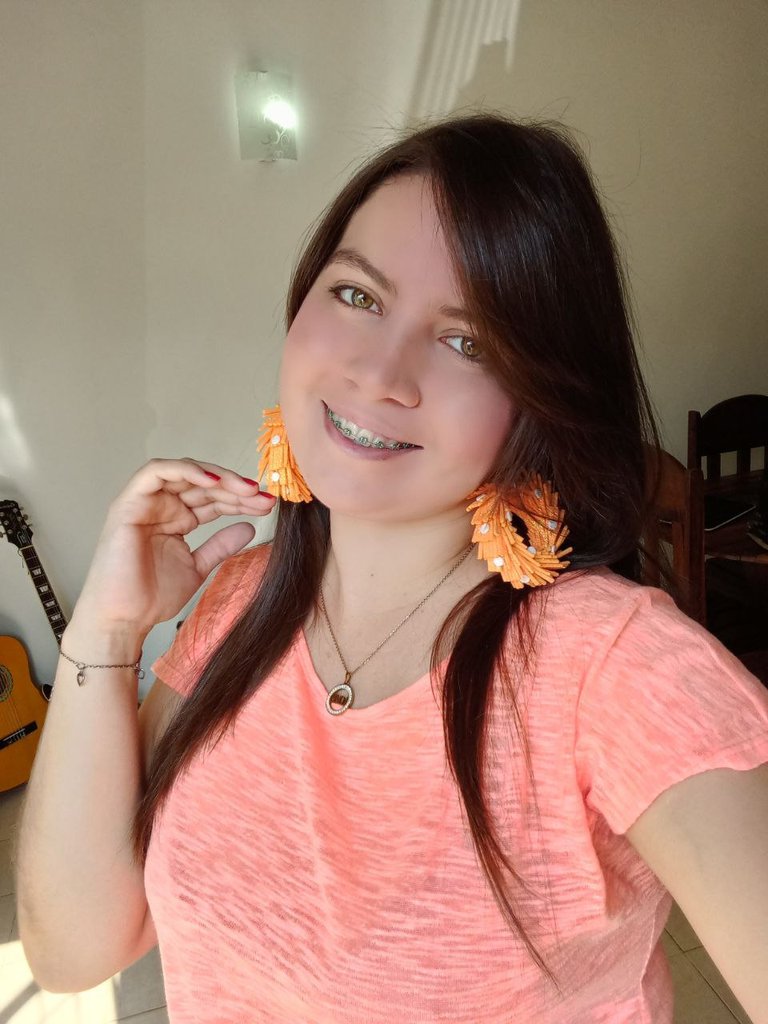
¡Y listo! De esta forma tan sencilla es como elaboré estos lindos y coloridos aretes de foami con flecos, que aunque parezcan grandes son bastante ligeros y cómodos. En lo personal me gustaron mucho, desde el diseño hasta el color, realmente lucen bastante bien ¿Qué les pareció a ustedes? Espero que les haya gustado, gracias por pasar, nos vemos pronto con una nueva idea creativa.
And ready! This simple way is how I made these cute and colorful foam earrings with fringes, which although they seem big, are quite light and comfortable. Personally, I really liked them, from the design to the color, they really look pretty good. What did you think? I hope you liked it, thanks for stopping by, see you soon with a new creative idea.


Todas las fotografías son de mi propiedad.
Fotografías capturadas con mi Samsung Galaxy A12
Separador de texto elaborado en Canva.
Nos vemos en mi próxima publicación.
¡Tengan un feliz día!
All photographs are my property.
Photos captured with my Samsung Galaxy A12
Text separator made in Canva.
See you in my next post.
¡Have a happy day!
Quedaron divinoooos Mary!!! Me encantó el color 😍
Gracias ami, son bellísimos 😊
Que lindura y cuchitura 😍😍😍❤️
Gracias ami, quedan super lindos 🥰
those are some beautiful earrings you have made thanks for sharing.
They are beautiful and look cute, I'm glad you like it, greetings! Thanks for the support!
Epa me encantaron estos aretes, y lo que me gusto aún más, es lo fácil que son de hacer, saludos, feliz domingo.
Hola muchas gracias, me alegra mucho que estos aretes hayan sido de tu agrado. Gracias por la visita, un abrazo! 🥰
Gracias por el apoyo 😊
Te quedaron geniales y creo que en color negro, pasarían perfectamente por otro material, complementando un outfit muy bien.
Es otro estilo para variar... como siempre la reina del foami.
Hola amiga muchas gracias, estaba loca por hacer accesorios de foami y aun tengo más ideas, espero ir haciendo mas para compartirlas por aquí. Gracias por el apoyo siempre 😍
This is a beautiful earrings you made, I so much admire it and would have loved to make something of this style for my sister.
Hello, it is a pleasure to know that you liked these earrings, they are very easy to make, I hope you are encouraged to create some at home for your sister, I am sure they will look great on her.
Pero que creativo, me encantó amiga, excelente. Saludos❤️
Gracias amiga, me alegra mucho que haya sido de tu agrado. Saludos! 😊
Amiii, se ven increíbles,y te quedan súper lindos. Vi la foto y pensé sería complicado pero nooo, están bastante sencillos y preciosos
Gracias mi Rosita bella, esas son las cosas que me invento yo jajaja no creí que fueran a quedar tan grandes pero me gusta como lucen 🥰
Contáctenos para saber más del proyecto a nuestro servidor de Discord.
Si deseas delegar HP al proyecto: Delegue 5 HP - Delegue 10 HP - Delegue 20 HP - Delegue 30 HP - Delegue 50 HP - Delegue 100 HP.
Muchas gracias por el apoyo 😊