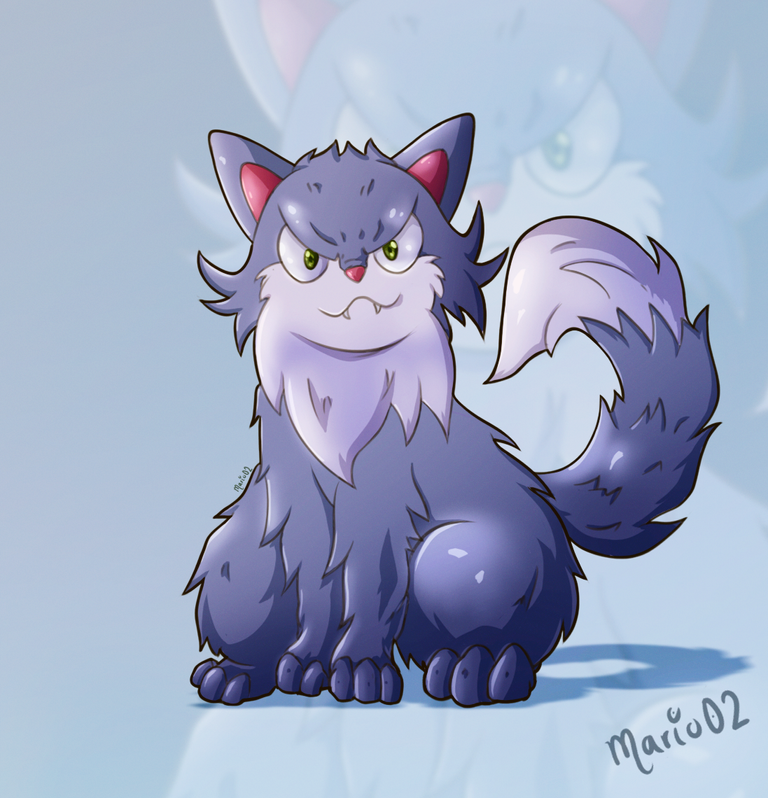
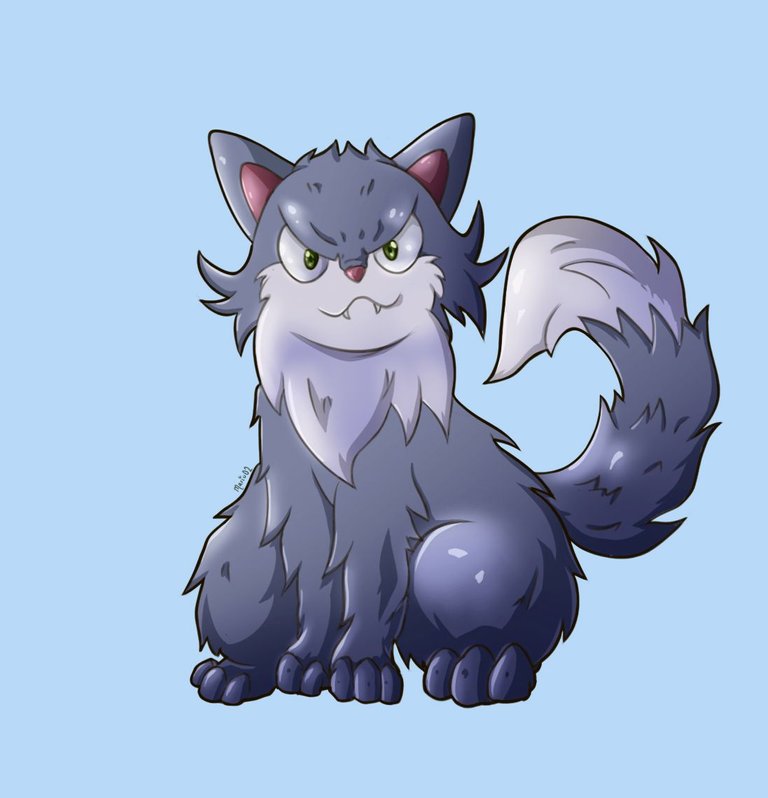
Miu Miu - Holozing Fan-Art! [ENG/ESP]
Miu Miu! 😾
Greetings once again Holozing community 😁!
I hope you all are in the best possible way. This time I come to share with the community a new Fan-Art illustration of one of my favourite characters of this project. This is Miu Miu, this little cat and all his versions I like very much, especially for the expression of the character, so I've started to work on a design of his second version and here is the result. I confess that I had a lot of fun making this illustration, I was a bit anxious to finish it and see the final result, now I'll share with you a little bit about my process to make my own version of the character, let's start!
¡Saludos una vez mas comunidad de Holozing! 😁
Espero que todos ustedes estén de la mejor manera posible. En esta oportunidad vengo a compartir con la comunidad una nueva ilustración Fan-Art de uno de mis personaje favoritos de este proyecto. Se trata de Miu Miu, este pequeño gato y todas sus versiones me gustan muchísimo, sobre todo por la expresión del personaje, por lo que me he puesto a trabajar en un diseño de su segunda versión y aquí esta el resultado. Les confieso que me divertí mucho realizando esta ilustración, tenia algo de ansiedad por culminarla y ver su resultado final, ahora les comparto un poco sobre mi proceso para realizar mi propia version del personaje. ¡Comencemos!

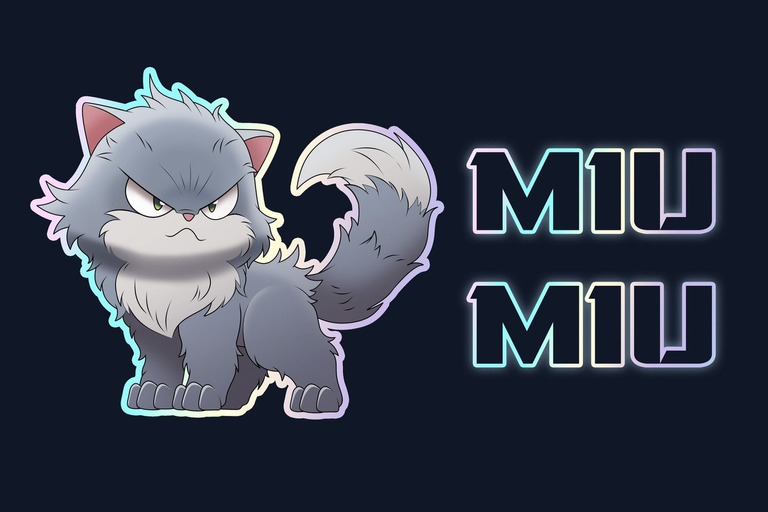
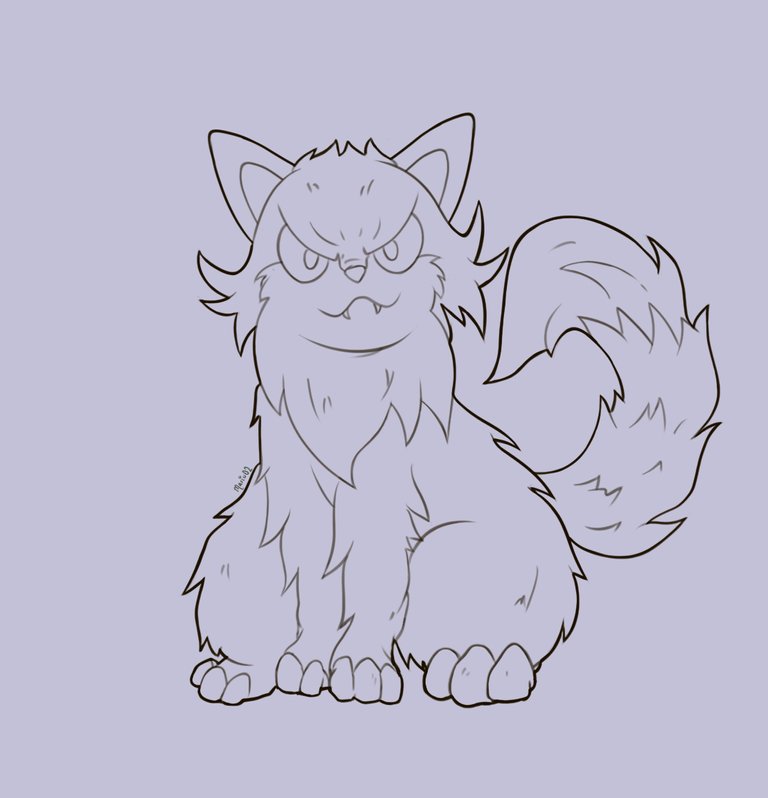
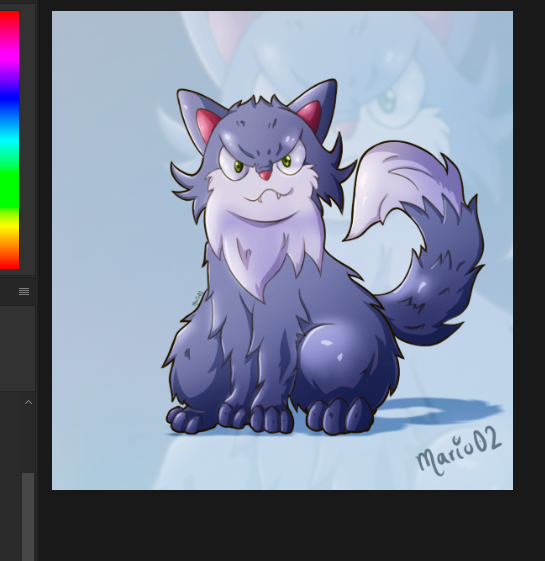
REFERENCE
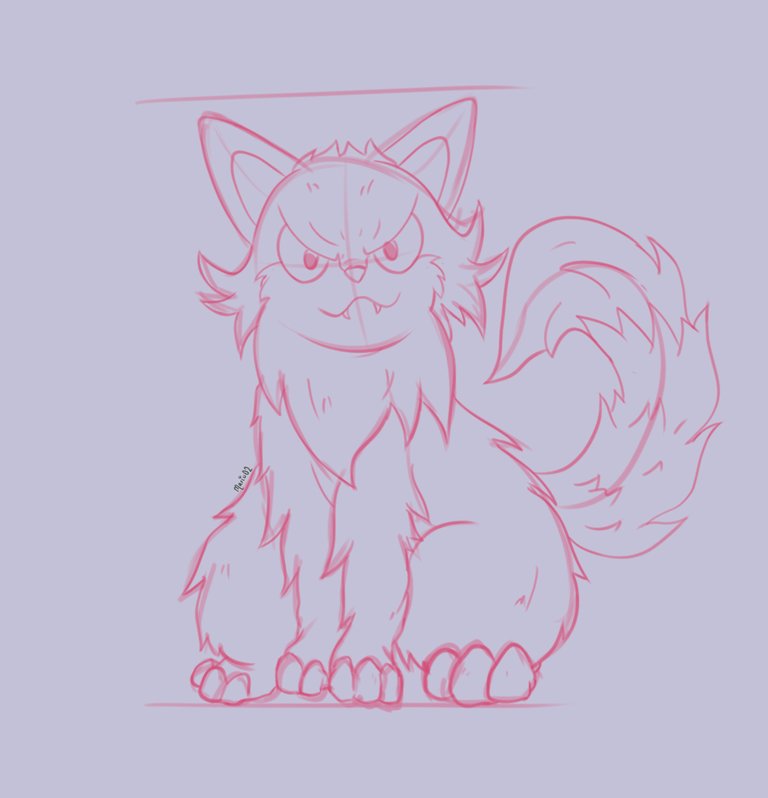
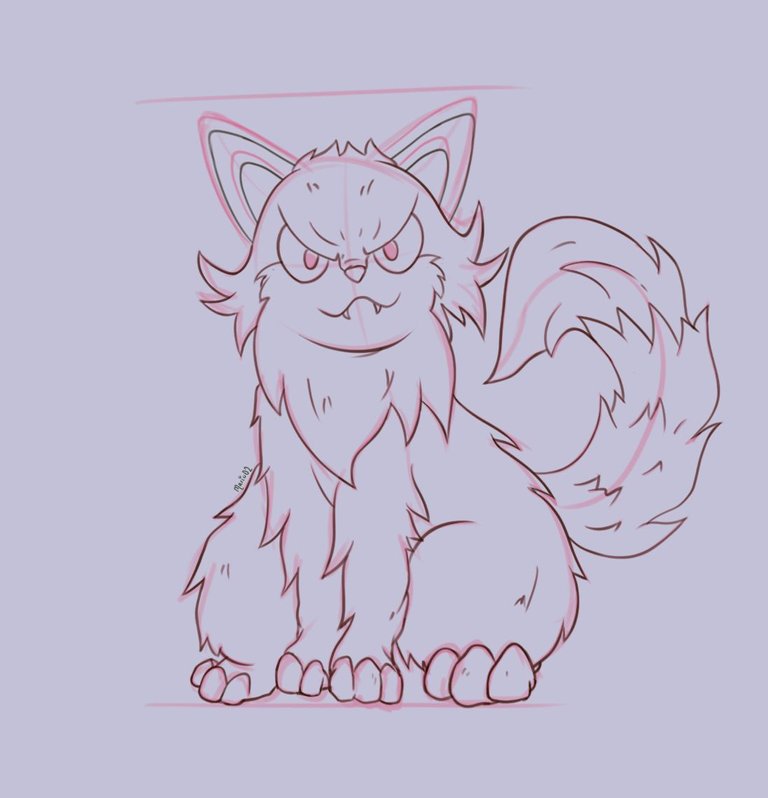
Creative Process | Proceso Creativo💡
I started making the sketch of the character yesterday, the design and the pose were clear to me so I didn't take too much time to make the sketch. Then I worked on the lines, here was one of the parts where it took me more time because I used a line with low opacity to draw all the character, once I had my lines clean and defined I made a new lineart but much thicker to mark the outline of the character.
Comencé realizando el boceto del personaje el día de ayer, el diseño y la pose los tenia algo claro por lo que realizar el boceto no me demoro mucho tiempo. Luego pase a trabajar en las líneas, aquí fue una de las partes donde mas de demoro tiempo ya que utilice una línea con baja opacidad para trazar todo el personaje, una vez tenia mis líneas limpias y definidas realice un nuevo lineart pero mucho mas grueso para marcar el contorno del personaje.
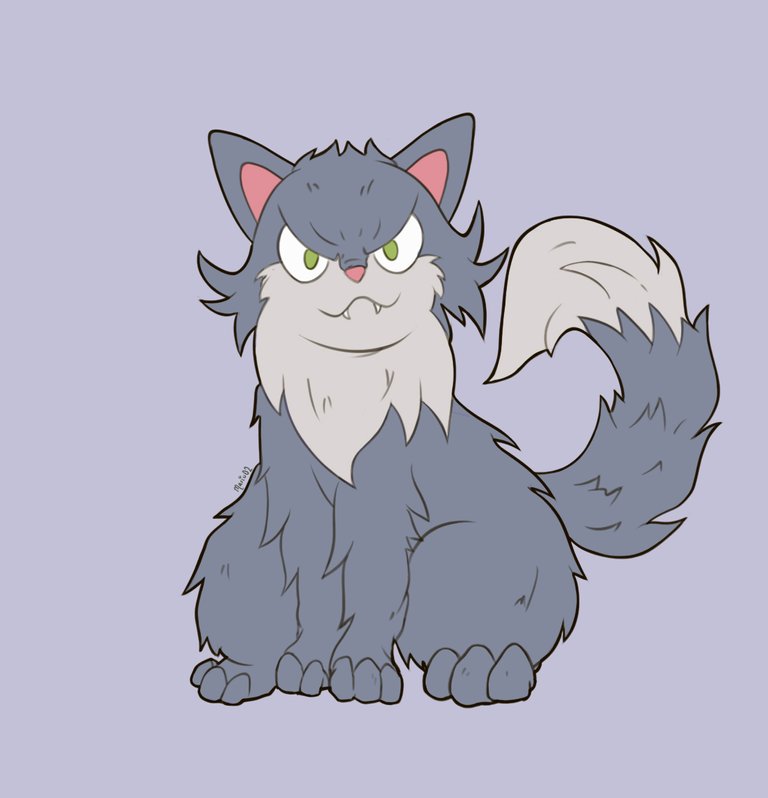
I was happy with the linear work and now I applied the colour, in this case I used a palette with some variations in the tones, unlike the reference character, as I was looking for more saturated tones. Then I made some gradients to mark the direction of the light and a general shadow.
Contento con el trabajo lineal pase ahora a aplicar el color, en este caso utilice una paleta con algunas variaciones en los tonos a diferencia del personaje de referencia ya que buscaba tonos un poco mas saturados. Luego realice algunos degradados para marcar la dirección de la luz y una sombra general.
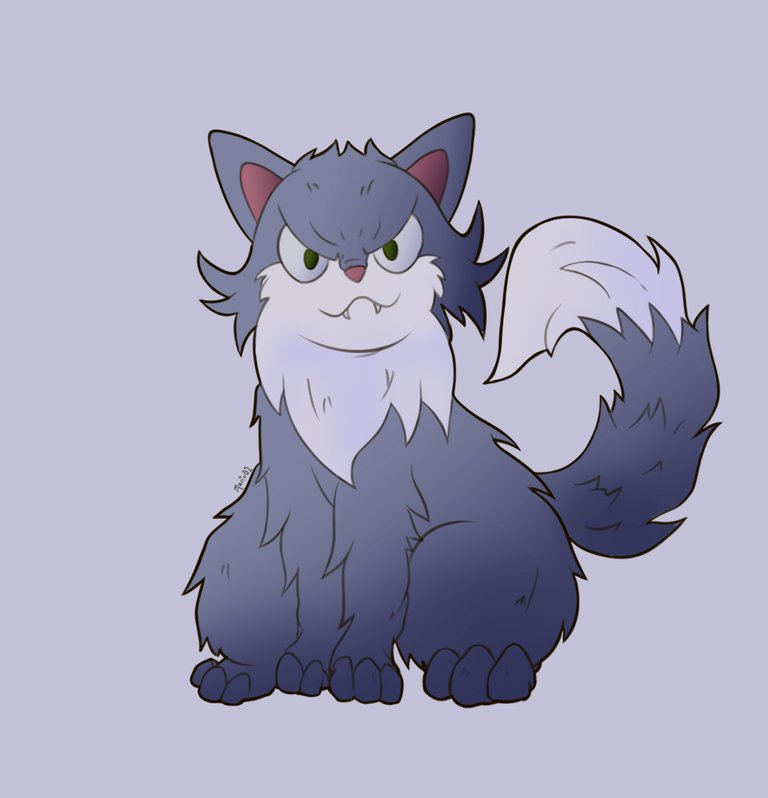
Then with a flat brush I started to mark the shadows that the character would have, following the guide of the gradients previously made. Later with a soft brush I added some lighting tones in specific areas as well as a reflected light in some areas of the character.
At this point I applied a light blue base tone as background and in a new layer I started to correct some tones of the character for more saturated and vivid ones, making it stand out a bit more. Finally I added a parallel shadow for some more depth.
Luego con un pincel plano comencé a marcar las sombras que tendría el personaje, siguiendo la guía de los degradados antes realizados. Posteriormente con un pincel suave agregue algunos tonos de iluminación en zonas especificas además de una luz reflejada en algunas zonas del personaje.
En este punto aplique un tono base color azul claro como fondo y en una nueva capa comencé a corregir algunos tonos del personaje por unos mas saturados y vivos, haciendo que este resaltara un poco mas. Por último agregue una sombra paralela para algo mas de profundidad.
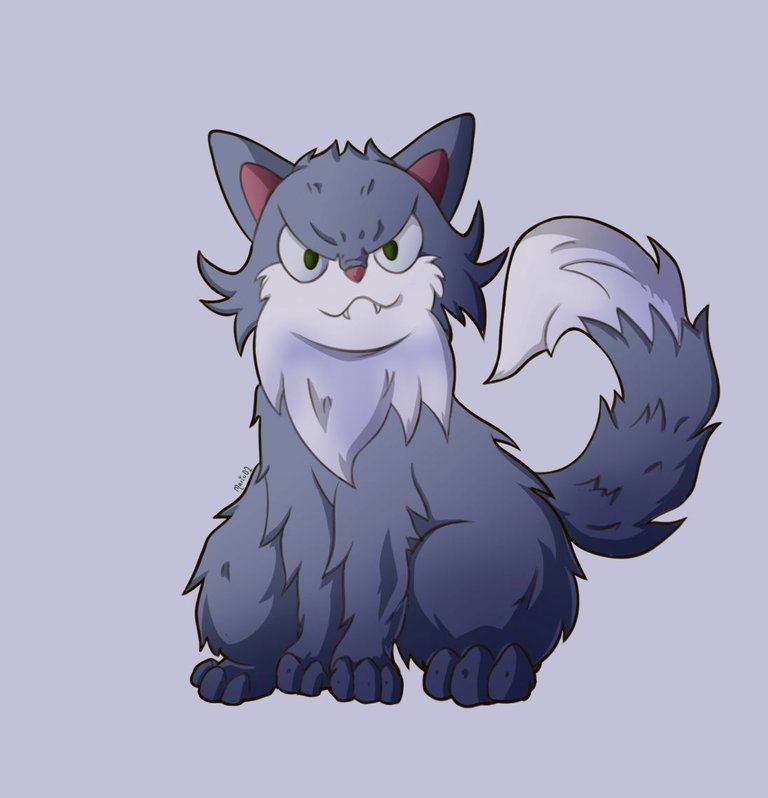
Finally I made some adjustments to the lighting and worked a bit more on the background.
Thanks so much for watching and see you next time! 🙏
Por último hice algunos ajustes en las iluminaciones y trabaje un poco mas en el fondo.
¡Muchas gracias por ver y hasta la próxima! 🙏
Tools Used | Herramientas Utilizadas:
- Photoshop CC versión 64 bits
- Tablet Huion H610 PRO V2

The illustration and separators used in the post are my property.
Translated with DeepL (free versión)
La expresión le quedo muy bien, es genial.
Congratulations @mario02! You have completed the following achievement on the Hive blockchain And have been rewarded with New badge(s)
Your next target is to reach 21000 upvotes.
You can view your badges on your board and compare yourself to others in the Ranking
If you no longer want to receive notifications, reply to this comment with the word
STOP