UN NUEVO ISOTIPO JUNIO 2020/ A NEW ISOTYPE JUNE 2020
Español
Hola. Un saludo a todos ustedes mis hiveamigos, una vez más bienvenidos a este pequeño rincón del arte y diseño. Soy @kadoshmenorah y hoy les comparto un mini tutorial de un nuevo isotipo 100 % original y fácil de hacer basado en un concepto un poco abstracto y con una triada de color. Así como es ya costumbre, espero que les guste.
Dates de interés sobre el diseño de hoy:
Programa usado: Adobe Illustrator 2020
Reference imagen usada: Ninguna
Colores empleados: 8F067E; D8255C; B8CB33; ECB82B; 579AA0
Tipografía: Haettenschweiler
English
Hello. A greeting to all of you my hive friends, once again welcome to this little corner of art and design. I'm @kadoshmenorah and today I share with you a mini tutorial of a new isotype 100% original and easy to do based on a little abstract concept and with a triad of color. As usual, I hope you like it.
Interesting facts about today's design:
Program used: Adobe Illustrator 2020
Reference image used: None
Colors used: 8F067E; D8255C; B8CB33; ECB82B; 579AA0
Typography: Haettenschweiler

PASO A PASO
STEP 1: TRAZADO
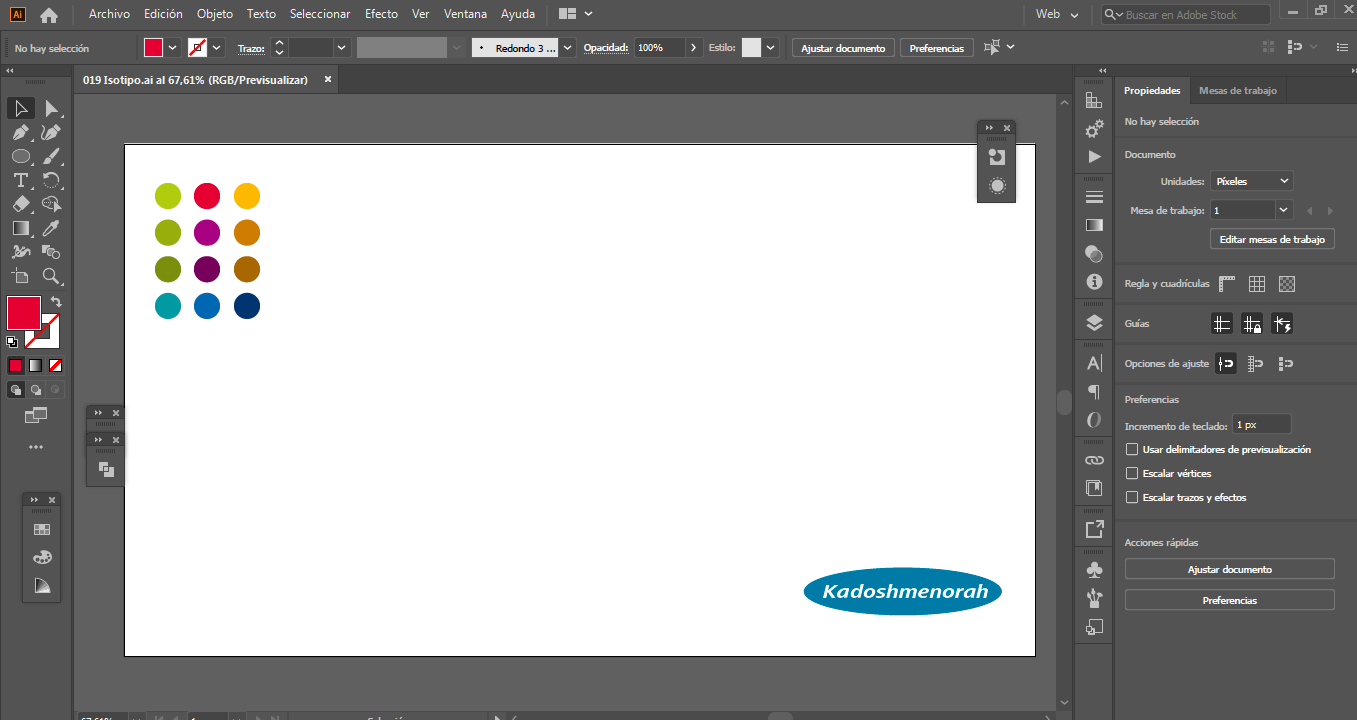
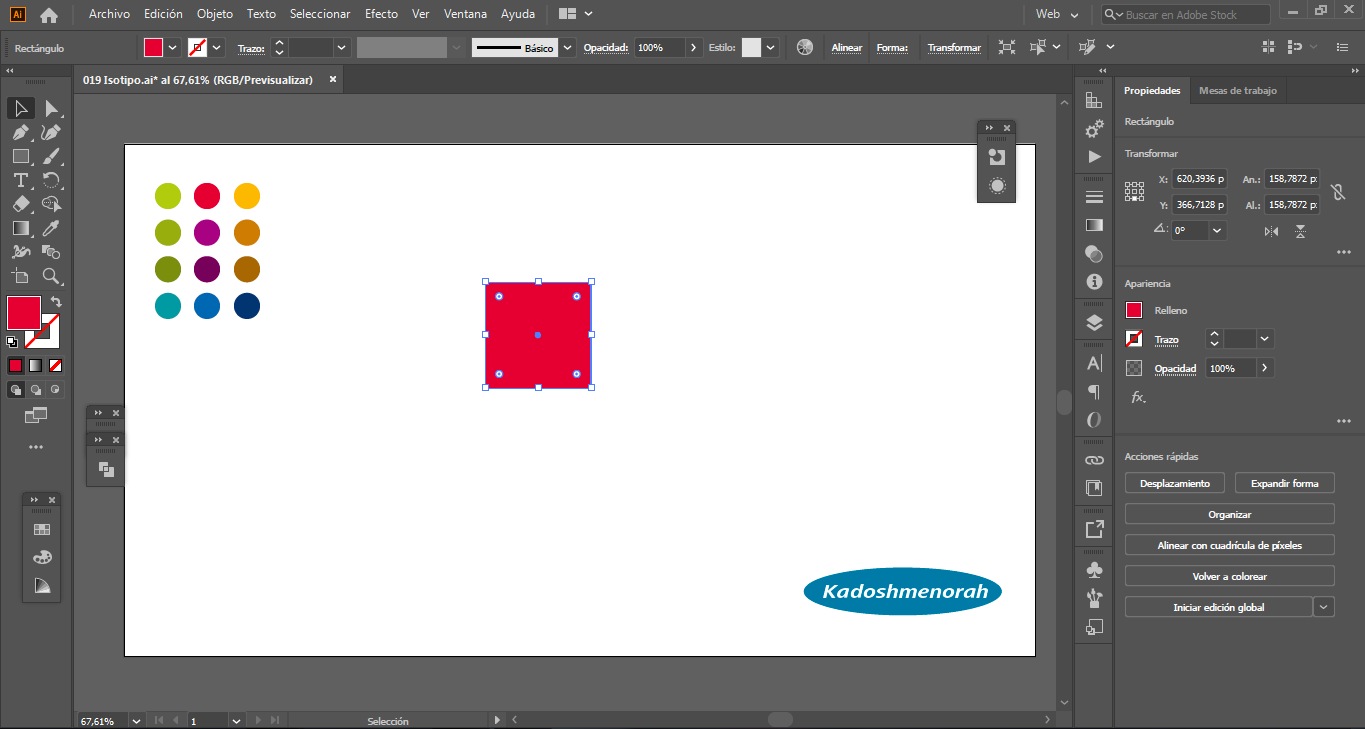
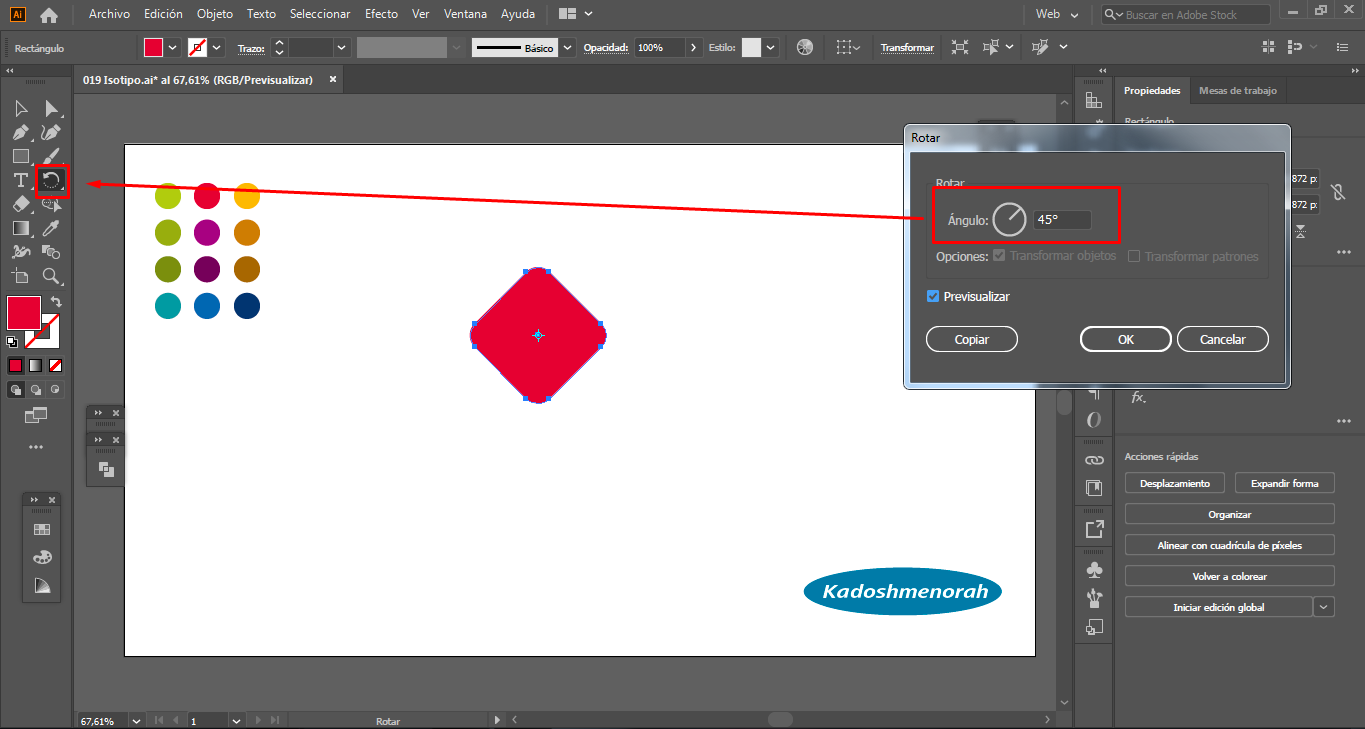
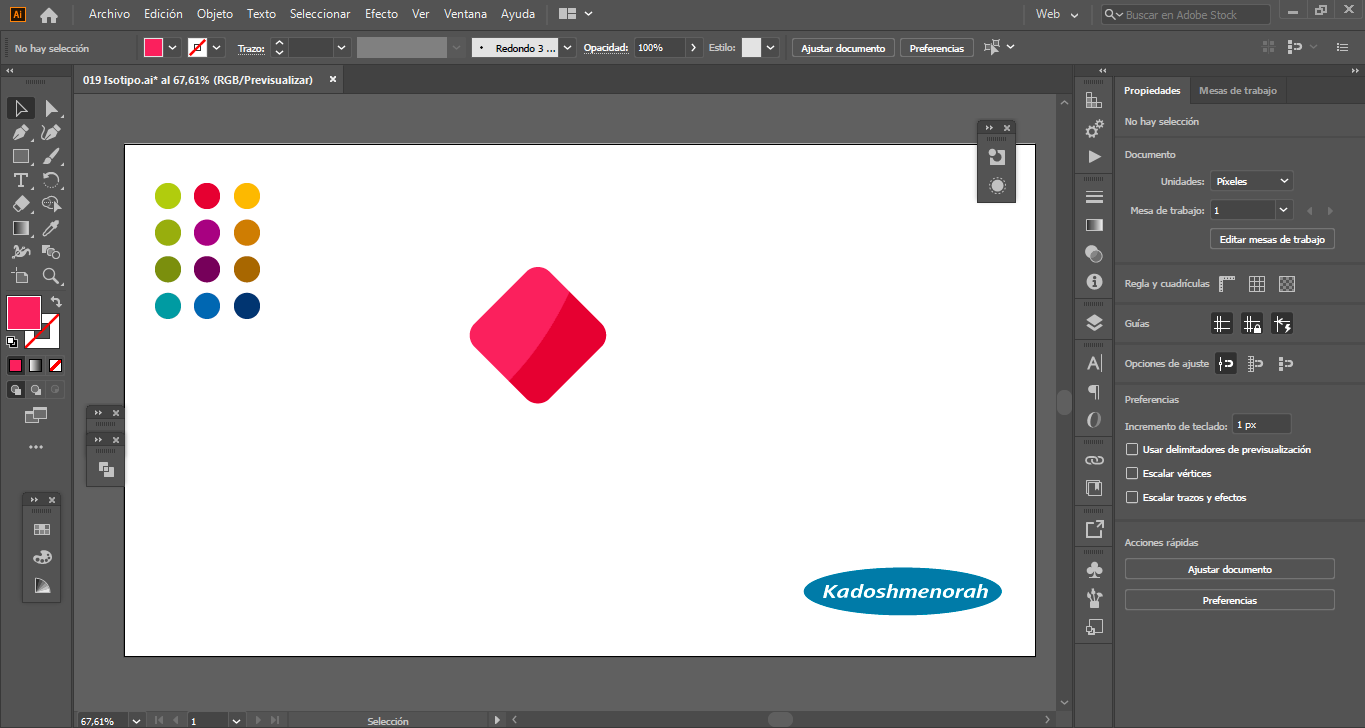
Primeramente establezco una tétrada de colores con las que voy a trabajar y creo mi paleta de colores. Luego dibujo un cuadrado redondeando sus vértices con la herramienta forma. Seguidamente le doy una rotación de unos cuarenta y cinco grados (45°)
STEP BY STEP
STEP 1: TRACING
First I establish a tetrad of colors with which I will work and create my color palette. Then I draw a square by rounding off its vertices with the shape tool. Then I give it a rotation of about forty-five degrees (45°)

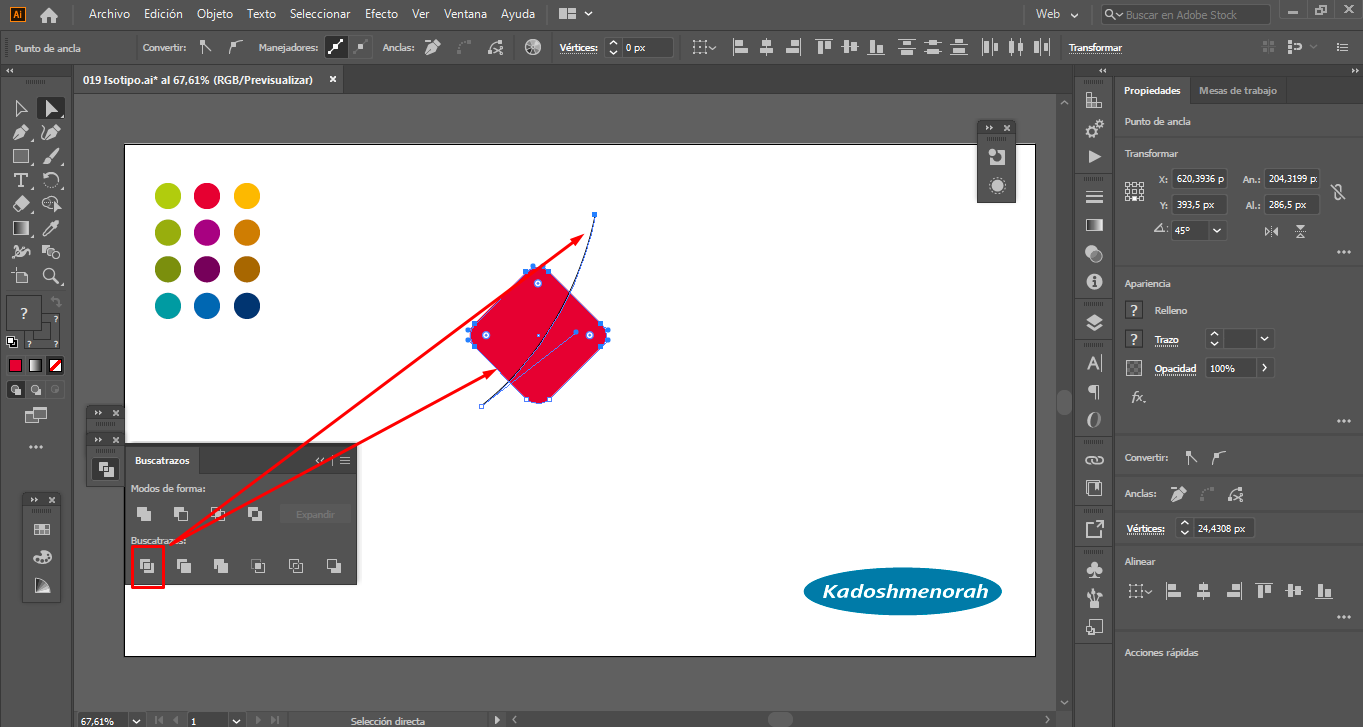
STEP 2: DIVISION
Ahora lo que vamos a hacer es dibujar una curva con la herramienta pluma, de tal manera que corte a la mitad más o menos nuestro rombo. Luego seleccionamos todo y con la herramienta forma o con le herramienta de dividir del buscatrazos segmentamos en dos partes nuestro rombo, y luego le aplicamos color a cada una de las dos partes.
STEP 2: DIVISION
Now what we are going to do is draw a curve with the pen tool, so that it cuts our rhombus more or less in half. Then we select everything and with the shape tool or with the splitting tool of the scavenger we segment in two parts our rhombus, and then we apply color to each one of the two parts.
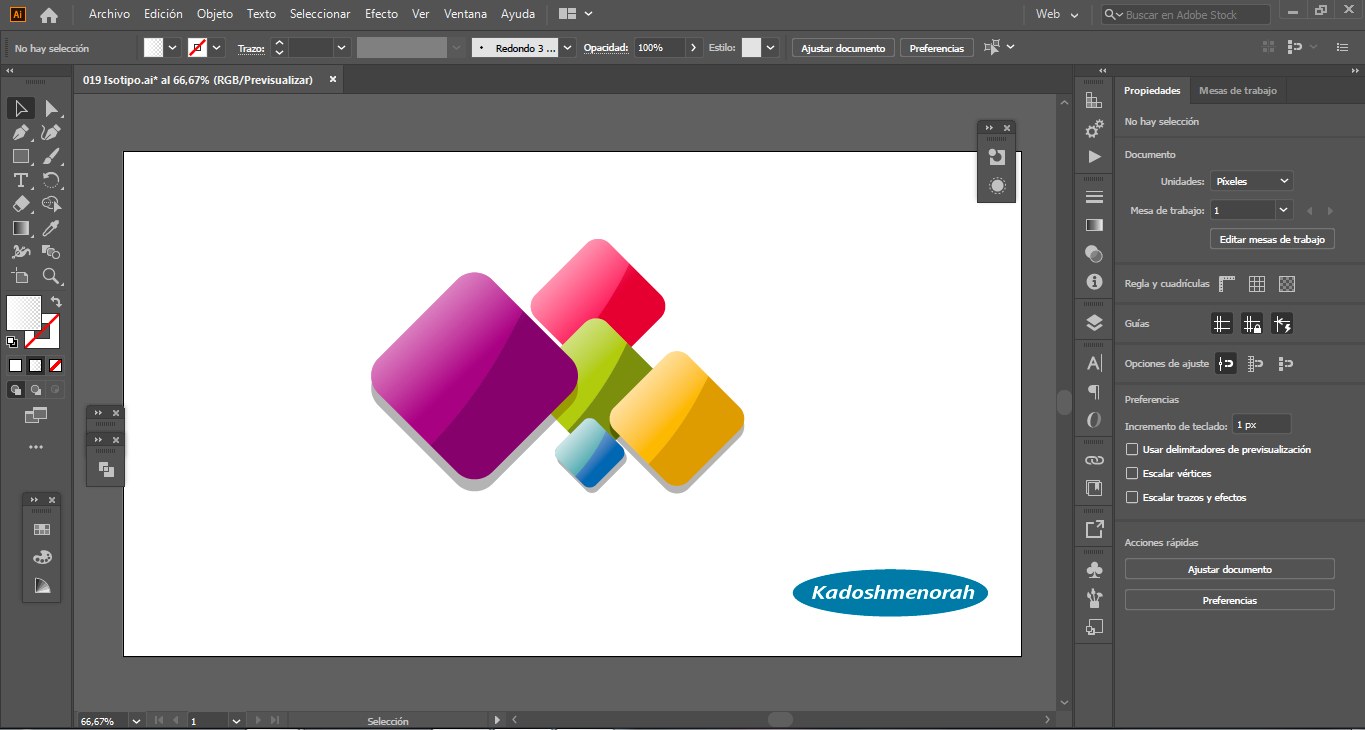
STEP 3: COPIAS
Ya que tenemos nuestro objeto base, lo que vamos a hacer, es crear cuatro (4) copias de diferentes tamaños, a las cuales cambiaremos de color.
STEP 3: COPIES
Since we have our base object, what we are going to do, is to create four (4) copies of different sizes, to which we will change the color.
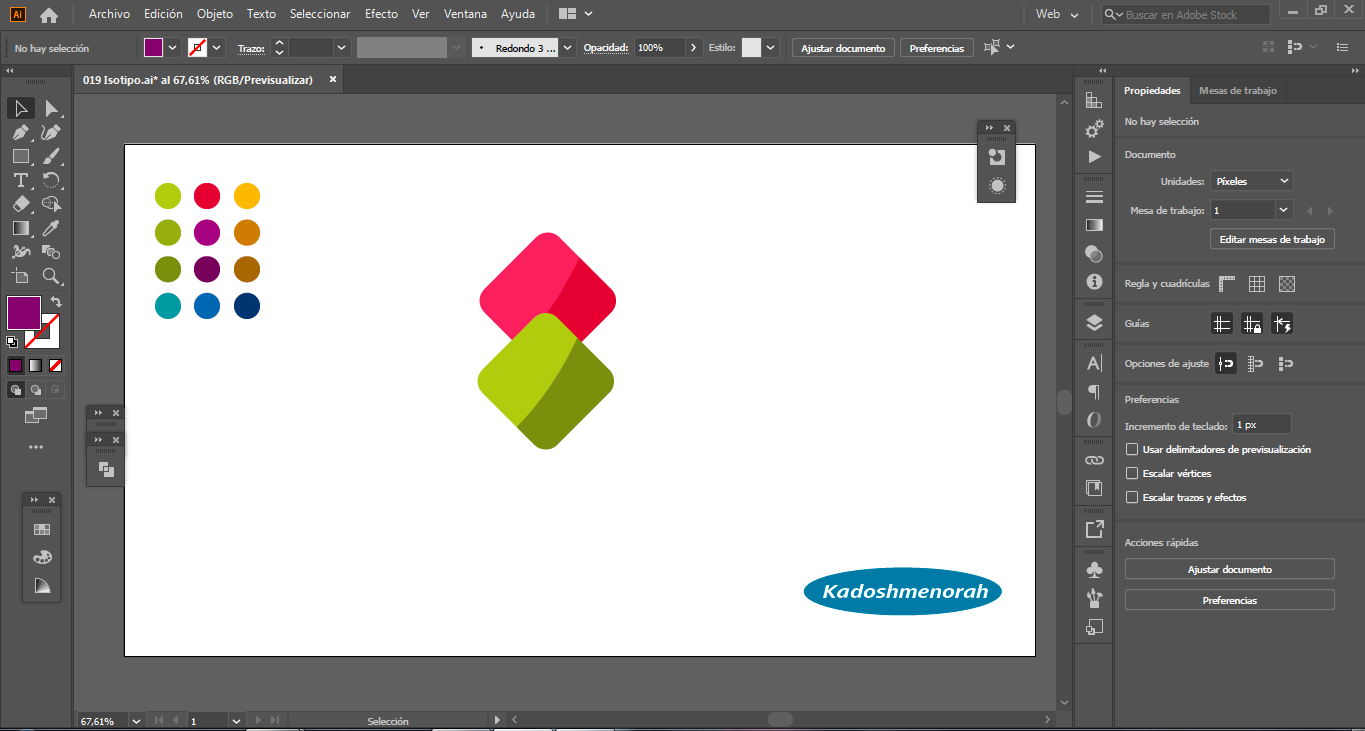
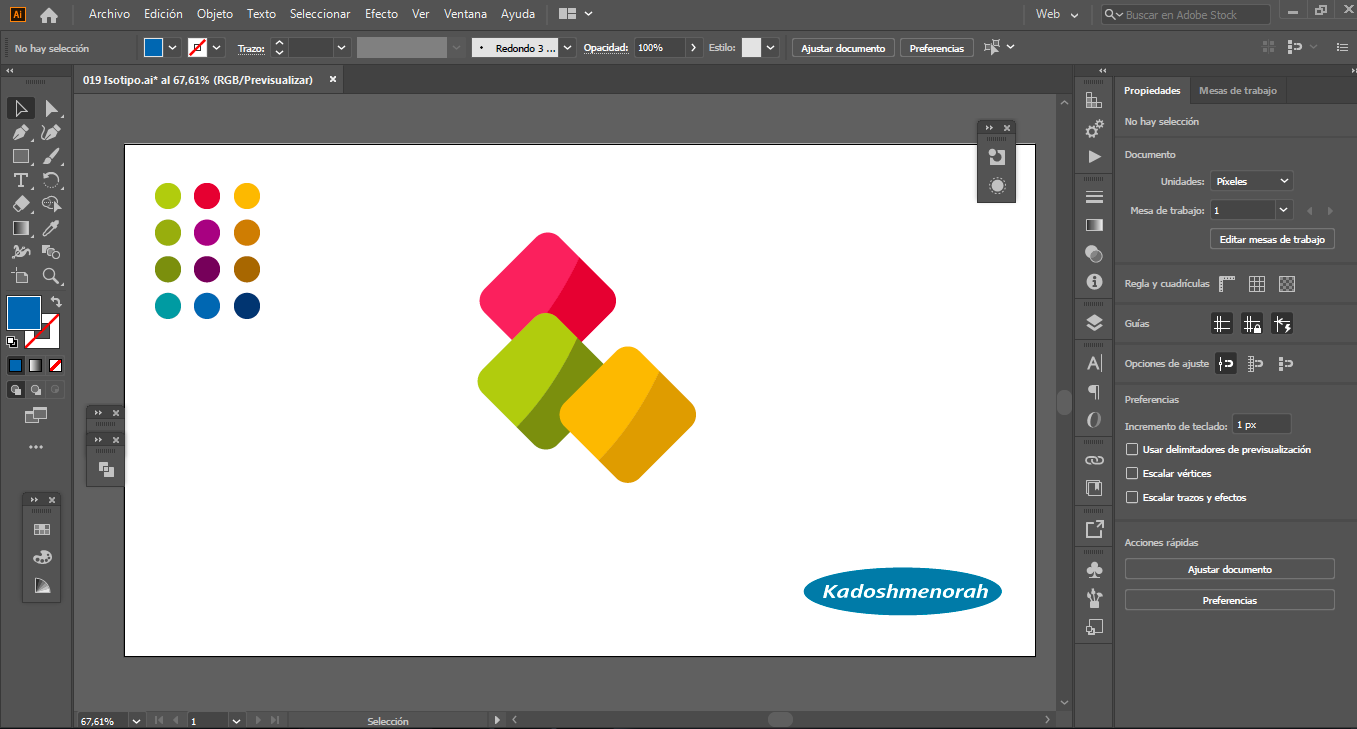

STEP 4: LUCES Y SOMBRAS
Aplicamos zonas de luces y sombras a cada uno de los rombos.
STEP 4: LIGHTS AND SHADOWS
We apply zones of light and shadow to each of the rhombuses.
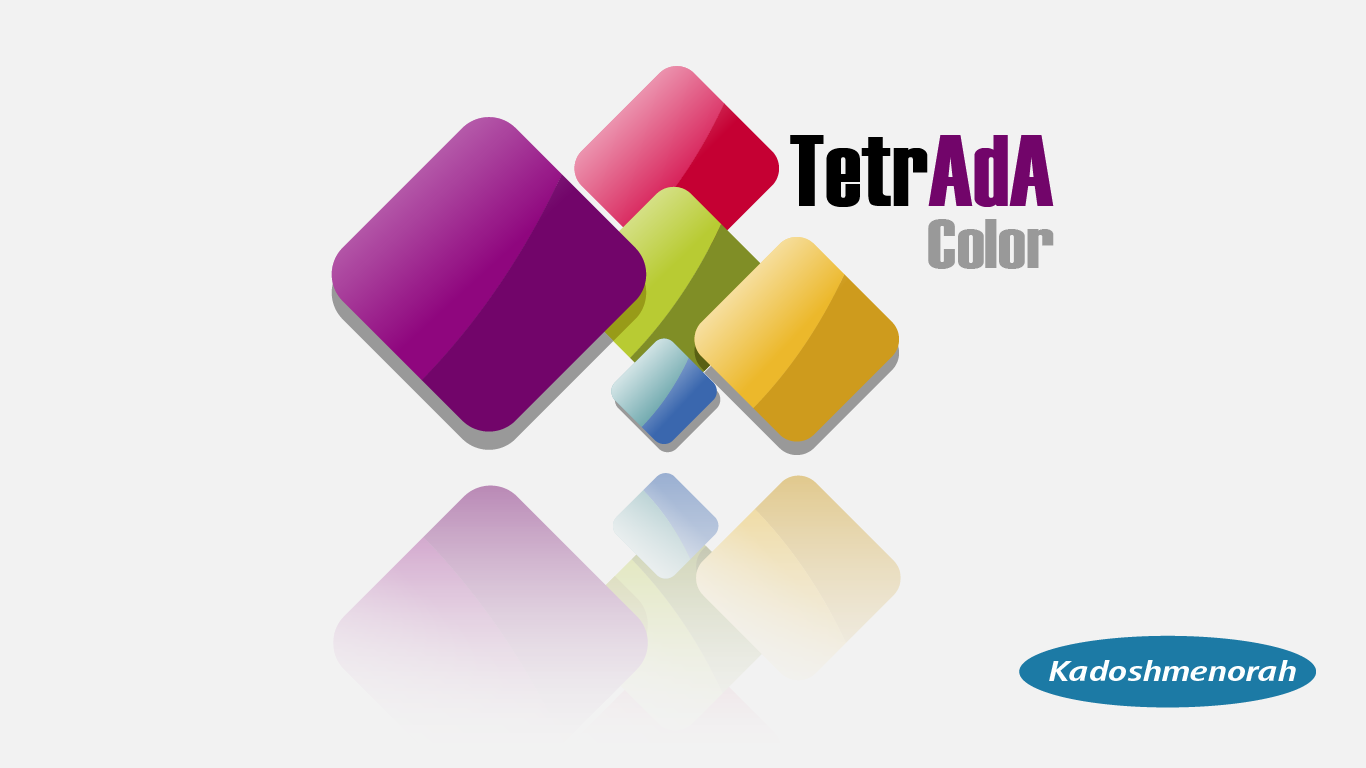
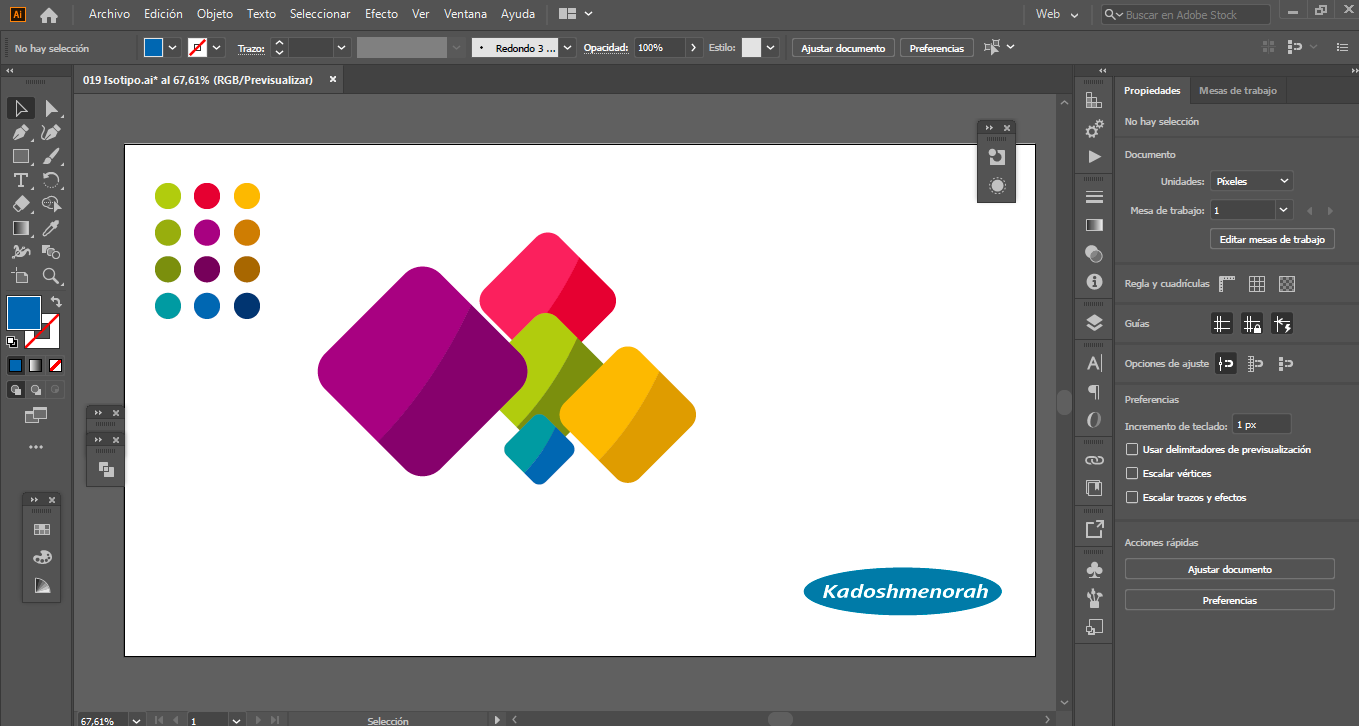
STEP 5: PRESENTACIÓN
Por ultimo creamos un reflejo de nuestro isotipo y lo colocamos en la parte inferior, y luego colocamos una tipografía. Para este ejemplo estableceré una tipografía en dos líneas como: TetrADA Color.
STEP 5: PRESENTATION
Finally we create a reflection of our isotype and place it at the bottom, and then we place a typeface. For this example I will set a two-line typography like: TetrADA Color.
Soy kadoshmenorah y hasta una próxima oportunidad y no olvides dejar tus comentarios acá abajo.

Me pueden encontrar en las redes sociales:

Español
Dates de interés sobre el diseño de hoy:
Programa usado: Adobe Illustrator 2020
Reference imagen usada: Ninguna
Colores empleados: 8F067E; D8255C; B8CB33; ECB82B; 579AA0
Tipografía: Haettenschweiler
English
Interesting facts about today's design:
Program used: Adobe Illustrator 2020
Reference image used: None
Colors used: 8F067E; D8255C; B8CB33; ECB82B; 579AA0
Typography: Haettenschweiler
Primeramente establezco una tétrada de colores con las que voy a trabajar y creo mi paleta de colores. Luego dibujo un cuadrado redondeando sus vértices con la herramienta forma. Seguidamente le doy una rotación de unos cuarenta y cinco grados (45°)
First I establish a tetrad of colors with which I will work and create my color palette. Then I draw a square by rounding off its vertices with the shape tool. Then I give it a rotation of about forty-five degrees (45°)
Ahora lo que vamos a hacer es dibujar una curva con la herramienta pluma, de tal manera que corte a la mitad más o menos nuestro rombo. Luego seleccionamos todo y con la herramienta forma o con le herramienta de dividir del buscatrazos segmentamos en dos partes nuestro rombo, y luego le aplicamos color a cada una de las dos partes.
Now what we are going to do is draw a curve with the pen tool, so that it cuts our rhombus more or less in half. Then we select everything and with the shape tool or with the splitting tool of the scavenger we segment in two parts our rhombus, and then we apply color to each one of the two parts.
Ya que tenemos nuestro objeto base, lo que vamos a hacer, es crear cuatro (4) copias de diferentes tamaños, a las cuales cambiaremos de color.
Since we have our base object, what we are going to do, is to create four (4) copies of different sizes, to which we will change the color.
Aplicamos zonas de luces y sombras a cada uno de los rombos.
We apply zones of light and shadow to each of the rhombuses.
Por ultimo creamos un reflejo de nuestro isotipo y lo colocamos en la parte inferior, y luego colocamos una tipografía. Para este ejemplo estableceré una tipografía en dos líneas como: TetrADA Color.
Finally we create a reflection of our isotype and place it at the bottom, and then we place a typeface. For this example I will set a two-line typography like: TetrADA Color.
Soy kadoshmenorah y hasta una próxima oportunidad y no olvides dejar tus comentarios acá abajo.
Me pueden encontrar en las redes sociales:
Hola @kadoshmenorah. Muy buen diseño, me gustó bastante. Saludos desde Colombia.
Gracias amigo, que bueno que te haya gustado. Saludos
Me encanta lo colorido que es. Lo veo ideal para muchas temáticas.
Gracias amiga, que bueno que te haya gustado, es un honor para mí que haces con con tu presencia, pues admiro tu talento, ah y soy un fan tuyo. Abracitos.
Felicidades por este diseño te quedo genial. Saludos
Gracias @elsan.artes que bueno que te haya gustado. Saludos
Gracias por apreciar y valorar este contenido.