Un regalo para mamá: Linda tarjeta en forma de maceta con flores 🌷 | A gift for mom: Cute card in the shape of a pot with flowers 🌷
¡Saludos amigos creativos! | ¡Greetings creative friends!
¡Feliz inicio de semana! Espero que se encuentren muy bien y deseo para todos una semana maravillosa y productiva. Desde hace mucho que no estoy muy activa con las manualidades pero he decidido volver para elaborar un lindo detalle para obsequiar a mamá en su día y de esta manera participar en esta Iniciativa Un regalo para mamá, así que hoy les comparto mi entrada con la elaboración de una linda tarjeta en forma de florero, espero que sea de su agrado, sin más, ¡vamos a crear!
¡Happy start of the week! I hope you are doing well and I wish you all a wonderful and productive week. I have not been very active with crafts for a long time but I have decided to return to make a nice detail to give to mom on her day and thus participate in this A Gift for Mom Initiative, so today I share my entry with the elaboration of a beautiful card in the shape of a vase, I hope you like it, Without further ado, let's create!

❥ Foami marrón sin escarcha.
❥ Foami escarchado morado.
❥ Cinta rosada de tela.
❥ 2 Palitos de altura.
❥ Abrehuecos.
❥ Corrector de tinta.
❥ Lapicero o marcador negro punta fina.
❥ Regla.
❥ Lápiz.
❥ Silicón.
❥ Tijera.
❥ Brown foam without frost.
❥ Purple frosty foami.
❥ Pink fabric ribbon.
❥ 2 Sticks in height.
❥ Opener.
❥ Corrector ink.
❥ Fine point black pen or marker.
❥ Rule.
❥ Pencil.
❥ Silicone.
❥ Scissors.


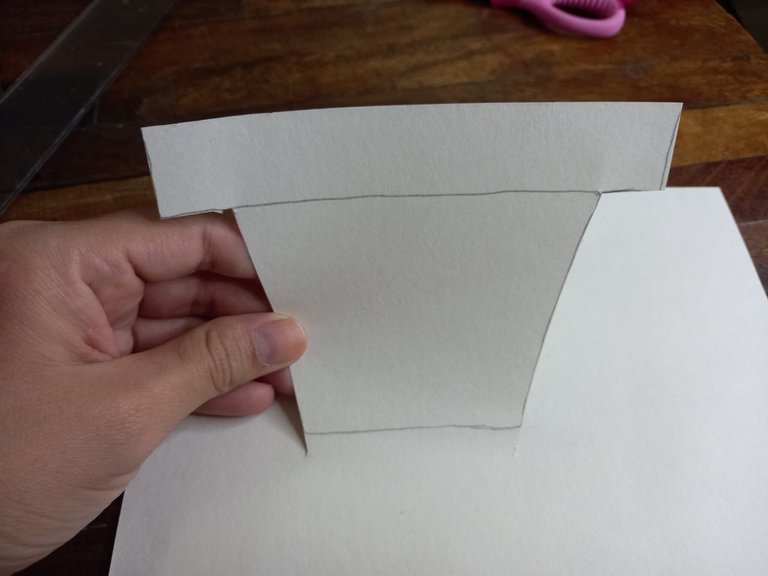
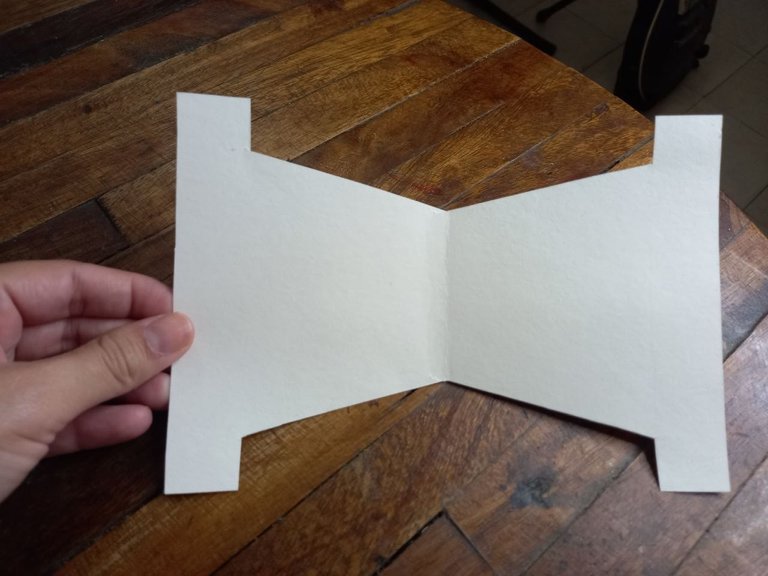
🌷 PASO 1. En la cartulina blanca vamos a dibujar la forma de una maceta, recortamos la parte superior y doblamos hacia el otro lado y hacemos otra forma como en modo espejo, luego recortamos quedando las dos figuras en una sola pieza que luego doblaremos justo a la mitad.
🌷 STEP 1. On the white cardboard we are going to draw the shape of a pot, we cut out the upper part and fold it to the other side and make another shape like in mirror mode, then we cut out the two figures in one piece which we will then fold right in half.


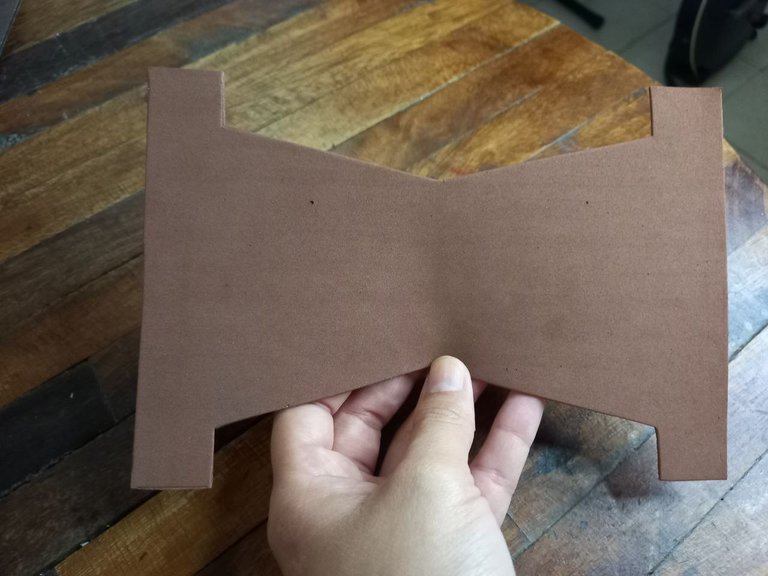
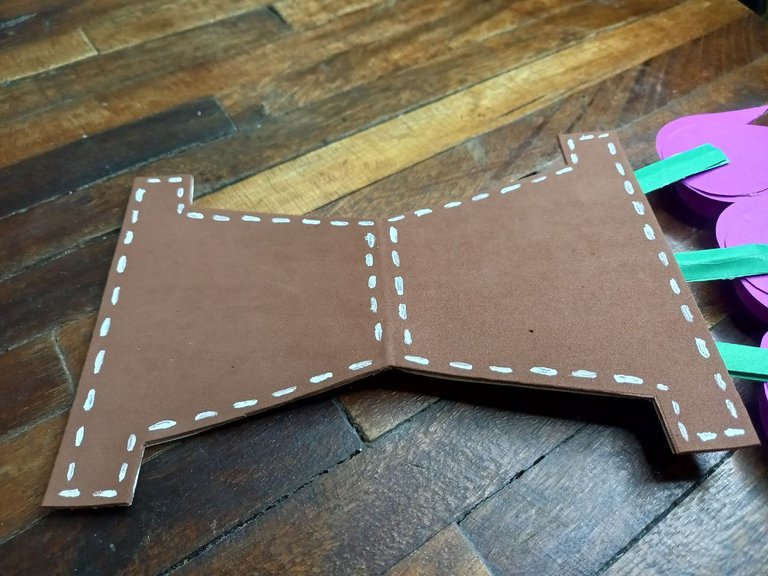
🌷 PASO 2. Ahora haremos esta pieza en el foami marrón y recortamos, seguidamente vamos a pegar sobre la figura de cartulina blanca y también doblaremos a la mitad para que mantenga su forma, quedando la cartulina en la parte interna y el foami en la eterna.
🌷 STEP 2. Now we will make this piece in the brown foami and cut it out, then we will glue it on the white cardboard figure and we will also fold it in half so that it maintains its shape, leaving the cardboard on the inside and the foami in the eternal.

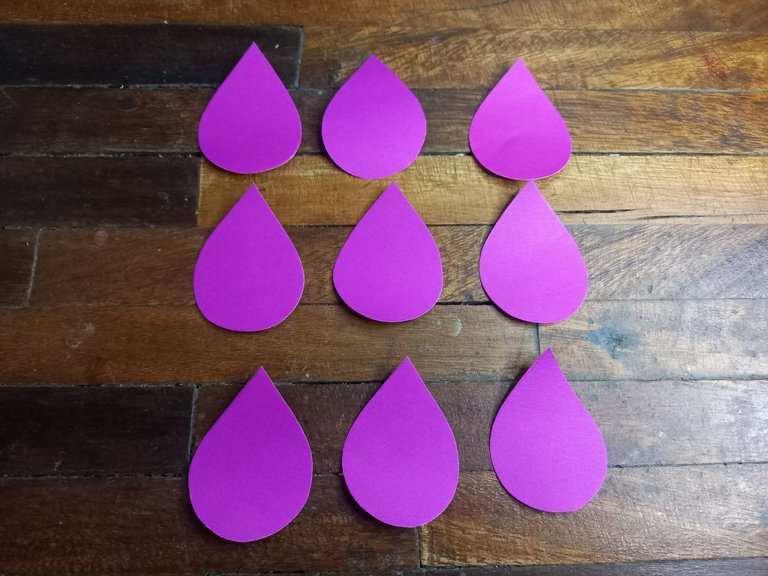
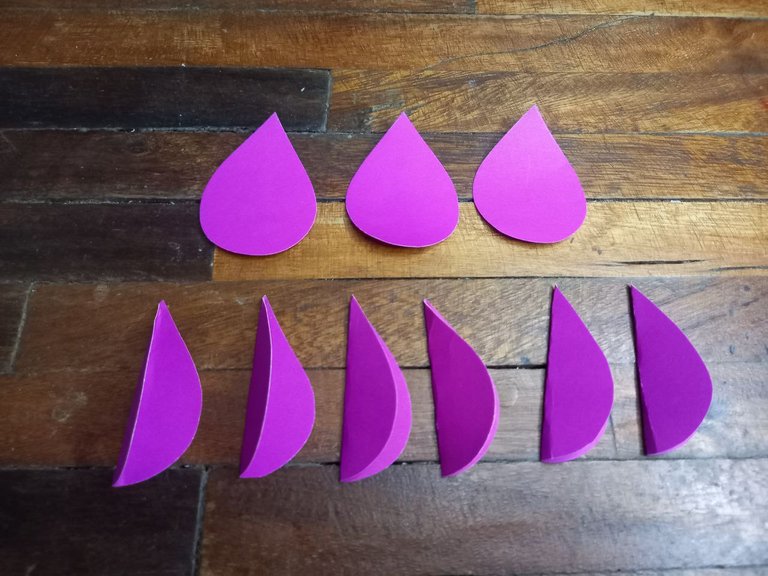
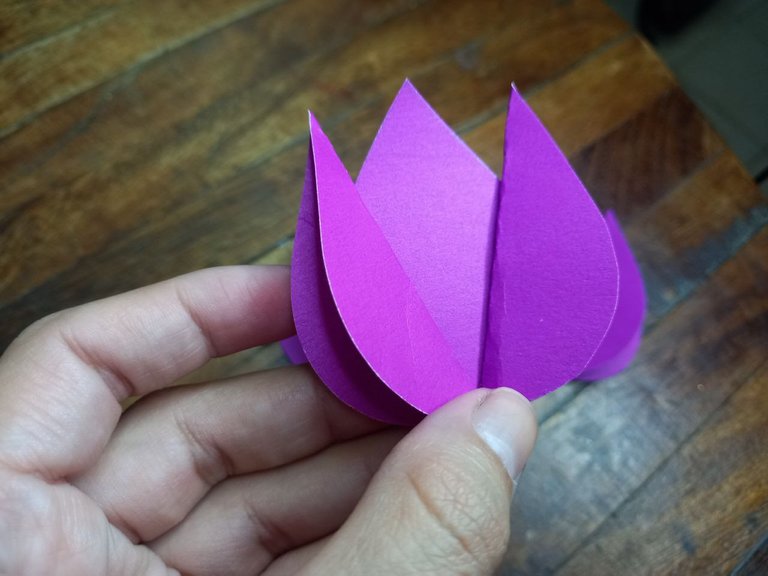
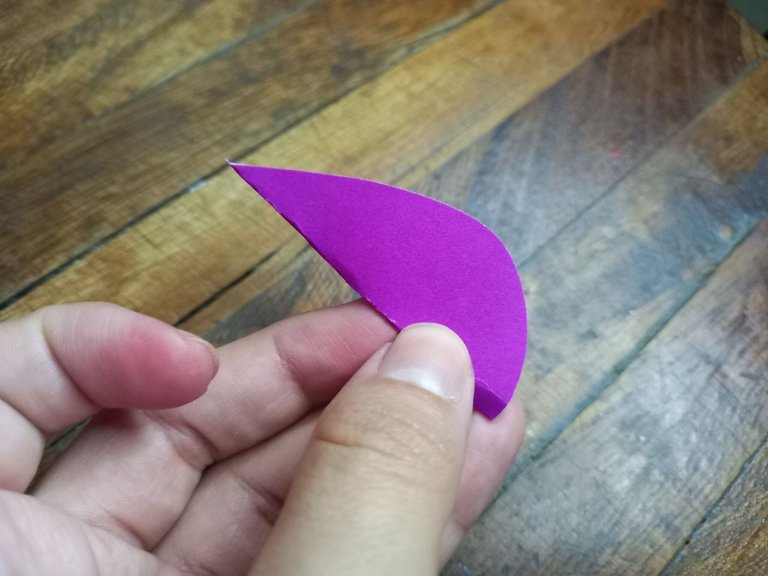
🌷 PASO 3. Ahora es momento de hacer las flores, para ello vamos a recortar 9 piezas de cartulina morada en forma como de una gota, todas del mismo tamaño, 6 de ellas las vamos a doblar a la mitad en sentido vertical y las otras 3 restantes serán la base, vamos a formar las flores pegando dos de las piezas dobladas sobre las piezas base cada una en una dirección diferente.
🌷 STEP 3. Now it is time to make the flowers, for this we are going to cut 9 pieces of purple cardboard in the shape of a drop, all the same size, 6 of them we are going to fold in half in the sense vertical and the other 3 remaining will be the base, we are going to form the flowers by gluing two of the folded pieces on the base pieces each one in a different direction.


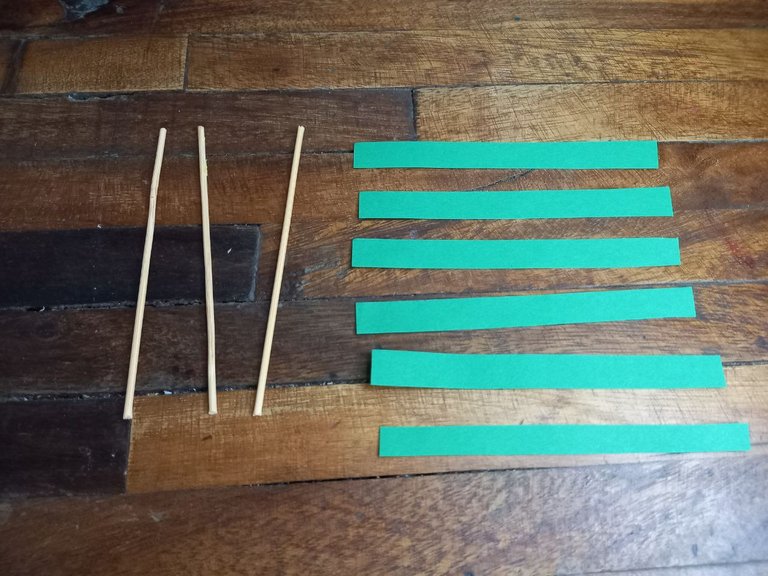
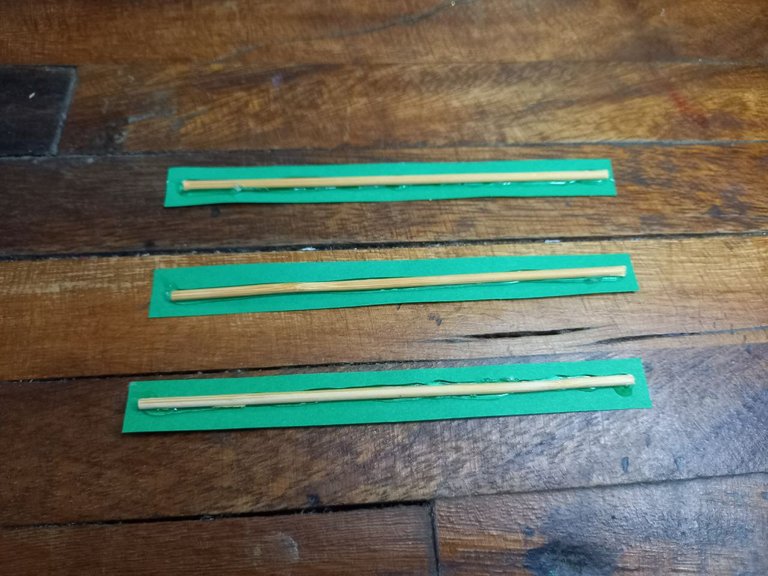
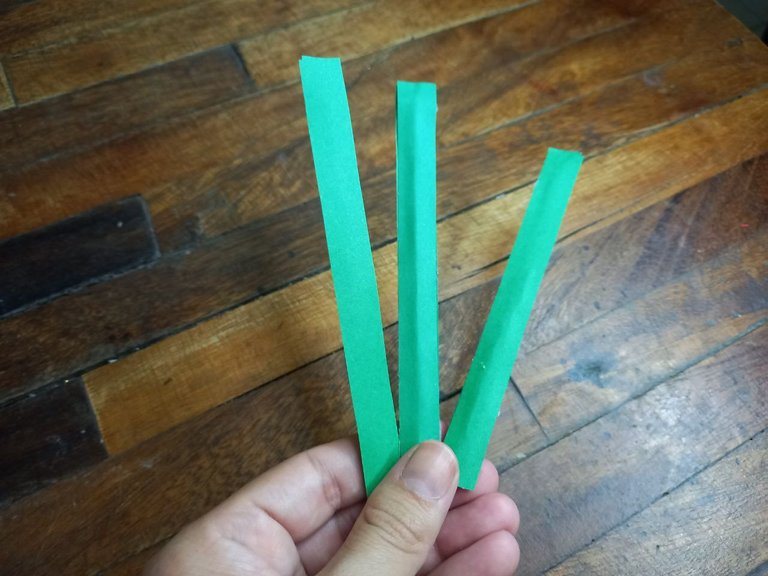
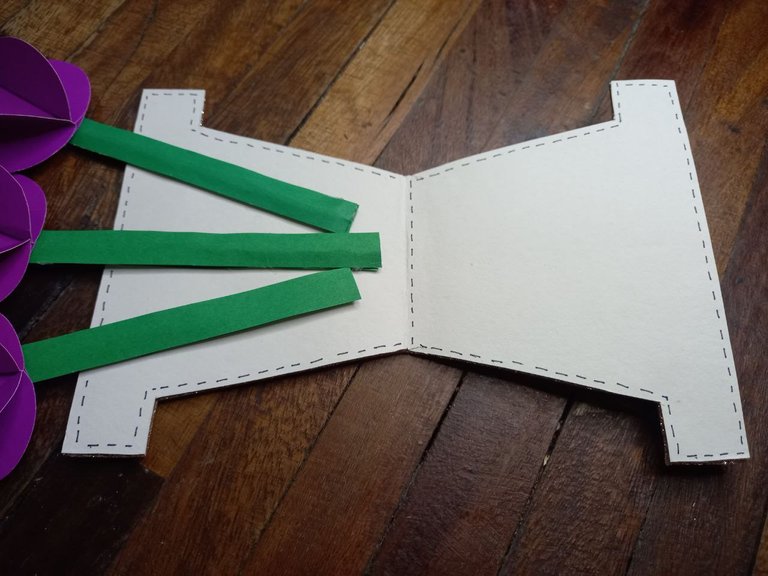
🌷 PASO 4. Cortamos los palitos de altura en 3 piezas del mismo tamaño (no muy largos) y recortamos 6 tiras de cartulina verde del largo de los palitos y un poco más anchos, vamos a pegar los palitos sobre 3 de las tiras de cartulina y las otras 3 tiras sobrantes las pegamos del otro lado.
🌷 STEP 4. Cut the tall sticks into 3 pieces of the same size (not very long) and cut 6 strips of green cardboard the length of the sticks and a little wider, we are going to glue the sticks on 3 of glue the cardboard strips and the other 3 excess strips on the other side.
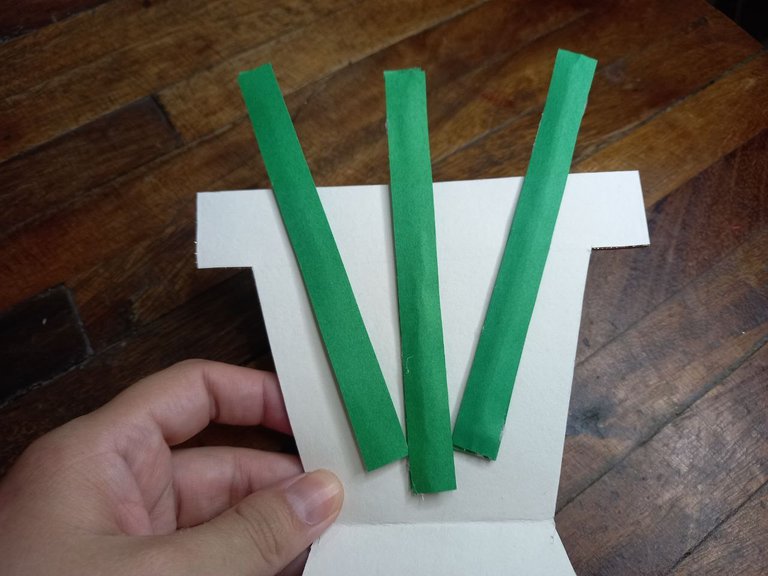
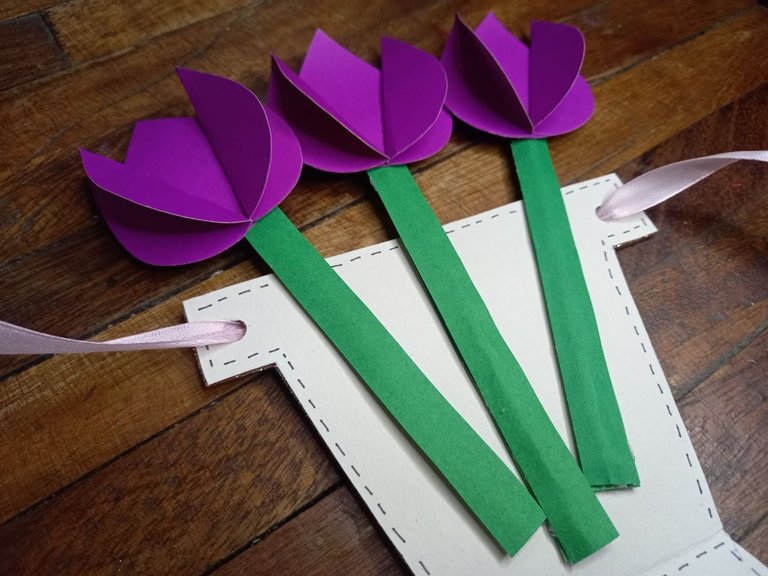
🌷 PASO 5. Pegamos los palitos ya forrados en la parte interna de la tarjeta quedando al menos la mitad en la parte de adentro y la otra mitad hacia afuera y en las puntas superiores pegamos las flores.
🌷 STEP 5. We glue the already lined sticks on the inside of the card, leaving at least half on the inside and the other half on the outside and on the upper ends we glue the flowers.

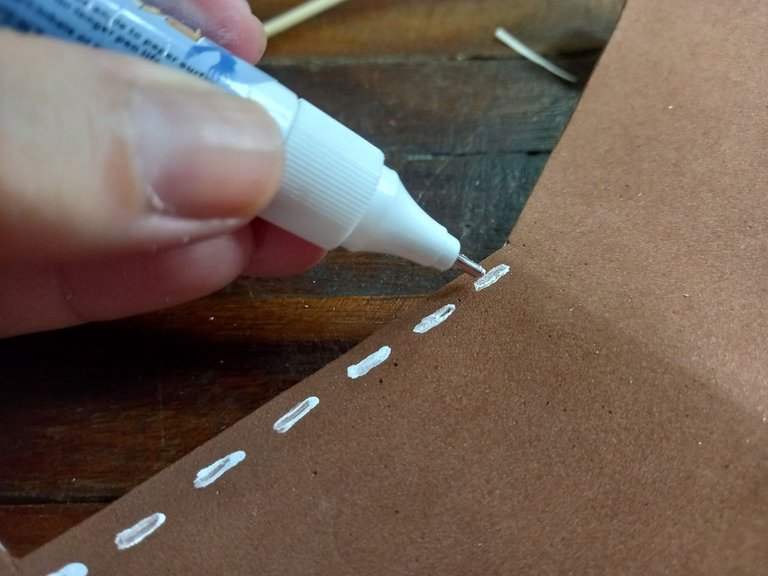
🌷 PASO 6. Con el corrector de tinta vamos a decorar la parte externa de la maceta, haciendo líneas por todo el borde, también nos podemos ayudar con un palito mojándolo en tinta blanca o como se nos haga más fácil, por la parte interna haremos lo mismo, vamos a dibujar líneas en todo el borde de la cartulina blanca con el lapicero o marcador de punta fina.
🌷 STEP 6. With the ink concealer we are going to decorate the outside of the pot, making lines all over the edge, we can also help ourselves with a stick dipping it in white ink or however we find it easier, for We will do the same for the inner part, we are going to draw lines around the edge of the white cardboard with a fine-tipped pen or marker.
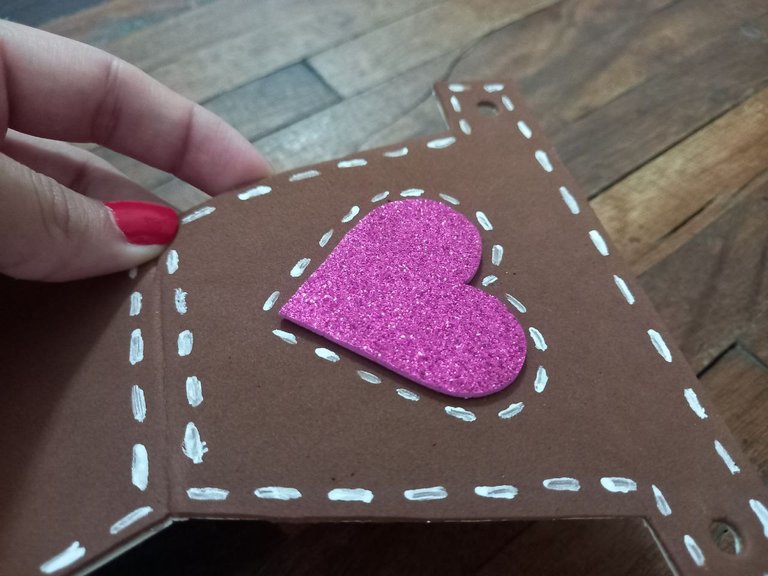
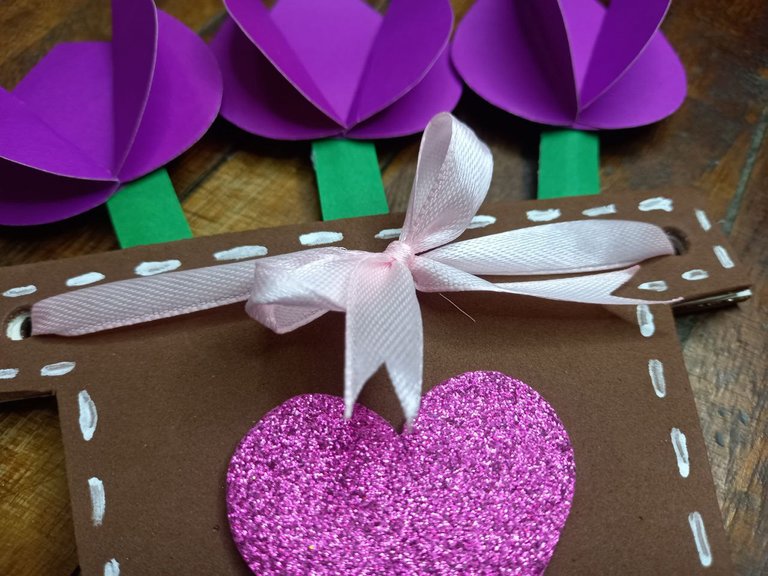
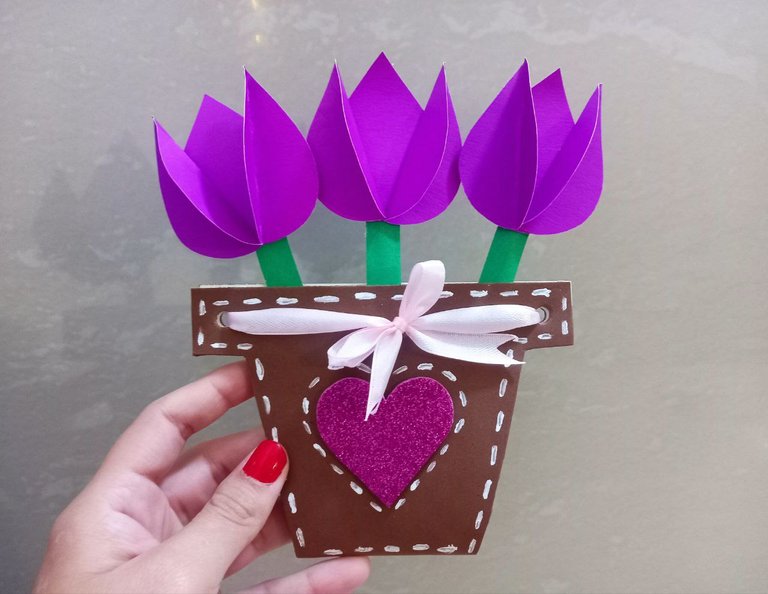
🌷 PASO 7. Hacemos un corazón pequeño de foami escarchado morado, recortamos y pegamos en la parte frontal de la tarjeta (parte externa de la maceta) y le dibujamos el borde con el corrector de tinta blanca.
🌷 STEP 7. Make a small purple frosted foam heart, cut it out and glue it to the front of the card (outer part of the pot) and draw the edge with the white ink corrector.

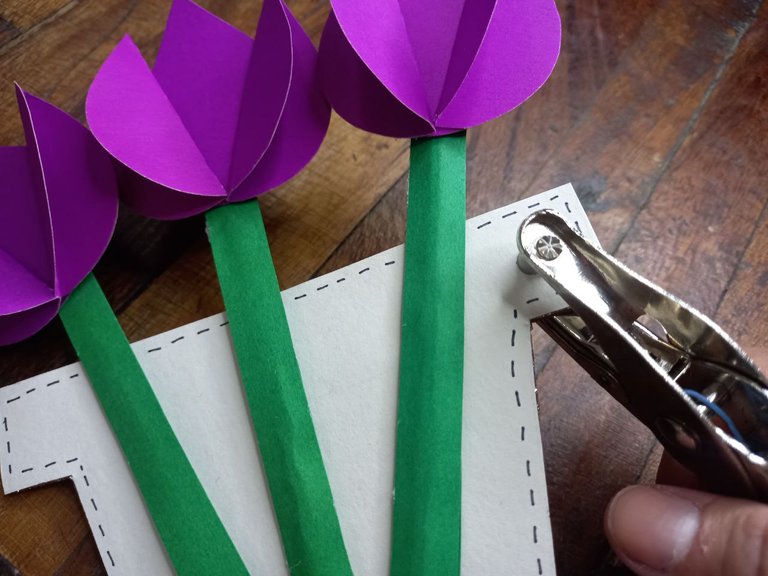
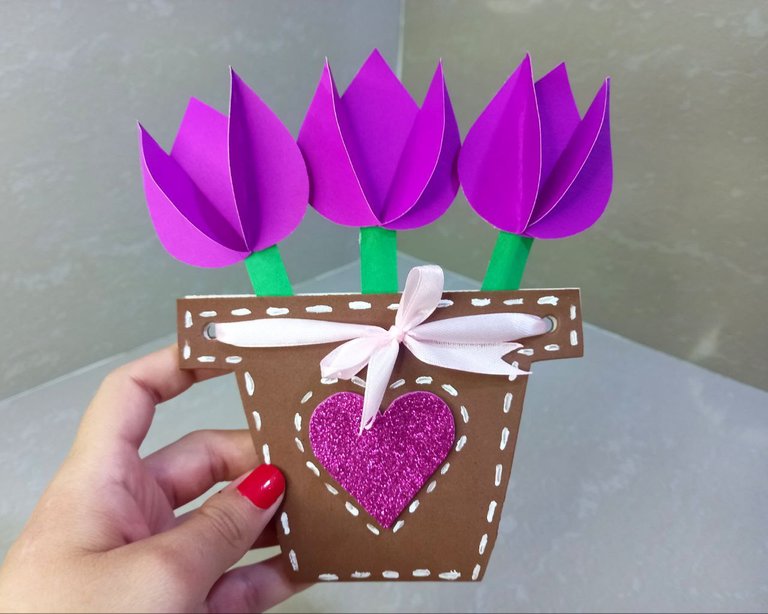
🌷 PASO 8. Ya por ultimo vamos a escribir en la parte interna de la tarjeta la frase “¡Feliz día mamá! , luego abrimos un agujero en cada una de las esquinas, recortamos una tira de cinta rosada y la vamos a pasar por la parte trasera de los agujeros al lado de las flores, cerramos la tarjera pasando la cinta por la otra cara de la tarjeta y le hacemos un lazo en la parte frontal.
🌷 STEP 8. Lastly we are going to write on the inside of the card the phrase “Happy day mom! , then we open a hole in each of the corners, we cut a strip of pink ribbon and we are going to pass it through the back of the holes next to the flowers, we close the card passing the ribbon through the other side of the card and we make a bow on the front part.


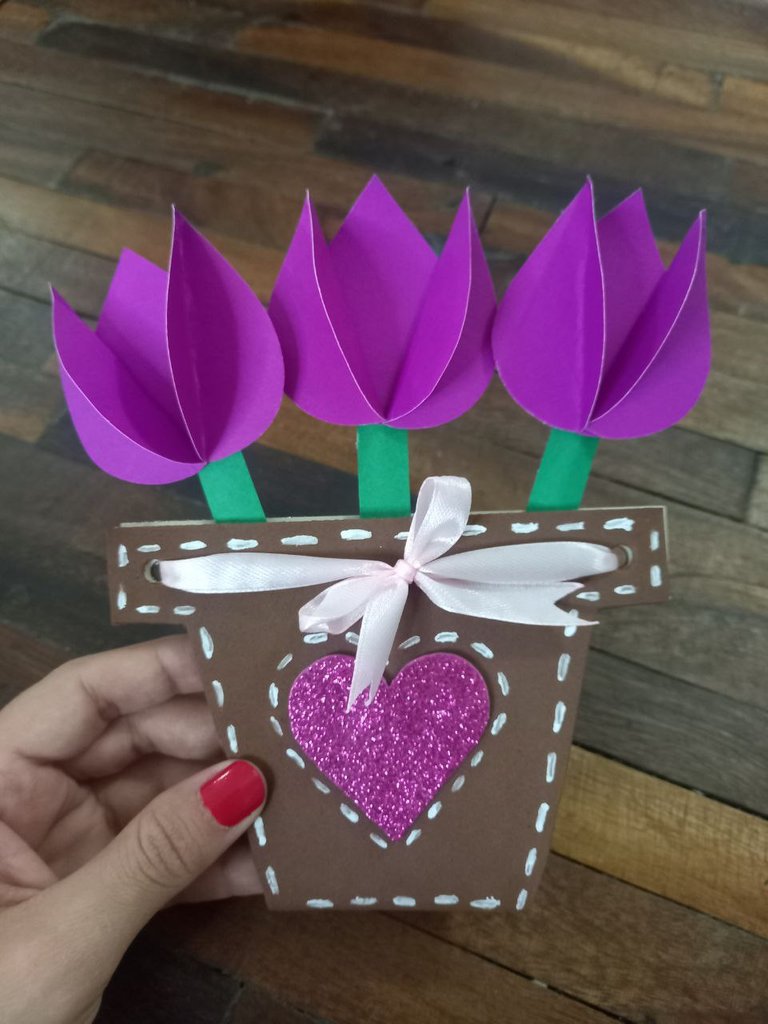
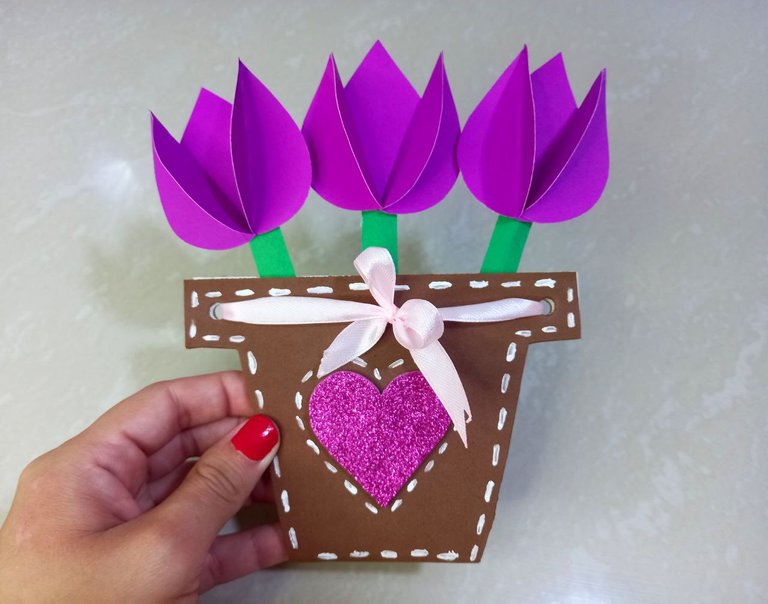
¡Y listo! De esta manera tan sencilla es como he elaborado una linda tarjeta para mamá en forma de maceta con flores, una linda opción para hacer un obsequio muy original, como ven su elaboración es sencilla y el resultado es hermoso, en lo personal a mí me encantó y me parece una forma muy linda de hacer un detalle especial, ¿Qué les pareció a ustedes? Espero que les haya gustado tanto como a mí y este tutorial les pueda servir de guía para hacer su propia tarjetita.
And ready! In this simple way is how I have made a beautiful card for mom in the shape of a pot with flowers, a beautiful option to make a very original gift, as you can see its preparation is simple and the result is beautiful, personally I loved it and I think it's a very nice way to do a special detail, what did you think? I hope you liked it as much as I did and this tutorial can serve as a guide to make your own little card.


Todas las fotografías son de mi propiedad.
Fotografías capturadas con mi Samsung Galaxy A12
Separador de texto elaborado en Canva.
Nos vemos en mi próxima publicación.
¡Tengan un feliz día!
All photographs are my property.
Photos captured with my Samsung Galaxy A12
Text separator made in Canva.
See you in my next post.
¡Have a happy day!
Extrañaba ver tu lado creativo y hermosas creaciones que haces @mariajcastro28 que tarjeta tan hermosa la ame.
!discovery 35
Gracias amiga bella, se me ocurrió esta idea y me animé a hacerla para compartirla, me alegra saber que a ti te ha gustado ♥️ Gracias por tu apoyo bella, te mando un super abrazo!
This post was shared and voted inside the discord by the curators team of discovery-it
Join our Community and follow our Curation Trail
Discovery-it is also a Witness, vote for us here
Delegate to us for passive income. Check our 80% fee-back Program
Muchas gracias por el apoyo! 🎉
Congratulations @mariajcastro28! You have completed the following achievement on the Hive blockchain And have been rewarded with New badge(s)
You can view your badges on your board and compare yourself to others in the Ranking
If you no longer want to receive notifications, reply to this comment with the word
STOPCheck out our last posts:
Hola amiga, está muy hermosa esa tarjeta, las flores me gustaron mucho!
Gracias por compartir tu lindo trabajo.
Saludos.
Hola amiga muchas gracias, ne alegra saber que te ha gustado. Gracias por pasar 💜
Hola amiguita, amé ésta hermosa creación, luce super lida y delicada, el detalle de las flores con el corazón escarchado te quedó de ensueño!
Mil gracias por compartir, te mando besitos inmensos!
Hola amiga muchas gracias. Me alegra mucho saber que te gustó mi creación, yo amé el resultado es super delicado 💜 Gracias por el apoyo, te mando un abrazo! 💫
Esta hermosa está tarjeta especial para mamá.
Esta muy bien explicado, para hacerlo o tener una idea para otro modelo.
También tengo tiempo que no hago una manualidad.
Me imagino que le gustó mucho ese detalle a tu mami amiga 🤗🥰
Gracias amiga, que bueno saber que te gustó, yo amé como quedó y sin duda se puede hacer otro modelo a partir de este y se puede usar para otras ocasiones también. Gracias por pasar amiga bella 💕
Un lindo detalle no solo para el día de las madres, sino para cualquier ocasión.
Exactamente amiga, sirve para cualquier ocasión y la idea se puede adaptar para hacer otros modelitos con otras formas 💜
Muy hermosa, creativa y práctica, me encanto 😍
Gracias bella 💫 Me alegra que te gustara. Saludos!
Que hermosa tarjeta para regalar amiga @mariajcastro28 , amé el resultado 🤩
Hola muchas gracias, que bueno que te gustó, yo también amé como quedó, nunca había hecho algo así. Gracias por pasar y dejar tu comentario 😉
Muchas gracias por el apoyo 😍
Ay no puedo con esta hermosura Mary! Me alegra verte haciendo estas cositas , sabes que para mí eres la mejor 💕 te quedó hermosa y ame las fotos.
Gracias mi Valen preciosa 💜 Me alegra que te gustara, es la primera vez que hago una tarjetita y me encantó y me hace feliz que les haya gustado a todos, en especial a ti porque para mi la mejor en eso eres tu 😍 Gracias por pasar amiga y por tu apoyo, besitos 💜
😍😍😍ay Maryy que belleza, me encanta. Se ve demasiado cuchiiii. Ademas el morado se ve hermosisisisiiimo
Gracias Mili 💜 Pues si, ese color está bello y logré combinar el foami con la cartulina, amé 😍
@tipu curate 4
Upvoted 👌 (Mana: 32/72) Liquid rewards.
Muchas gracias por el apoyo! 😍♥️🎉
Mariii que preciosa!!! Me encanta, esos tulipanes quedaron súper lindos amiga, en general la tarjeta es muy bella.
Las Manualidades siempre te quedan lindas
Gracias mi Rosa bella, sabía que te gustaría, tenía tiempo con ganas de hacer algo así hasta que por fin lo hice porque he estado floja con las manualidades. Gracias por pasar amiga 🥰
Te quedó demasiado hermosa mi Mary! Me gusta lo delicada y bella que se ve, sin duda es un regalo perfecto 💗
Gracias mi Vane bella, que bueno saber que te gustó, yo amé como quedó ♥️ Gracias por pasar!
Que linda amiga
Gracias bella 😍
Amo esta tarjeta es realmente hermosa, me encanto tu explicación, ahora solo me queda realizarla
Feliz día amiga y gracias por compartir
Hola, me alegra saber que te ha gustado, yo disfruté realizándola y amé el resultado, espero ver como te queda a ti, estoy segura de que muy linda. Gracias por pasar, saludos!
Ayy que linda y delicada se ve amiga, me encanta😍
Gracias amiga lindaaaa ♥️♥️♥️
Pero que belleza Mary. Incluso con mis colores favoritos 🥰😍.. como siempre haciendo notar tu gran talento. Gracias por compartir amiga bella 😘
Gracias mi Val preciosa, me encanta volver a las manualidades y sobre todo que les guste, gracias por tu apoyo siempre ♥️
Un bellísimo trabajo, y sin lugar a dudas un gran regalo para Mamá.
Gracias por unirte a la iniciativa, mucha suerte!
Contáctenos para saber más del proyecto a nuestro servidor de Discord.
Si deseas delegar HP al proyecto: Delegue 5 HP - Delegue 10 HP - Delegue 20 HP - Delegue 30 HP - Delegue 50 HP - Delegue 100 HP.
Gracias, me alegra saber que les gustó, me encantó poder elaborar ese detalle y compartirlo por acá. Gracias por el apoyo, saludos! ♥️
♥️🎨
¡Es muy hermosa! Y no se ve complicada de hacer, muy buen post
Gracias amiga, es super fácil, espero que mi tutorial te sirva para intentarlo 😉 Saludos!
Que lindoo
Gracias ♥️