The Candy Machine Dispenser
My son and I are working on building a Lego Candy Machine dispenser. We had the idea to begin to build this awhile back and then joined a Creative Engineering class with Mark Rober on monthly.com (https://monthly.com/mark-rober-engineering/) which really committed us to some fun.
When we began brainstorming the project we came up with a number of ideas for what we needed, what we wanted, and how we might go forth to build. Our original plan called for a large reservoir - filled with candy - with one hole on the floor on one side. This hole would drop the candy into a "bucket" which would then be moved via a wheel system to the dispensing mechanism, where the candy would simply be dropped down another hole. We wanted a slope, or a slide, for the candy to fall down so it didn't just drop on the table.
We started building the slide first. That was easy. I was thinking of a longer slide, but the boy was happy with this, and since it's a group project, we went with it.
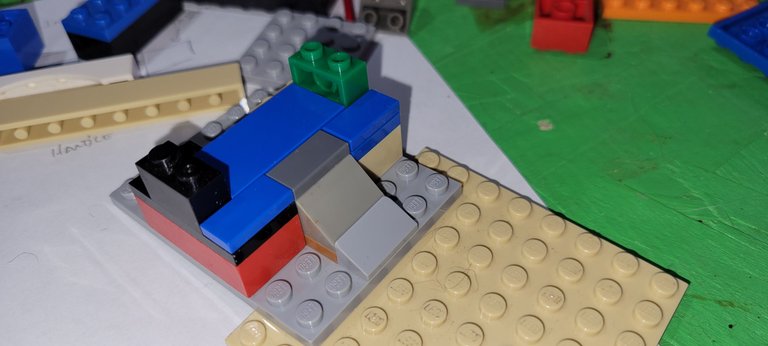
The slide was going to be fed by a horizontal conveyor, of sorts, and we began to think of ideas for building this. Our first idea was to use a mechanical crank and a tire with a long flat lego board sitting on top of the tire:
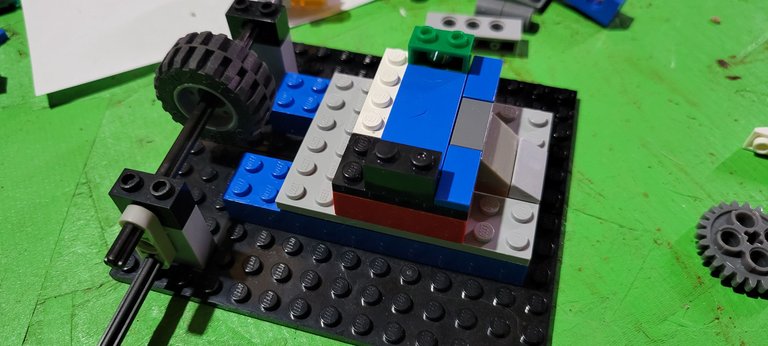

Frankly, this wheel didn't work; it wasn't level, and there simply wasn't enough traction to keep the board engaged. I began to think of a pulley system which would have made the entire build more complex than I felt was necessary. Finally, after digging through some boxes, I came across a couple of these awesome doohickeys that looked like they'd do just what we needed:

This really did begin to perform a lot better.
Now, at this point, we really did still have the idea of using a conveyor to shuttle the candy from one part to another, but we began to notice really quickly that our mechanism wouldn't efficiently be able to actually move the candy and drop it without another lever, which I didn't want to do, so we decided on using the mechanism we just finished to push the candy out.
If you look at the next blurry photo, the idea was for the candy to be placed where the blue and yellow strips are, and then have the conveyor push them out.
This actually worked pretty well, with a few caveats:
- There was no mechanism in place to keep the conveyor in place; meaning, if we pushed it too far, it'd jump off the belt.
- If we pulled the conveyor back to far, it would fall out of it's groove.
Bear in mind, there was also yet no way for the candy to actually get onto the platform.
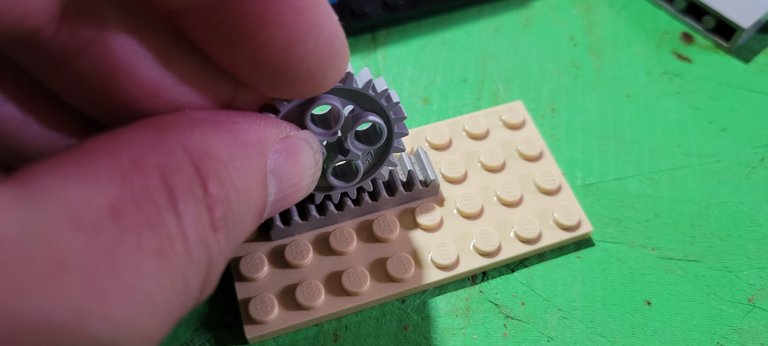
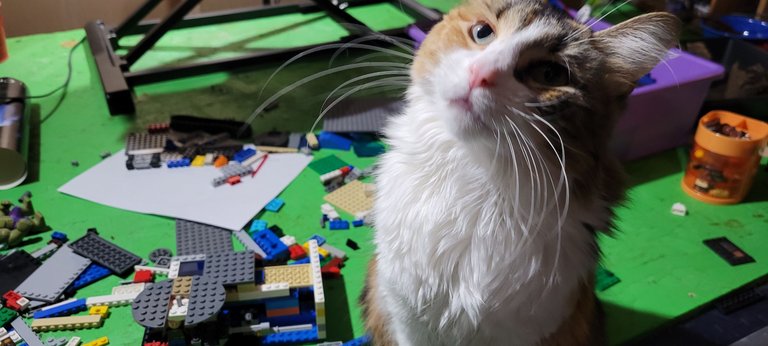
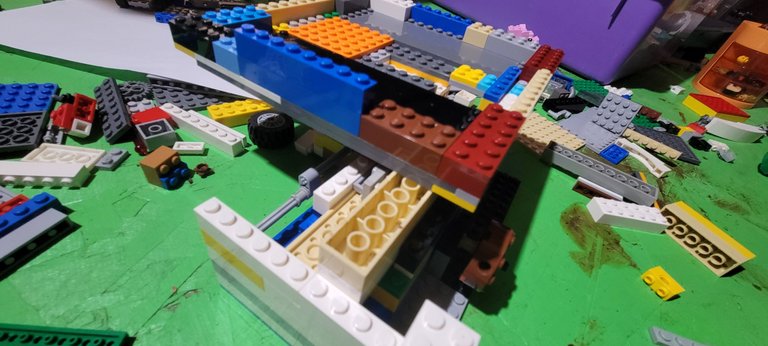
I began to take some inspiration from standard run-of-the-mill candy machines found in grocery stores and use a twisting mechanism to push the candy from a reservoir out the chute. This required another handle and gear set up, as well as another platform. With the cat's help we began building a reservoir for candy with a twisting mechanism:
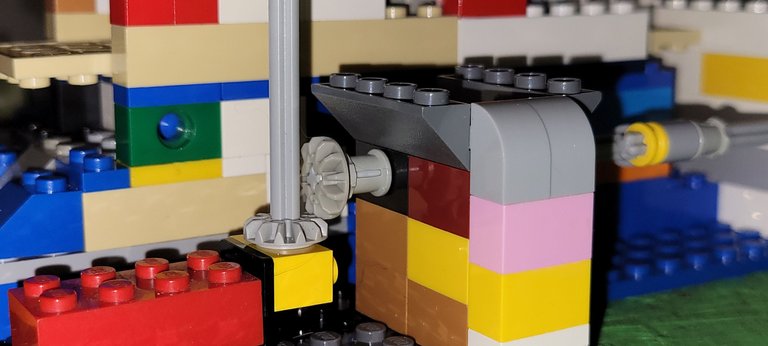
This is a close-up of the gear mechanism used to twist the handle to push the candy. It is a second mechanism, in addition to the first to push the candy off the platform.
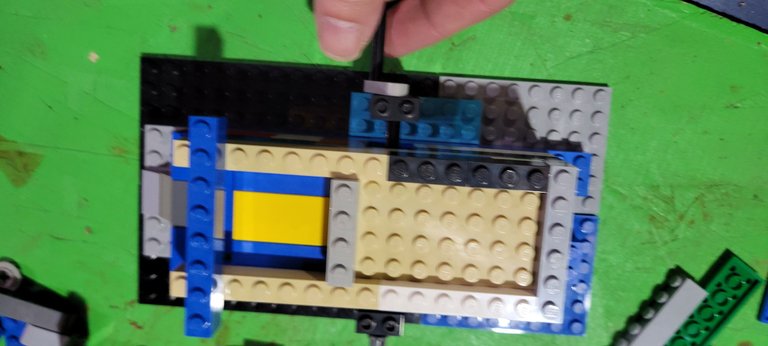
And this is how it began to look:
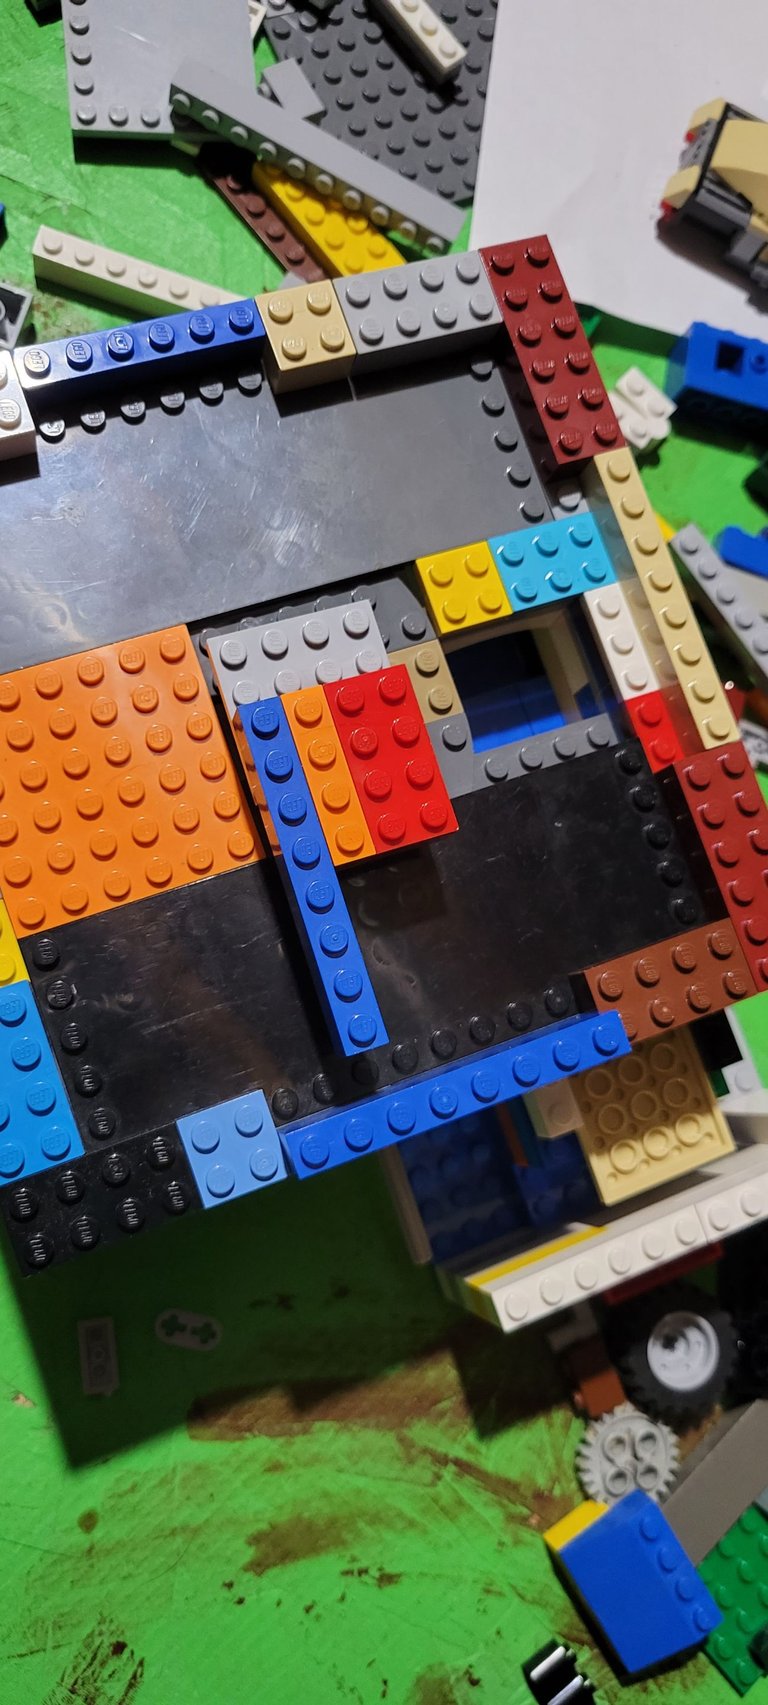
The process, at this point, for obtaining candy is to:
- Twist the top arm to sweep some candy down through a hole onto the platform.
- Twist the conveyor to push the candy off the platform and down the chute.
Now, I know what you're thinking:
- Don't you have any uniform colours?
- You really don't need the second conveyor anymore, do you?
And the answers are, in order:
- No, I don't.
- No, I don't.
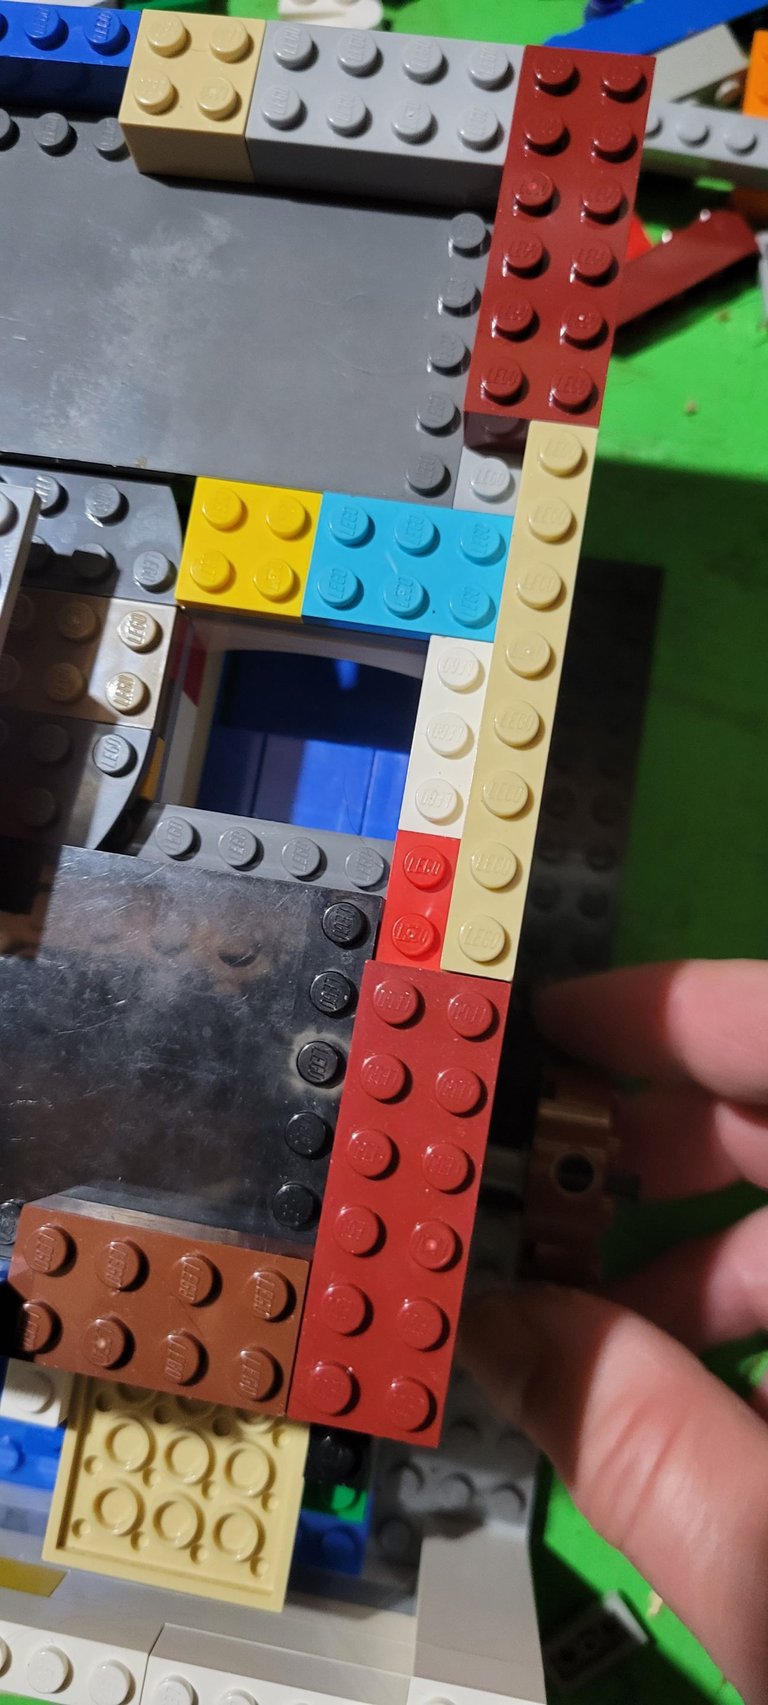
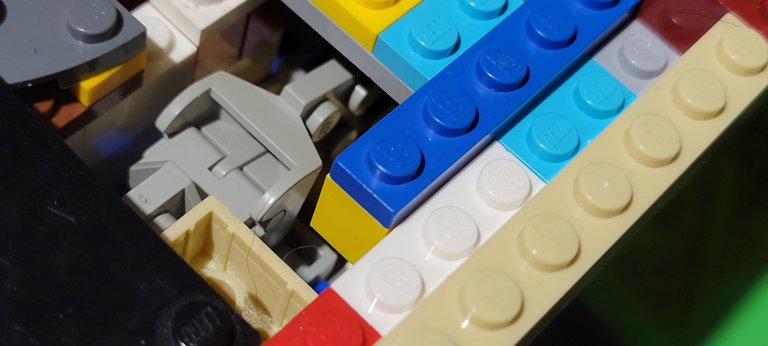
Honestly, the conveyor just isn't needed at all anymore, but I'm leaving it there - at least for now - because I spent so much damn time on it and I'm quite proud of it. It's not easy to see in these pictures, but a lot of engineering went into that conveyor. For instance:
See that upside down yellow log 2x8 log? It serves two purposes: first, it keeps the conveyor from being pulled too far off track when retracting and, two, it serves as a guide to ensure that the conveyor platform itself stays pressed against the gear beneath it.
In the middle of the conveyor is a small blue brick that acts as a break to prevent the conveyor from going too far forward.
At the front, the conveyor now as a hinged platform that neatly drops the candy out of the machine, instead of gruffly pushing it out:
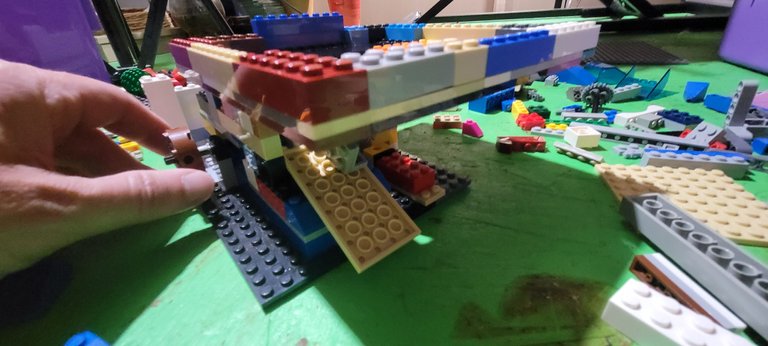
Lastly, unseen in these pictures, are strategic pieces with flat surfaces to allow the component parts of the conveyor to glide smoothly. How does it all work? Well, enjoy my great expertise in youtube video making to see the contraption-in-action:
Lessons Learned
- Nothing is as easy as you originally expect it to be. Ever.
- I can never find the lego part I'm looking for.
- I don't have nearly enough of the lego parts that I'm ever looking for.
Future plans
This is a version 1. I know that I have two different mechanical components; they are actually close enough that I can piece them together with another gear, but I'm concerned about how the timing of the two different pieces will work. Instead, we do plan on attaching a Lego robotics component, either an NXT or EV3 (yes, I have both) to drive both the mechanical arms with motors. I would also like to have it coin operated. Seriously, if the Roman's could build a coin operated holy water dispensing vending machine, I can do the same with legos.
After we're done with this I'll probably make a second that looks more like a traditional candy machine, with the handle to twist for the candy. Now that I have a little more idea of what I'm doing I think it'll be easier the second time.
(c) All images and photographs, unless otherwise specified, are created and owned by me.
(c) Victor Wiebe
About Me
Amateur photographer. Wannabe author. Game designer. Nerd.
General all around problem-solver and creative type.
My Favourite Tags
| #spaceforce3 | #altphoto | #crappycameraphotos |
| #digitalpinhole | #pinhole | #firehydrant |

Ha, I like the conclusions - I'm struggling to put that Lego Technic 4x4 kit together I started a month ago. Everytime I get back into it, life gets in the way - it's ridiculous, lol
Oh yeah, I still have a lego set from Christmas that I haven't even cracked open yet. There's always something that crops up. What I ought to do is put a movie on and do it while watching.
Your content has been voted as a part of Encouragement program. Keep up the good work!
Use Ecency daily to boost your growth on platform!
Support Ecency
Vote for Proposal
Delegate HP and earn more