Do It Yourself: I Knitted Wristband Using Cardboard
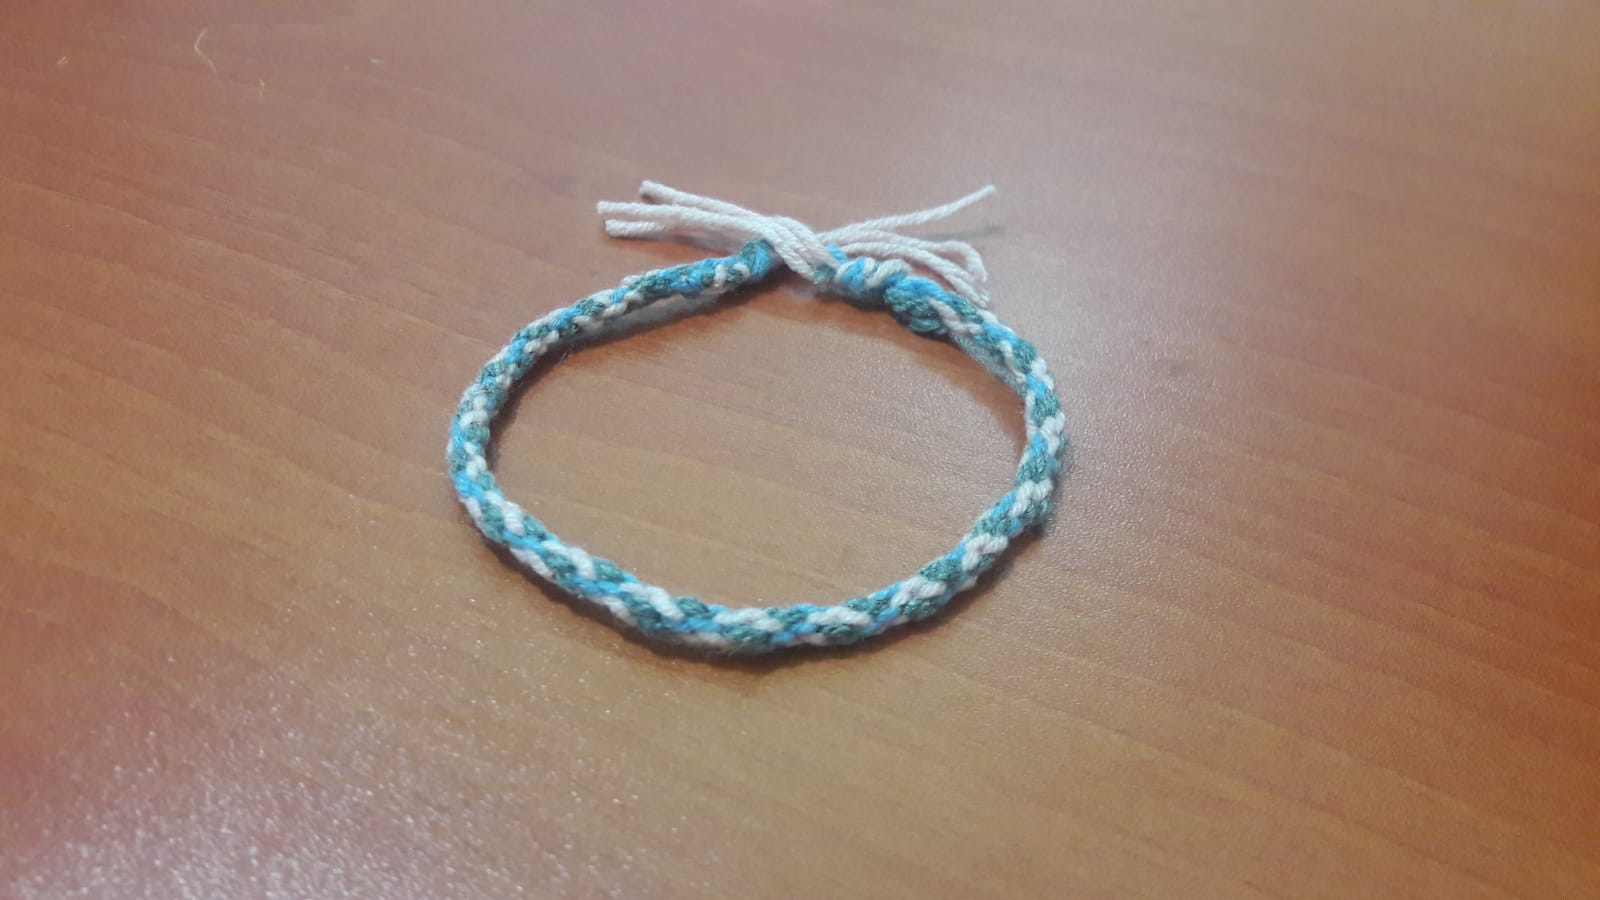
Good morning, dear friends. I wish everyone a happy and healthy day. Today I will tell you step by step how to knit a bracelet with the help of cardboard.
Günaydın sevgili arkadaşlar. Herkese mutlu ve sağlıklı bir gün diliyorum. Bugün sizlere karton yardımıyla nasıl bileklik öreceğimizi adım adım anlatacağım.
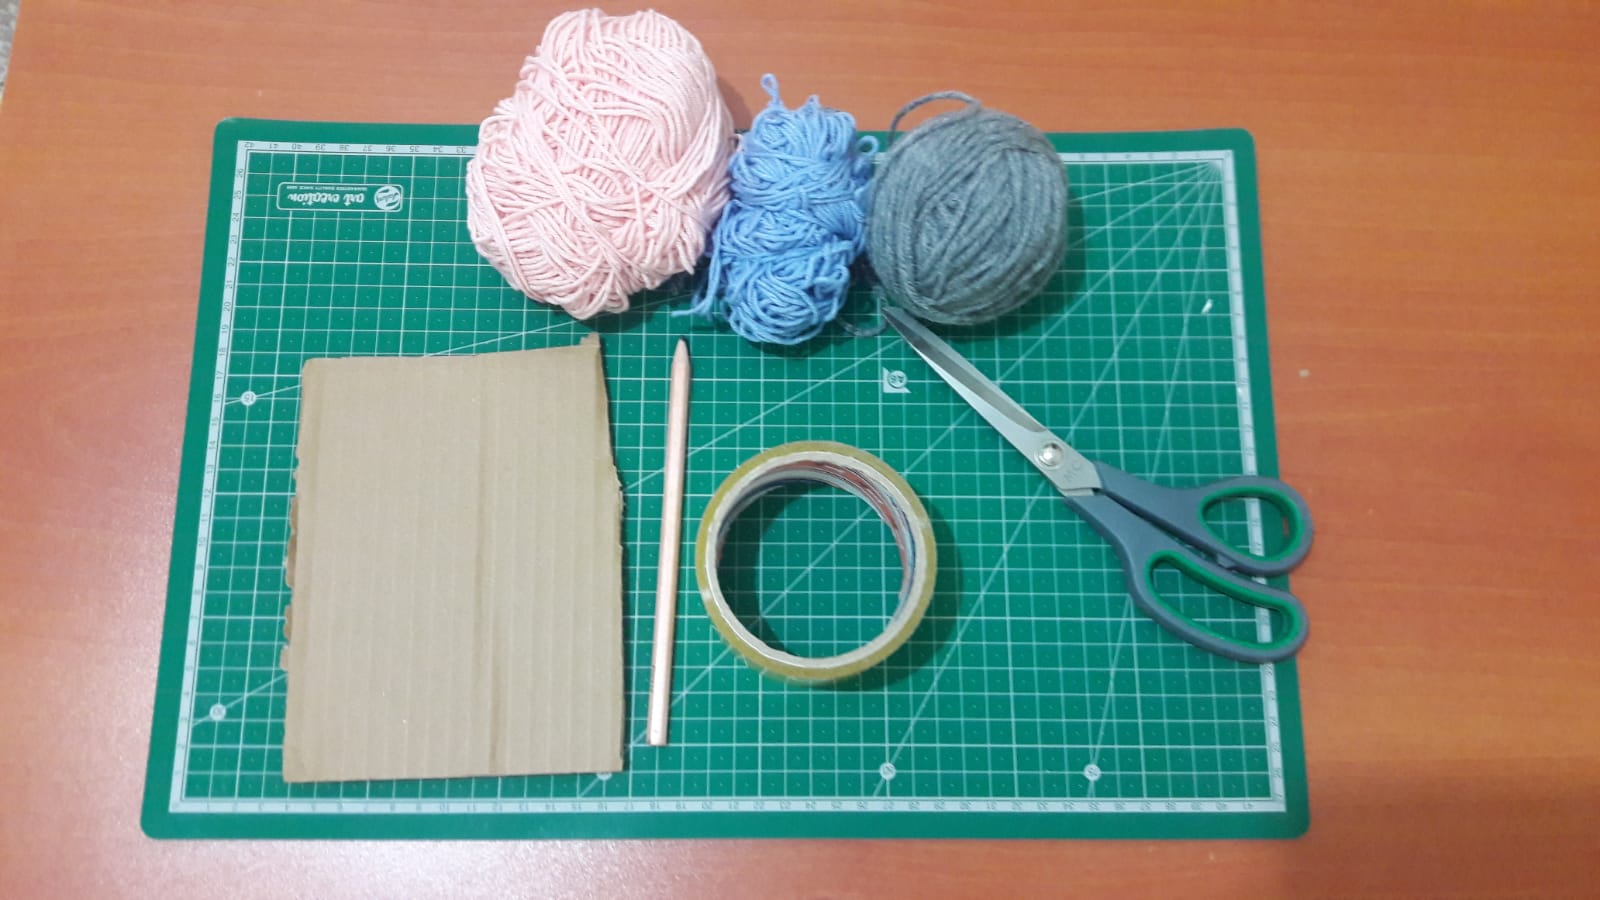
Materials we need: Wool string, scissors, cardboard, ruler, pencil
İhtiyacımız olan malzemeler: Yün ip, makas, karton, cetvel, kalem
PREPARATION STAGE:
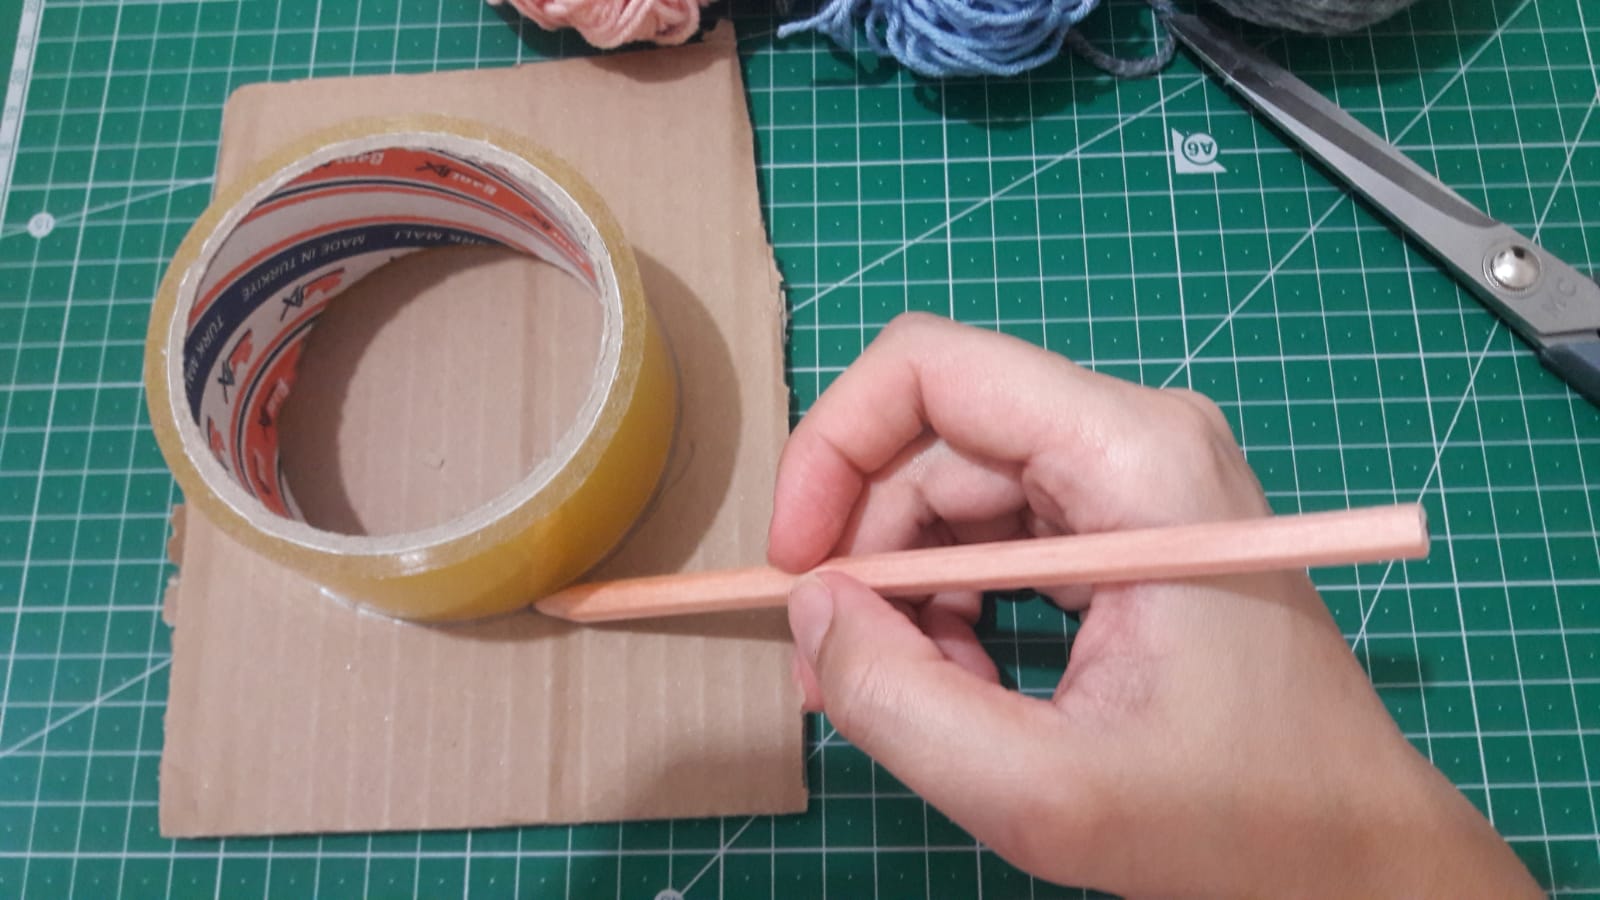
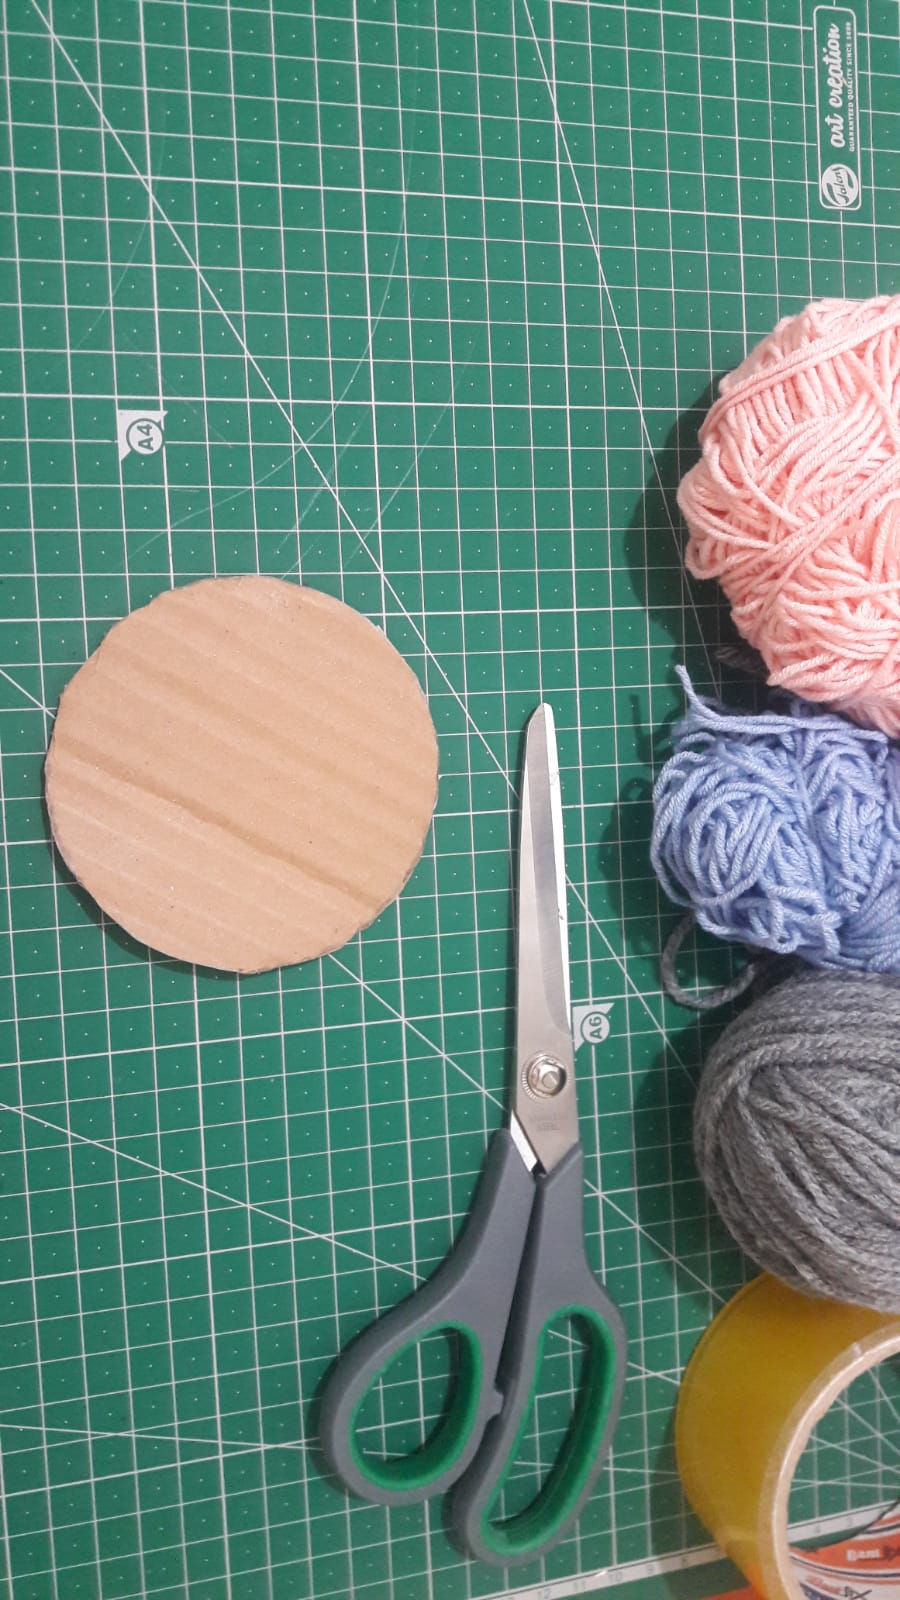
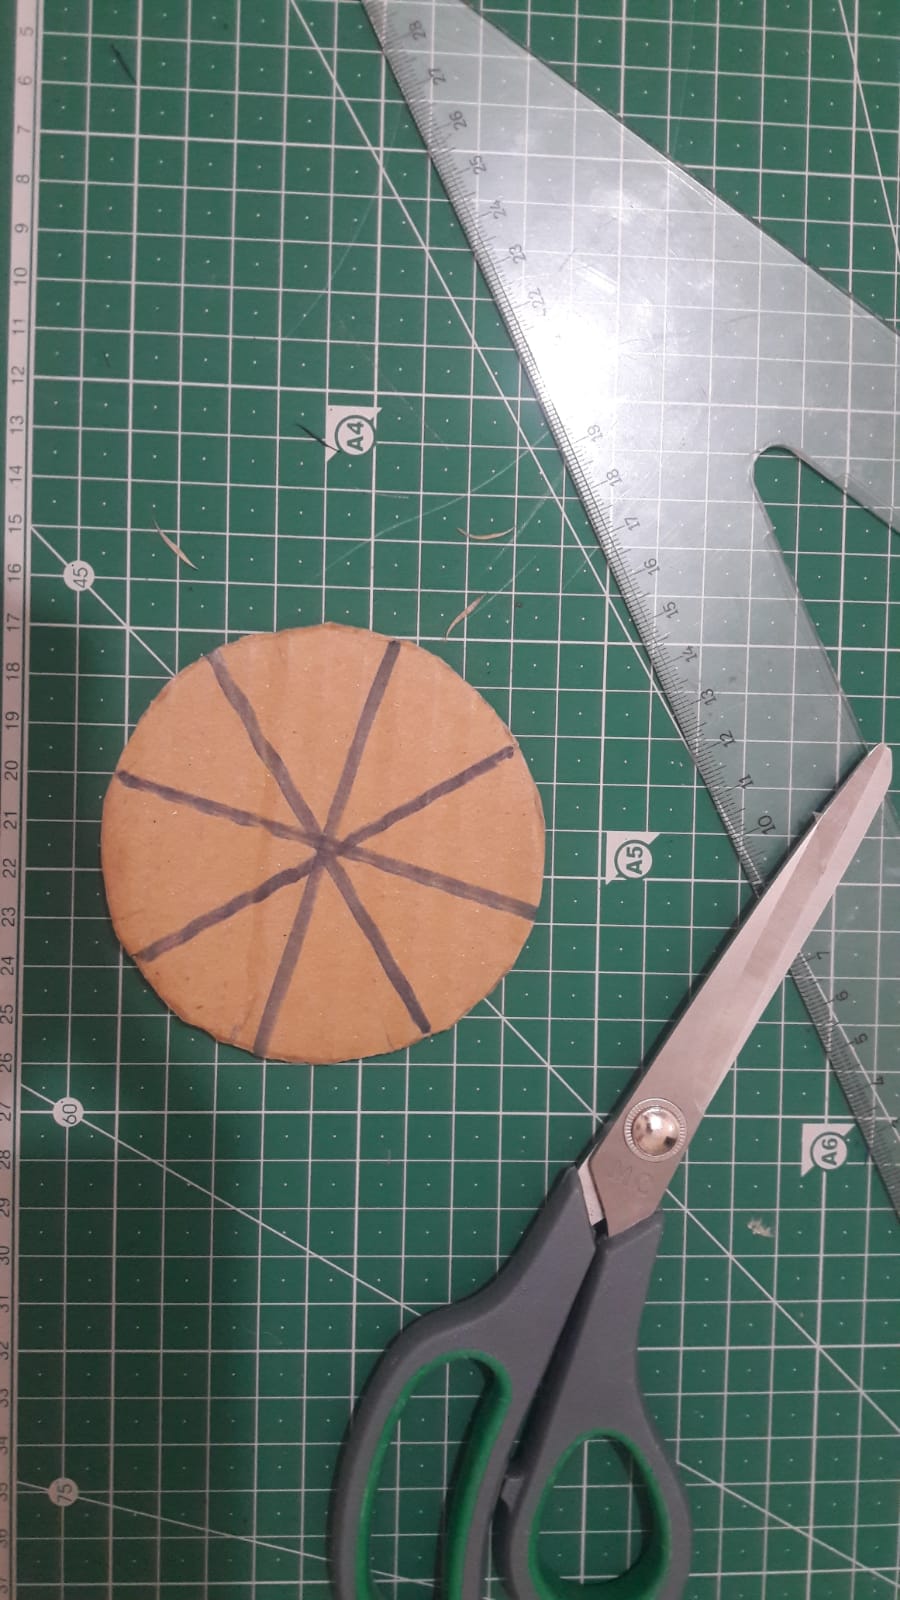
Let's draw a circle on the cardboard. Let's cut the circle we draw.
HAZIRLIK AŞAMASI :
Kartonumuza bant yardımıyla daire çizelim. Çizdiğimiz daireyi keselim.
Let's find the middle point of the circle with the help of a ruler. Let's draw 8 identical pieces. Cut the end of the lines with scissors.
Dairenin orta noktasını cetvel yardımıyla bulalım. 8 eş parça çizelim. Çizgilerin ucunu makas yardımıyla kesin.
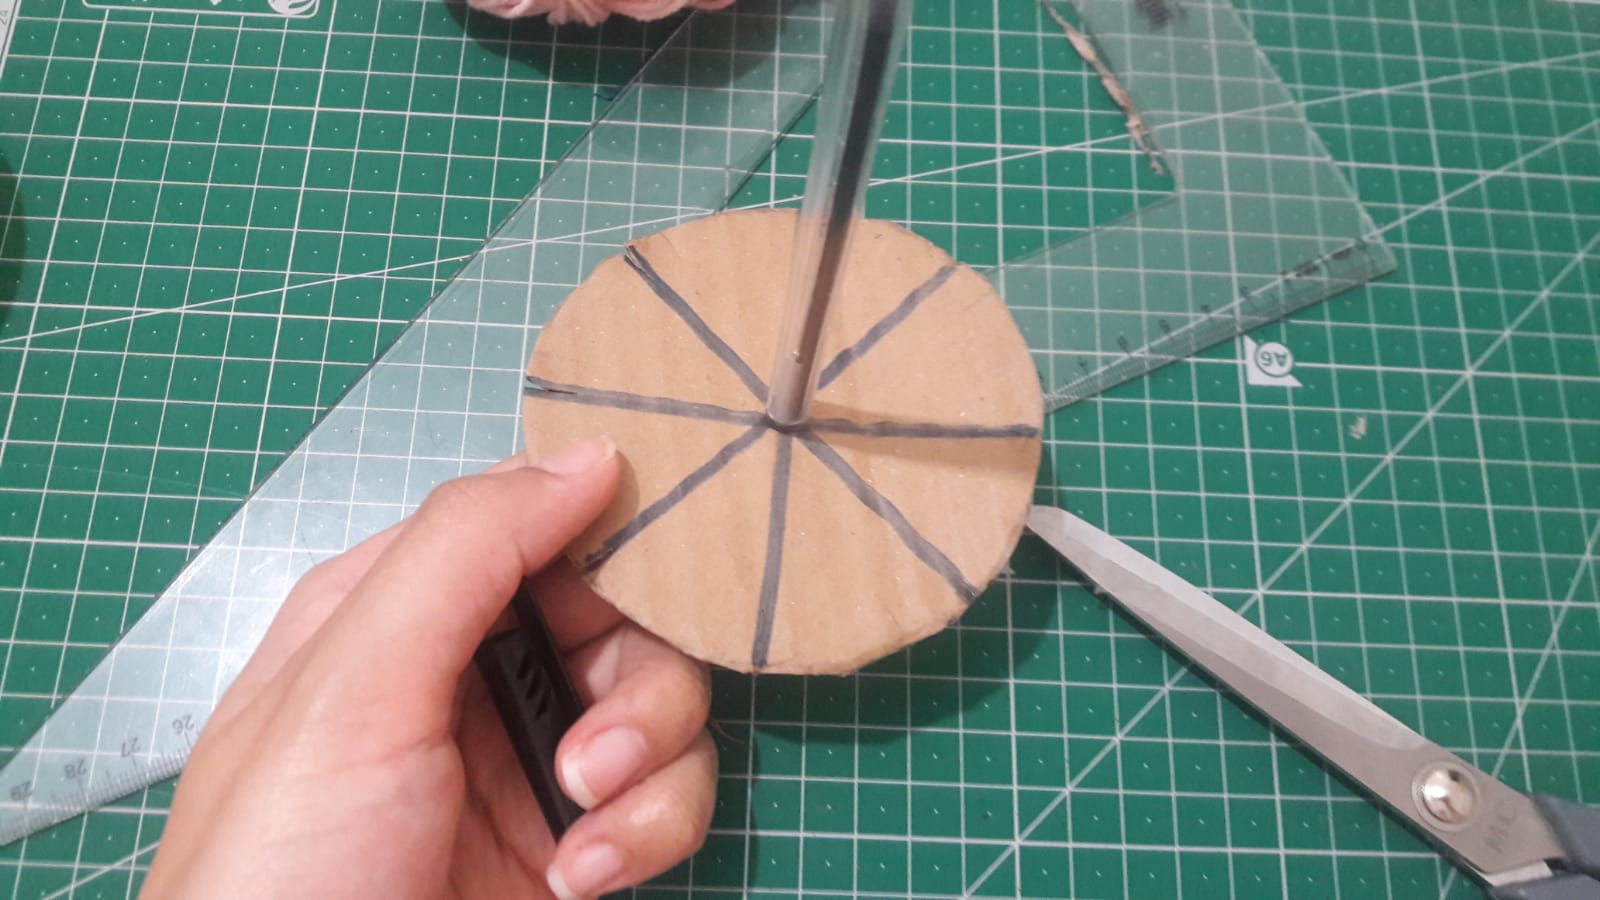
Let's drill the middle of the circle with a pencil.
Dairenin ortasını kalem yardımıyla delelim.
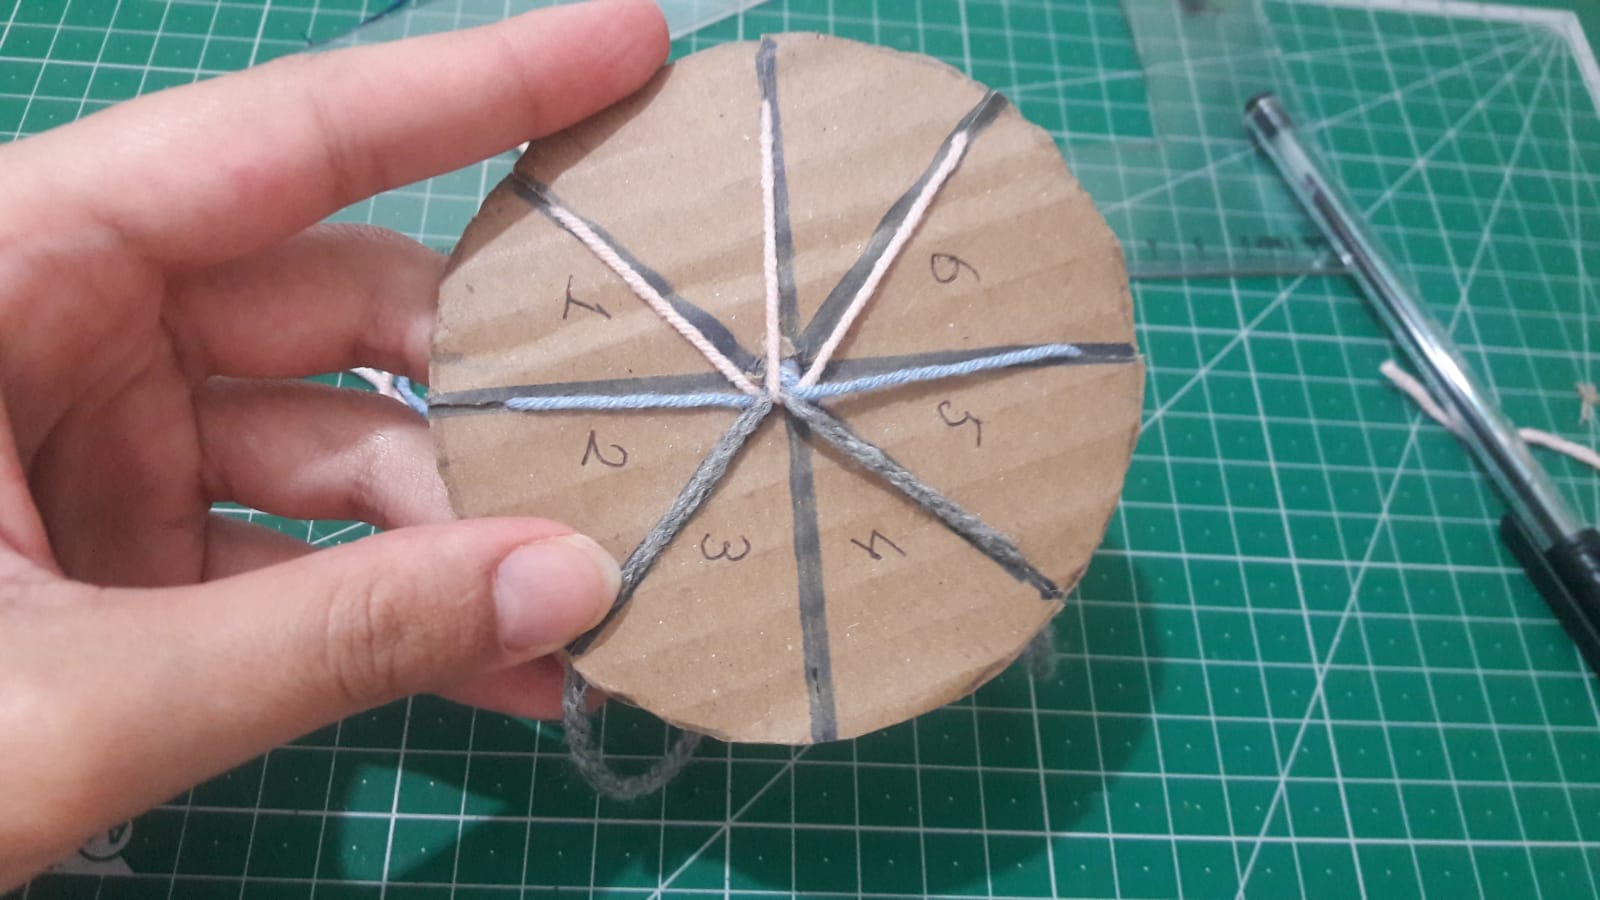
Cut 7 wool threads to 50 cm. I cut 3 pink, 2 gray and 2 blue threads. Knot the threads. Thread it into the hole of the circle.
7 tane yün ipi 50 cm olacak şekilde kesin.Ben 3 tane pembe, 2 tane gri ve 2 tane mavi ip kestim. İpleri düğümleyin. Dairenin deliğine geçirin.
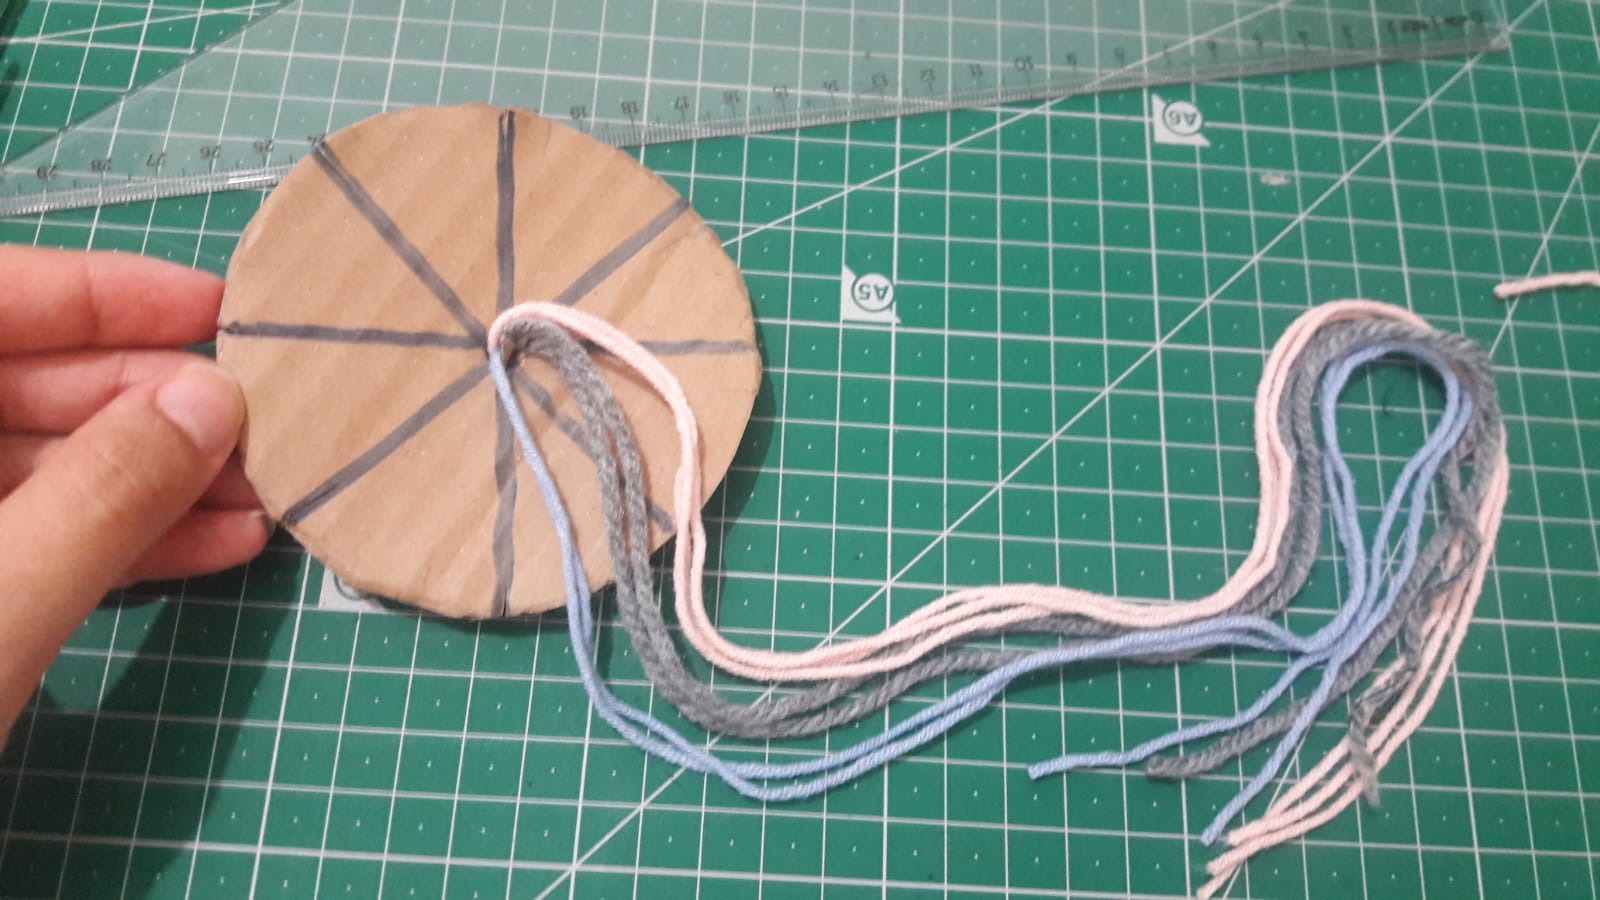
Pass the ropes through the cut.
İpleri kesik yerlerden geçirin.
THE CONSTRUCTION PHASE:
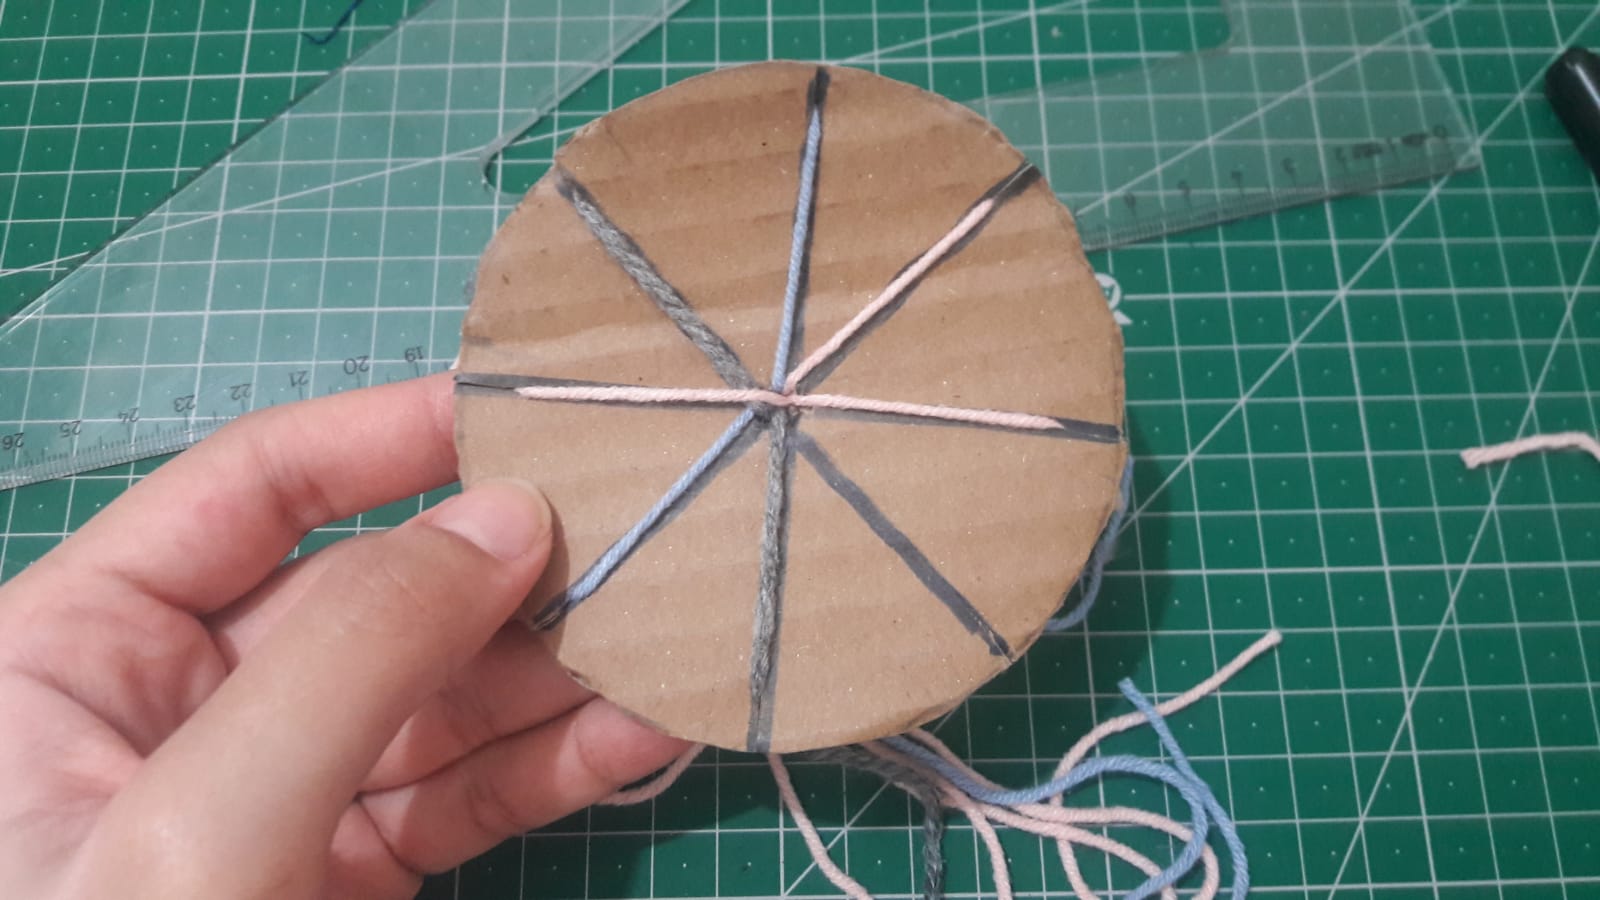
Pass the 3rd thread into the empty space, counting from the empty part in the cardboard. Now pass the 3rd thread into the empty space, counting from the newly formed space.
YAPIM AŞAMASI:
Kartonumuzda ip geçirilmeyen kısımdan sayarak 3. ipi boş yere geçirin. Şimdi yeni oluşan boşluktan sayarak 3. ipi boş yere geçirin.Bu şekilde 4 cm ip kalacak şekilde örün.
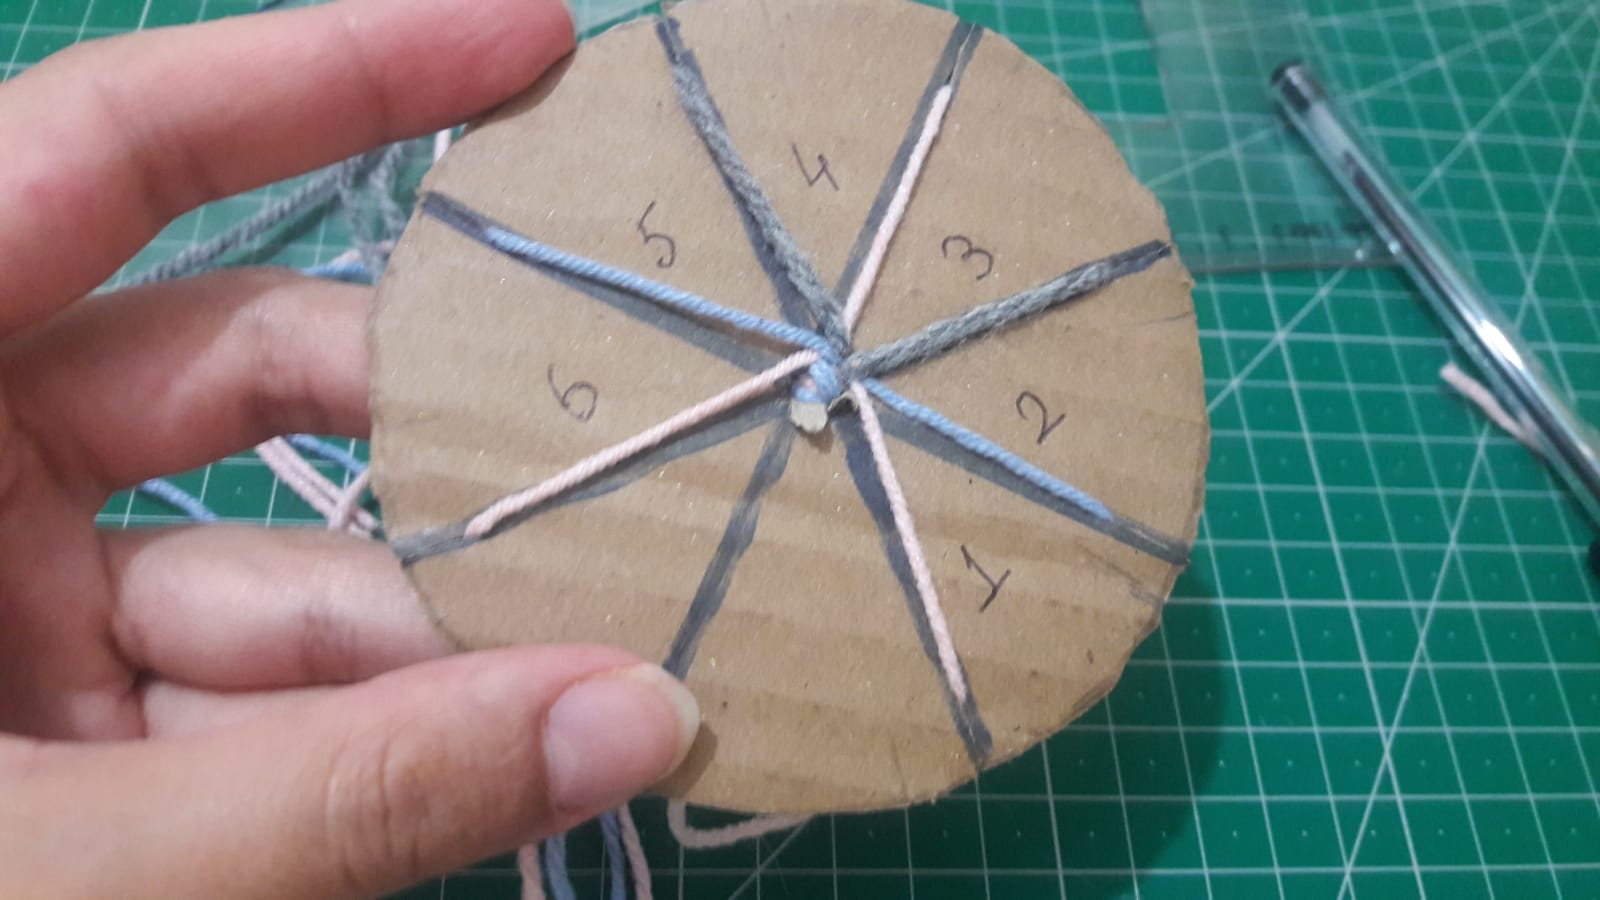
As you continue to knit, your wrist will appear under the hole.
Siz örmeye devam ettikçe deliğin altında bilekliğiniz ortaya çıkacak.
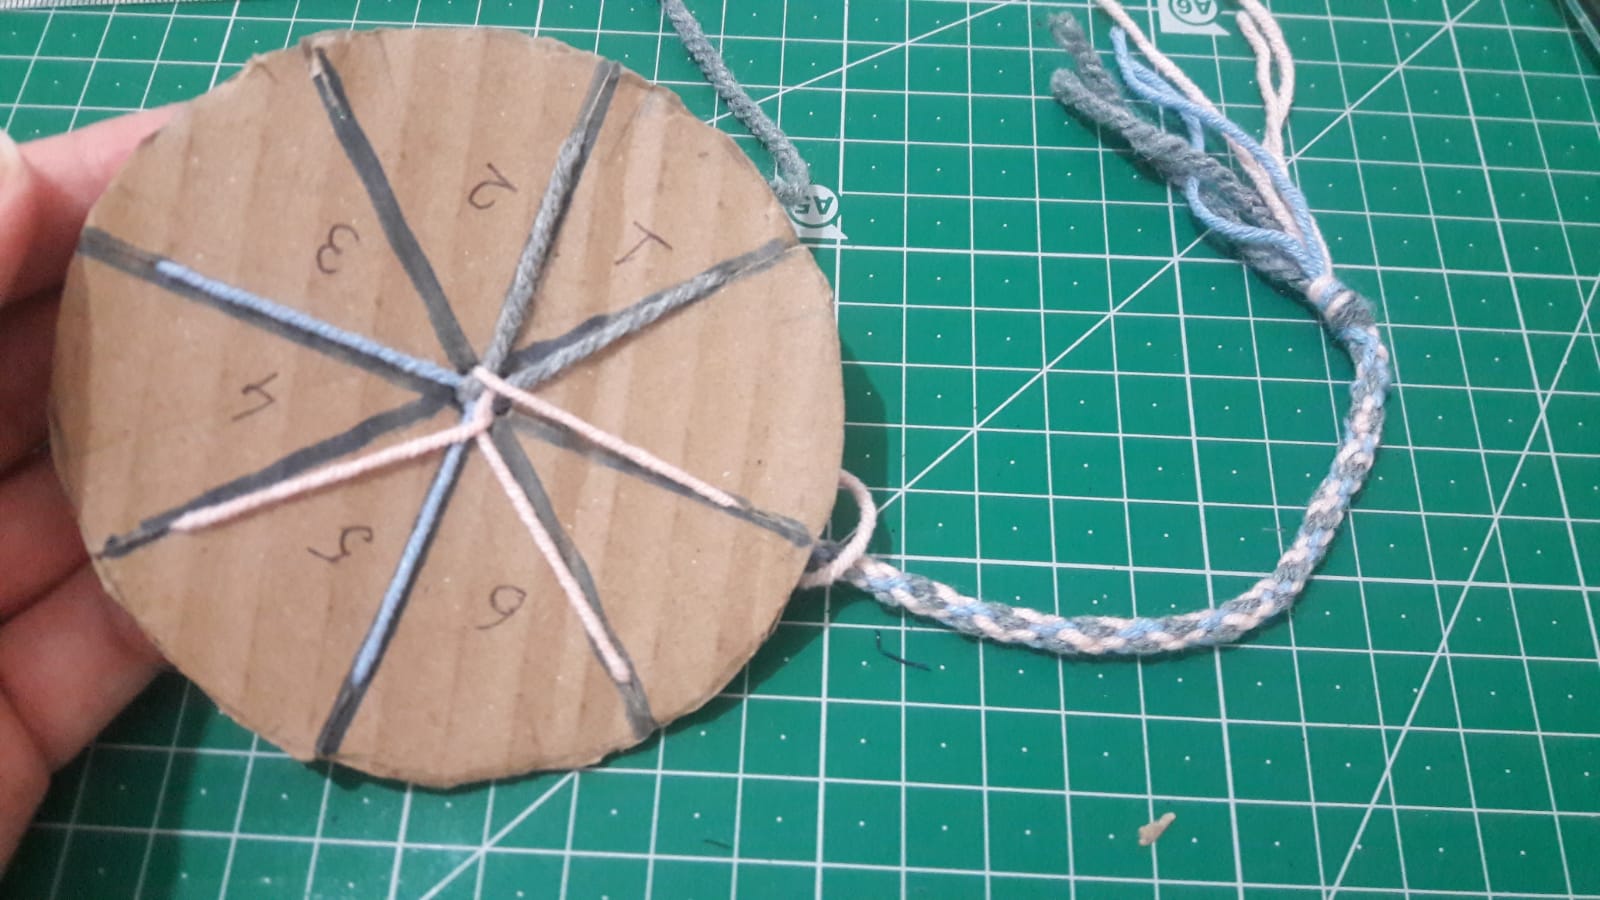
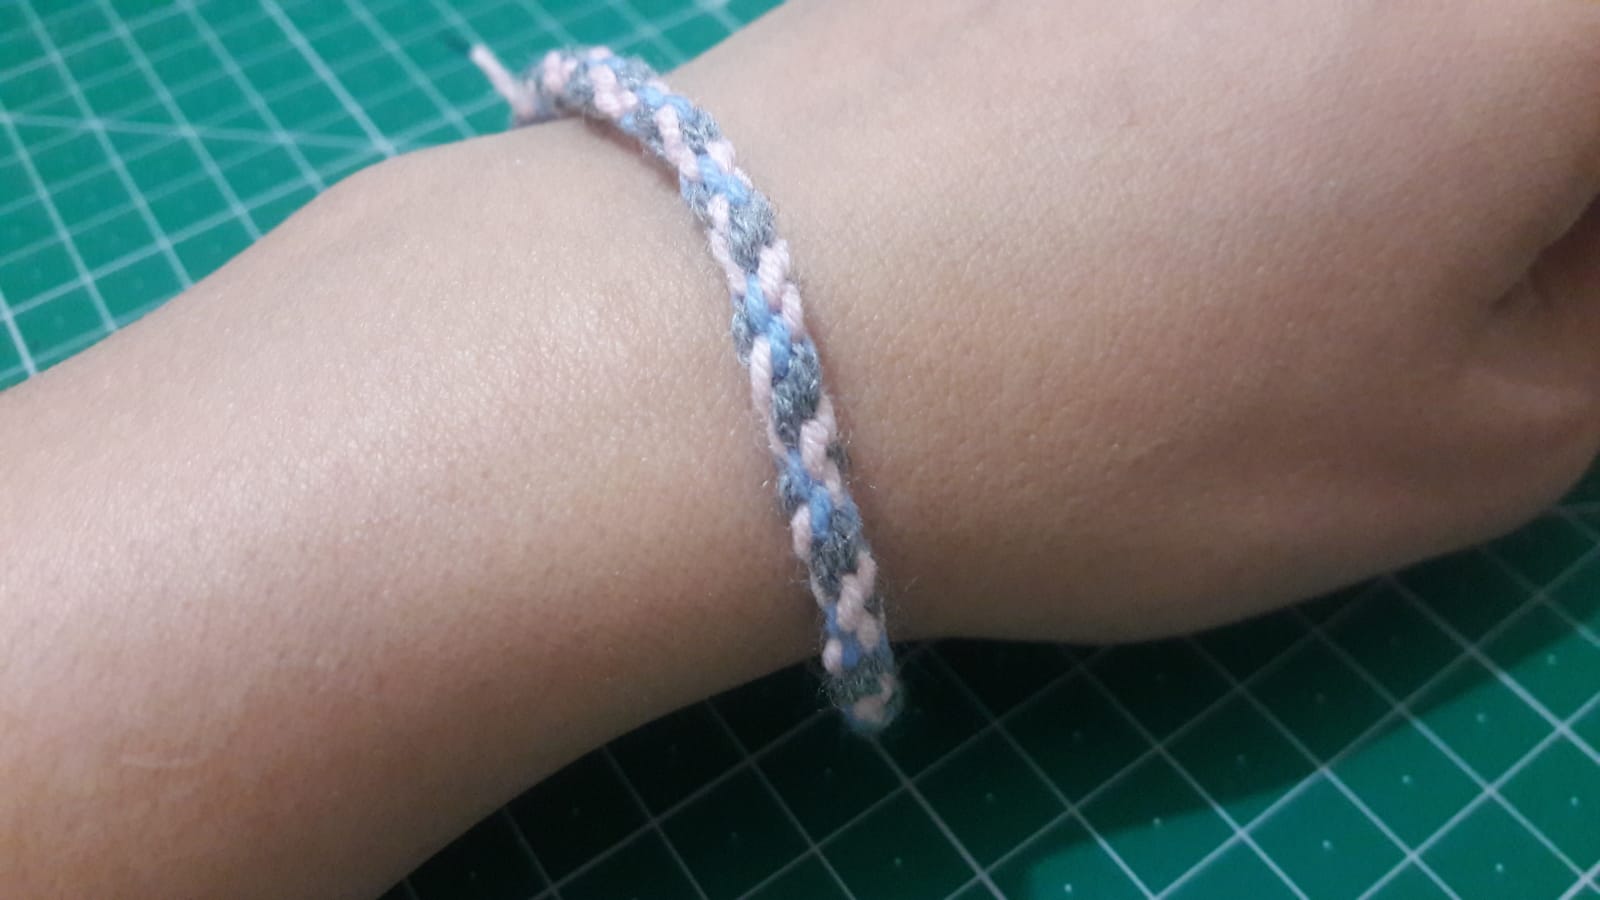
Remove the ropes and knot. And your bracelet is ready. Feel happy while using it.
Thanks for your support and see you in other articles :)
İpiniz azalınca ipleri çıkarın ve düğüm atın. Ve bilekliğniz hazır. İyi Günlerde kullanın.
Destekleriniz için teşekkürler diğer yazılarda görüşmek üzere :)
thanks for support <3 @upmewhale
Congratulations, your post has been upvoted by @dsc-r2cornell, which is the curating account for @R2cornell's Discord Community.
Enhorabuena, su "post" ha sido "up-voted" por @dsc-r2cornell, que es la "cuenta curating" de la Comunidad de la Discordia de @R2cornell.
Thanks for sharing your creative and inspirational post on HIVE!
This post got curated by our fellow curator @k-banti and you received a 100% upvote from our non-profit curation service!
Join the official DIYHub community on HIVE and show us more of your amazing work!