DIY/Baby carrier or cuddle to take the newborn for a walk. 👶

A warm greeting to this blessed community of Hive, as they are going through these days of quarantine, I know that for many it is not easy, everything gets complicated and people start to worry a lot. But we are going to raise our spirits, because as long as we have our health and our family is well, this is the most important thing.

As you know, I am a craftsman and I work from home, so I am used to being here within these four walls. The other thing that has been good in my work is that even though we are in quarantine, women do not stop bringing children into this world; so I get jobs from time to time.
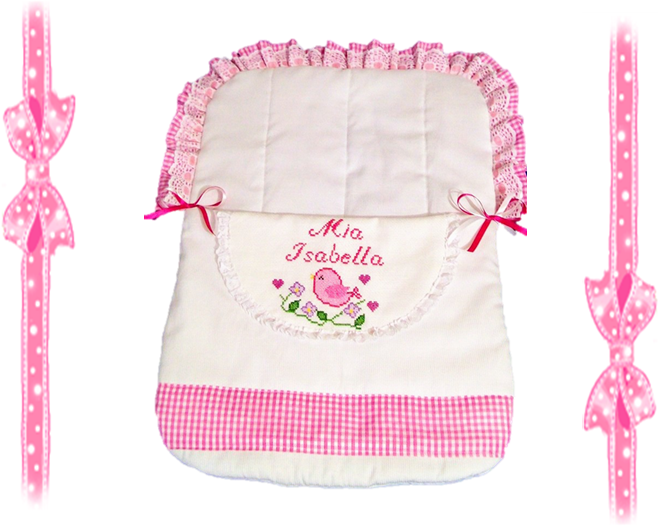
Today I come to show you this beautiful lullaby that I was asked to do for Mía Isabella, who is soon to be born. For those of you who don't know what a lullaby is, I tell you that some time ago it became very fashionable and mothers started using them to take their baby out of the clinic for the first time.


The first thing we do is choose each one of the materials we are going to use, keep in mind what we want to do, what colors the client likes, what design she wants for the embroidery, all that must be very clear.
Choosing an embroidery is not easy, today we not only have the magazines but also the internet that gives you a wide range of designs, you no longer have to search letter by letter to embroider a name, simply write in google the name of the person "Carolina in cross stitch" and you get different types of letters of all sizes and shapes.

- Etamine or Aida fabric.
- Half a meter of Thousand Stripes or Poplin fabric.
- Half a meter of Wadding.
- Half a meter of lining fabric
- 1/4 of a fabric to match. (Vichy)
- 2 Meters of lace.
- Ribbons.
- Scissors
- Embroidery threads.
- Cross stitch embroidery needle #22
Step 1.
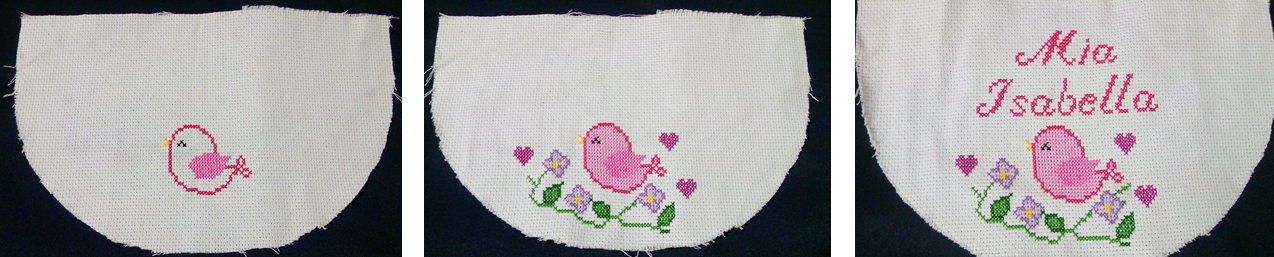
We are going to cut a semicircle in Etamina cloth, 19 cm high by 28 cm wide and give it the circular shape. Then we start the cross-stitch embroidery.
Remember that to embroider in cross-stitch you must take into account the amount of pictures you are going to use, you cut the special fabric to make this work called Etamina or Aida, you must leave a margin of two cm more because the fabric tends to fray a little, you look for the center of the fabric and the center of the drawing and from there you make the count of the pictures.
Step 2.
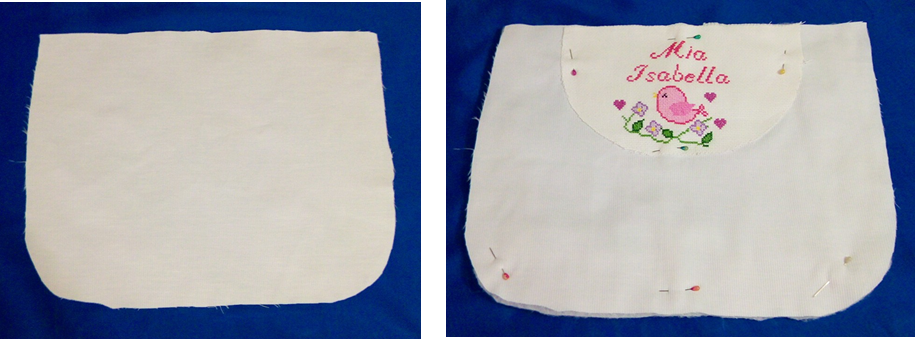
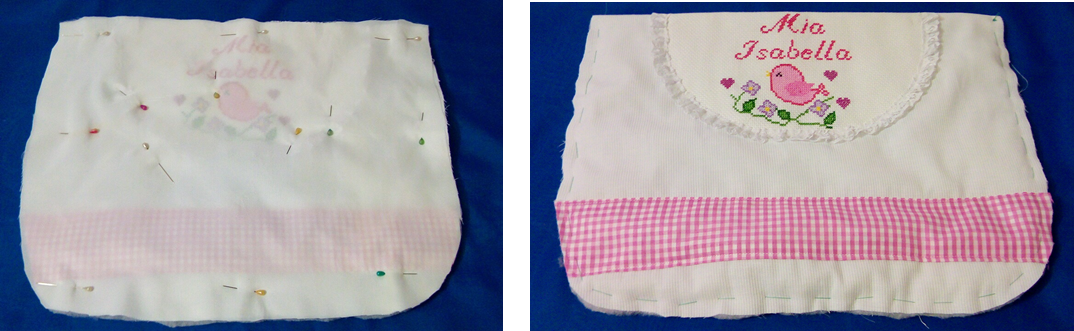
- We cut out a painting on the main canvas that is 44 cm wide by 36 cm high. We make the rounded shape in the lower corners. (as seen in the picture).
- We mount this fabric on the wadding and cut it out to give it the same shape. We place the embroidery that we made previously on top and fix it with thread and needle or with pins.
Step 3.
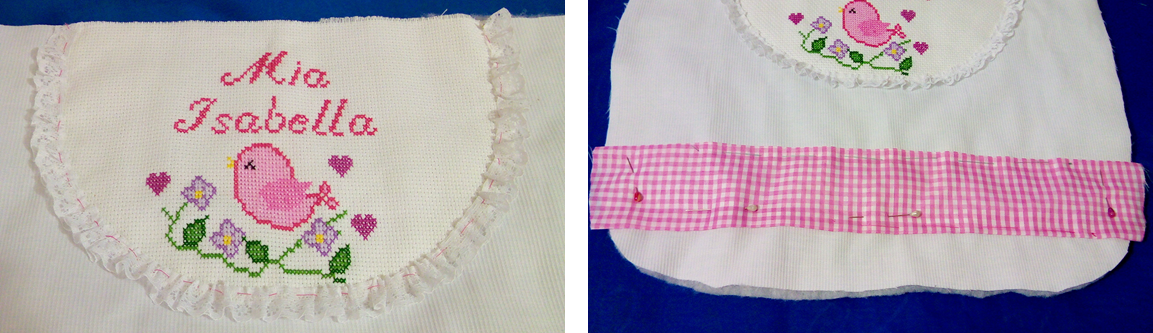
In this step we will fix the lace around the embroidery, first we do it with needle and thread and then we pass the sewing machine.
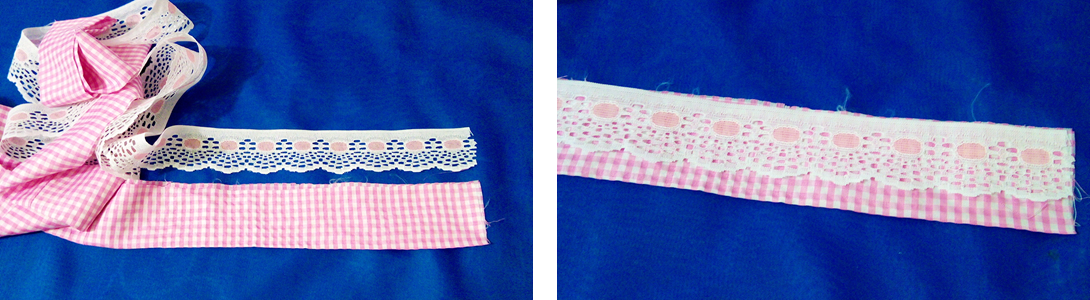
Then we work the fabric to decorate that measures 12 x 45 wide, I used vichy but you can use single color or print fabric. We put the edges in about one cm, iron and sew straight.
Step 4.
- We place the lining fabric and sew only on the top, then we turn this fabric and arrange everything to be firstly sewn with thread and needle, before passing through the sewing machine. It is a good idea to fix or trim by hand first so that when you sew, there are no imperfections.
Step 5.
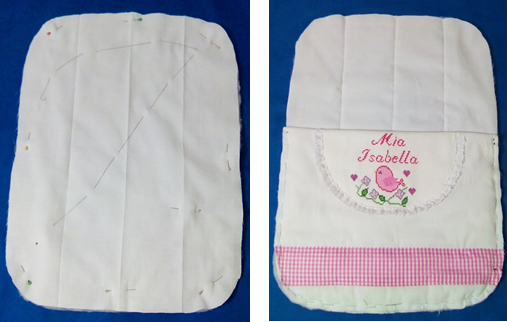
We cut a rectangle out of the main fabric that measures 44 cm wide by 62 cm high. We divide the work in half and pass the plate, again we do the same and so we divide the fabric into 4 parts as shown in the image.
We put this fabric on the wadding and cut out the shape, then we fix it with needle and thread or with pins, so that when we pass the seam with the sewing machine the fabric will not move. We pass the seam straight over these lines that we made with the iron.
We put the piece that we made previously and we make them also.
Step 6.
- We make the flyers or lace that we are going to use to decorate the top of the lullaby. We cut strips of 1.80 cm long by 10 cm wide and make the arruche system. If you don't like this idea you can change it for an embroidered strip.
Step 7.
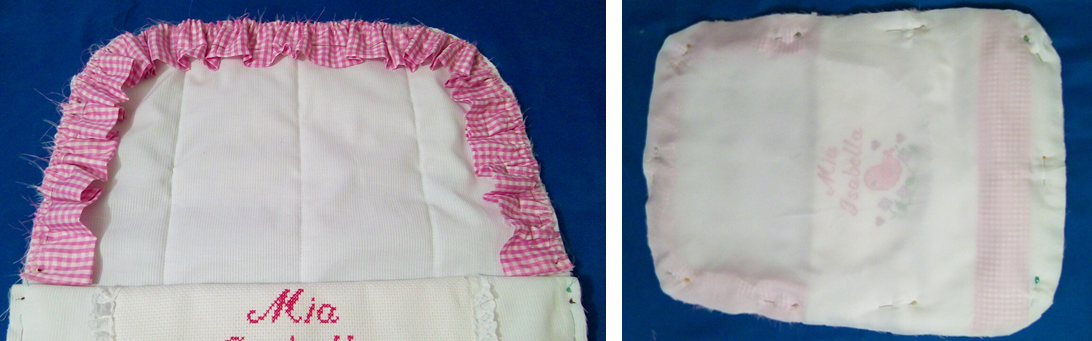
We place this steering wheel or lace fixing it first by hand, when we are sure that it is well placed and without imperfections we proceed to pass straight and zigzag sewing.
Place the lining fabric, fix it and pass the seam straight and zigzag all around, leaving an opening of approximately 7 cm to turn. Turn over and close the opening with a hidden seam.
Finally we decorate to our taste with matching ribbons.
I hope you liked my work today, I always try to take it step by step as best I can and explain it in an easy way, but if you have any doubts you can ask me. See you in a next post friends and remember,


That is so very cute and I love the little embroidery part with that sweet little bird - It is just perfect :)
This post was shared in the Curation Collective Discord community for curators, and upvoted and reblogged by the @c-squared community account after manual review.
@c-squared runs a community witness. Please consider using one of your witness votes on us here
Congratulations @carolinacardoza!
Your post was featured on our daily build newsletter. We've sent 250 liquid BUILD tokens from our @build-it.funds account to your wallet upon which you can sell, trade or buy on Hive engine.
Build-it is a DIY (do it yourself) platform where you can find tons of how-to's, ideas, and advice to create or build something all by yourself. The platform leverages a robust digital token, called the BUILD. The recommended tags required when creating a DIY article are #diy, #build-it. #how-to, or #doityourself. Please subscribe to our HIVE community here and earn extra 'HIVE' tokens.
Chat with us on our discord and telegram channels Discord, Telegram.