[ESP-ING] Butterfly hair ponytail 🦋| Cola de cabello en forma de Mariposa 🦋
Un saludo Creativos 🤗 / Best regards Creativos 🤗
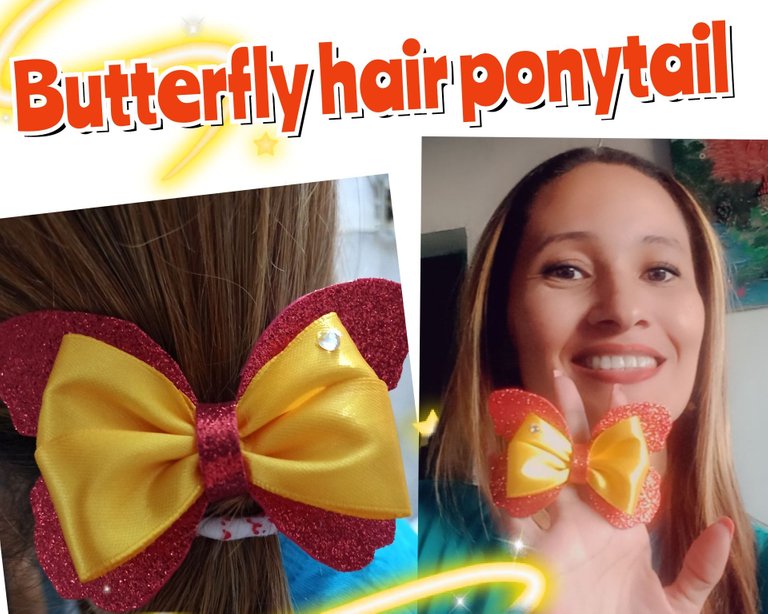

Los accesorios para el cabello son cada día más variados y puedes hacerlos con diferentes materiales, cinta, foami, fieltro en fin hay muchísima variedad, por ello hoy les he traído un tutorial de cola para cabello en forma de mariposa.
Es un tutorial fácil y sencillo así que manos a la obra mis creativos.

Hair accessories are becoming more and more varied and you can make them with different materials, ribbon, foami, felt in short there is a lot of variety, so today I have brought you a tutorial for a butterfly hair ponytail.
It is an easy and simple tutorial so let's get to work my creatives.
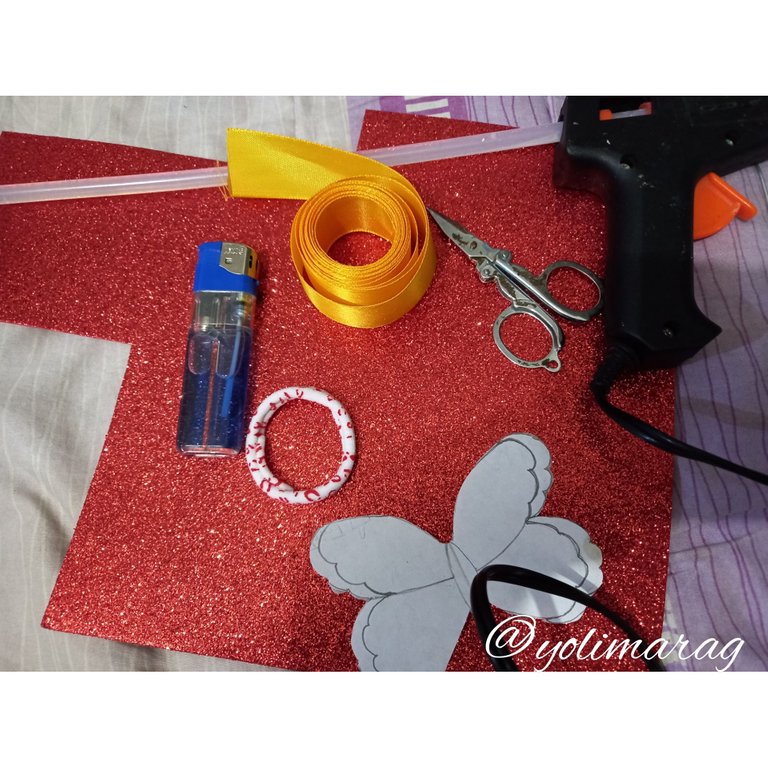
Materiales:
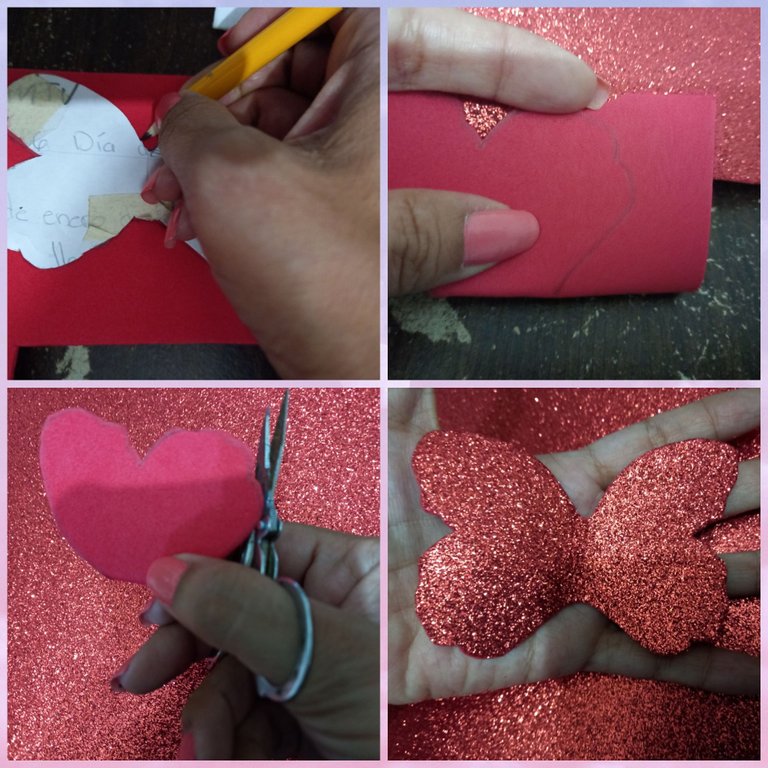
- Foami escarchado
- Silicona caliente
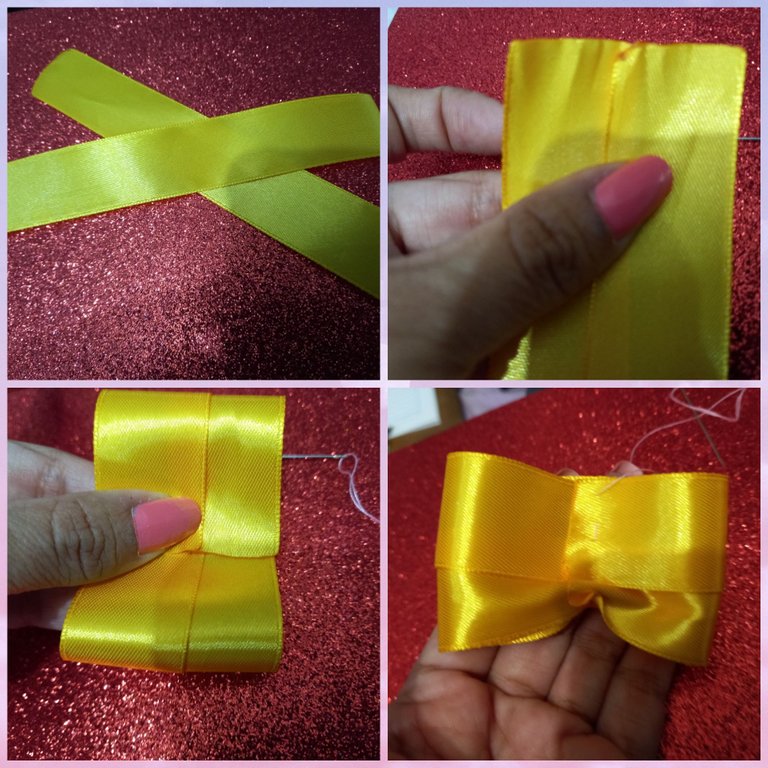
- Cinta raso de 16cm.
- Cola de cabello
- Aplique
- Hilo y aguja.
Materials:
- Frosted Foami
- Hot Silicone
- Satin ribbon of 16cm.
- Hair glue
- Applique
- Thread and needle.

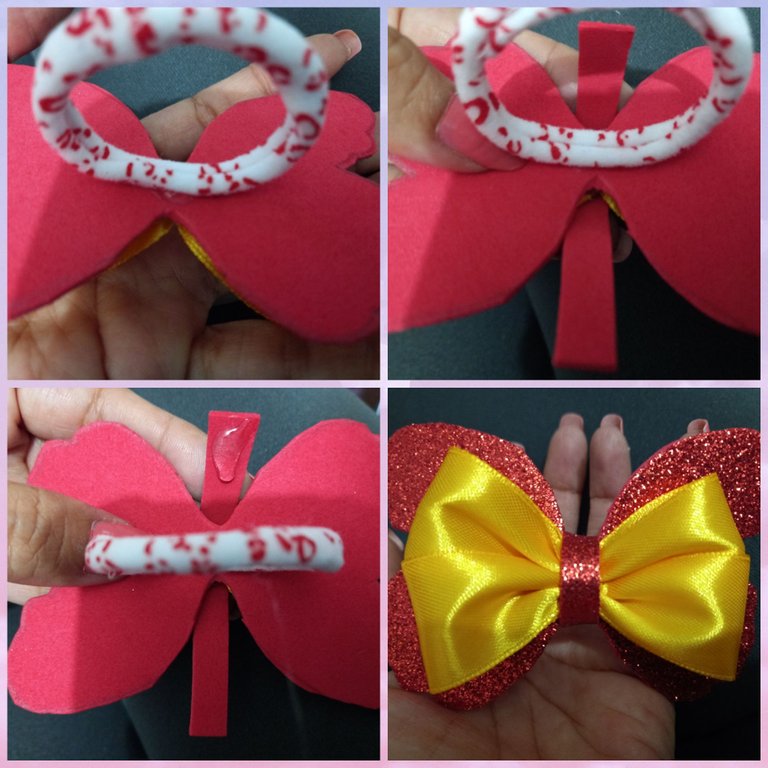
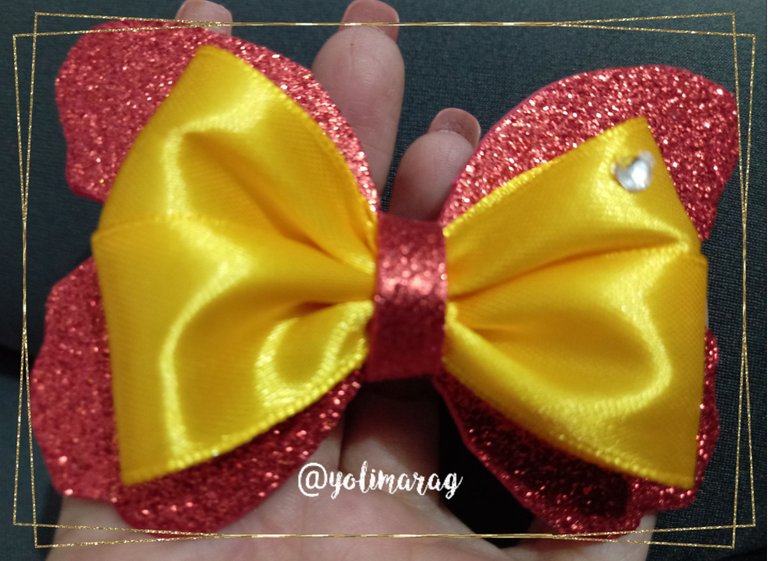
Por último pegaremos un aplique que le de luz a nuestro lazo y listo tenemos un hermoso lazo para lucir en cualquier momento que ustedes quieren para niñas y para las que quieran usarlo.
Espero que le gustará este pequeño tutorial, nos vemos en una próxima publicación muchas bendiciones 😘.
Finally we will paste an applique that will give light to our bow and ready we have a beautiful bow to wear at any time you want for girls and for those who want to use it.
I hope you will like this little tutorial, see you in a next post many blessings 😘.
Fotos principal editada con Canva.
Fotos de mi Autoría derechos reservados
Cámara: Samsung A20S
Traducido con www.DeepL.com/Translator (versión gratuita)
Photos edited with Canva
Photos by me Author's rights reserved
Quote> Camera: Samsung A20S
Translated with www.DeepL.com/Translator (free version)


Congratulations @yolimarag! You have completed the following achievement on the Hive blockchain and have been rewarded with new badge(s) :
Your next target is to reach 500 posts.
You can view your badges on your board and compare yourself to others in the Ranking
If you no longer want to receive notifications, reply to this comment with the word
STOPCheck out the last post from @hivebuzz:
Support the HiveBuzz project. Vote for our proposal!