[ENG/ESP] Design Portal Portrait with Cd. / Diseño Portal Retrato con Cd.
Greetings Hive friends!, I was inspired to make a "Portal Portrait Design with Cd". Use recycling material, a cd and other materials that I had at home, this craft is something simple, put in this wonderful portrait frame a nice memory of a Christmas photo of my son, the design is very bright to highlight this beautiful portrait frame, I hope you like it.
Saludos amigos de Hive!, me inspiré a realizar un “Diseño Portal Retrato con Cd”. Utilice material de reciclaje un cd y otros materiales que tenía en casa es algo sencillo esta manualidad, coloque en este maravilloso porta retrato un lindo recuerdo de una foto navideña de mi hijo , el diseño es muy brillante para resaltar este hermoso porta retrato , espero les guste.

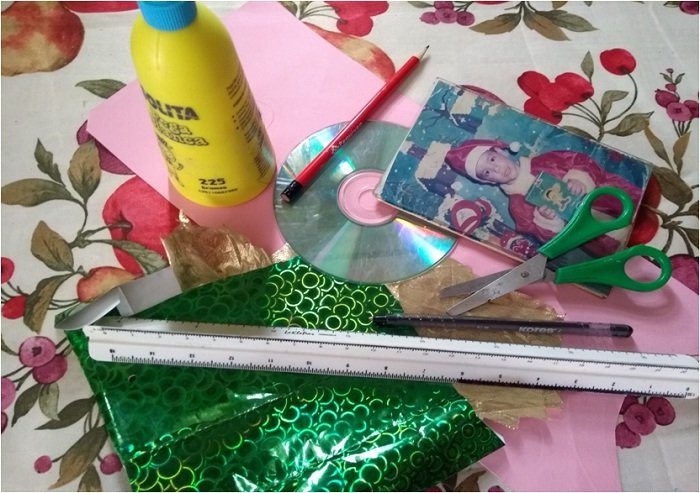
Used materials:
• 1 Cd.
• 20 centimeters of golden fabric.
• 1 Christmas photo size 8 centimeters high and 7 centimeters wide
• 10 centimeters of glossy green glossy paper.
• 30 centimeters of pink card stock.
• Strong cardboard piece and thin cardboard piece
• White glue, scissors, scaler, pencil, white sheet.
Materiales Utilizados:
• 1 Cd.
• 20 Centímetros de tela dorada.
• 1 Foto navideña tamaño alto 8 centímetros y ancho 7 centímetros
• 10 Centímetros de papel lustrillo verde brillante.
• 30 Centímetros de cartulina color rosado.
• Trozo de cartón fuerte y trozo de cartón fino
• Pega blanca , tijera, escalimetro, lápiz, hoja blanca.
Steps for Preparation / Pasos Para la Elaboración.
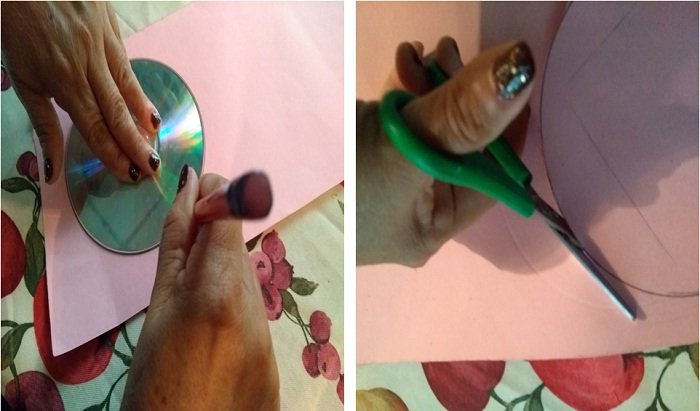
1.- We draw on the pink cardboard the circumference that covers the entire cd, measuring 11 centimeters, cut it out and stick it to the cd.
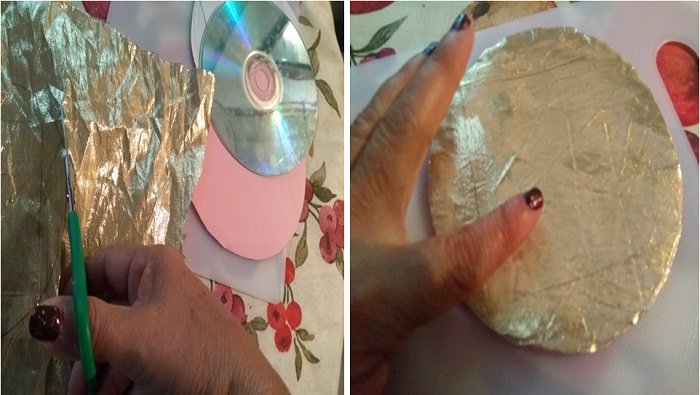
2.- Marking the circumference of the cd on the golden fabric, cut it out and stick it on the surface of the cd on top of the pink cardboard, let it dry for a few minutes.
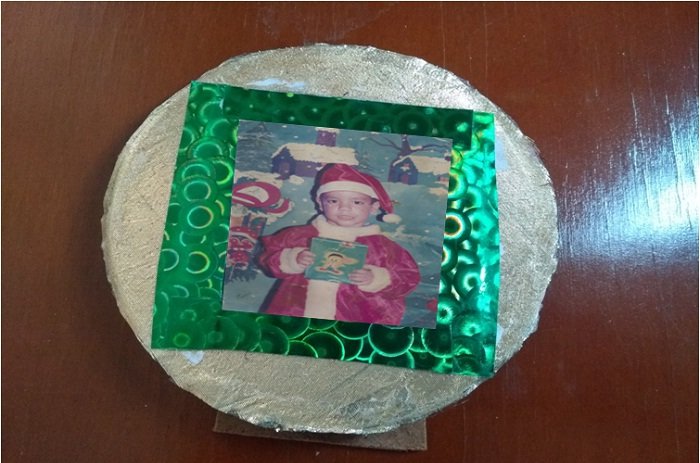
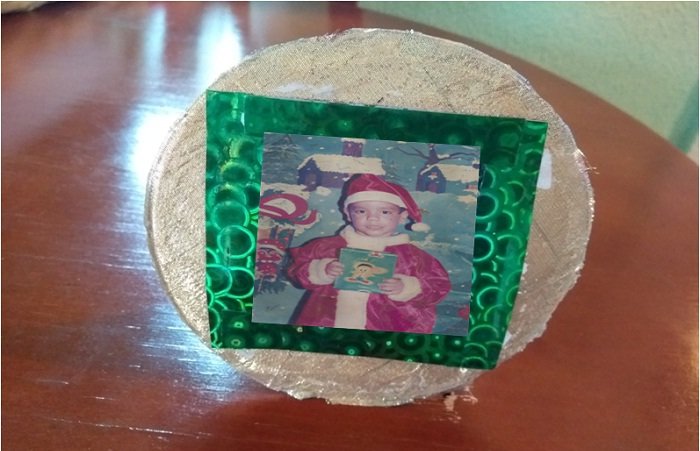
3.-We paste the photo in the center of the golden surface on the cd and we mark the measurement of the photo on bright green paper to make the square that will cover around the photo measures 1 centimeter of each side we let dry.
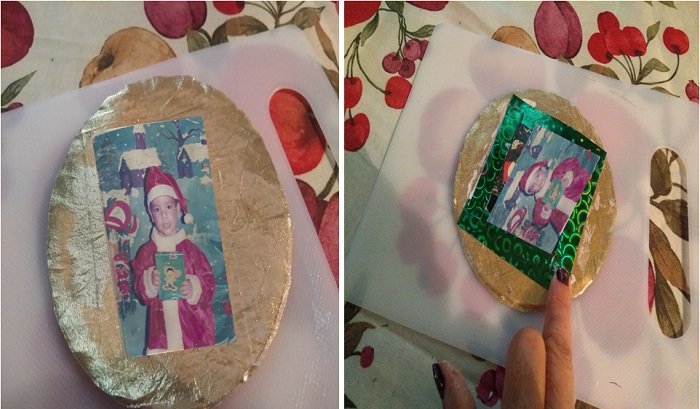
4.-On the back of the cd we stick a thin piece adhered to the cd and join the strong cardboard adhered to a piece of cardboard. Let it dry well, this will be the support to hold the portrait holder.

5.- List the Portraits Design with Cd.
1.- Dibujamos en la cartulina rosada la circunferencia que recubre todo el cd medidas 11 centímetros recortamos y la pegamos al cd.
2.- Marcando en tela dorada la circunferencia del cd la recortamos y pegamos en la superficie del cd encima de la cartulina rosada dejamos secar unos minutos.
3.-Pegamos la foto en centro de la superficie dorada en el cd y marcamos en papel verde brillante la medida de la foto para hacer el cuadro que recubrirá alrededor de la foto medidas 1 centimetro de cada lado dejamos secar.
4.-En la parte trasera del cd pegamos un trozo fino adherido al cd y unimos al carton fuerte adherido a un trozo de carton dejamos secar bien este será el soporte para sostener el porta retrato.
5.- Lista el Diseño del Porta Retrato con Cd.
Unpublished craft design @ magdasierra.
Diseño artesanal inédito @magdasierra.
The images were taken with a Moto G5 phone.
Las imágenes fueron tomadas con un teléfono Moto G5.
Thank you ; I hope you like it.
Gracias ; Espero que les Guste.
0
0
0.000
0 comments