Diseño Abstracto de un Tucán en Inkscape [ESP/ENG]
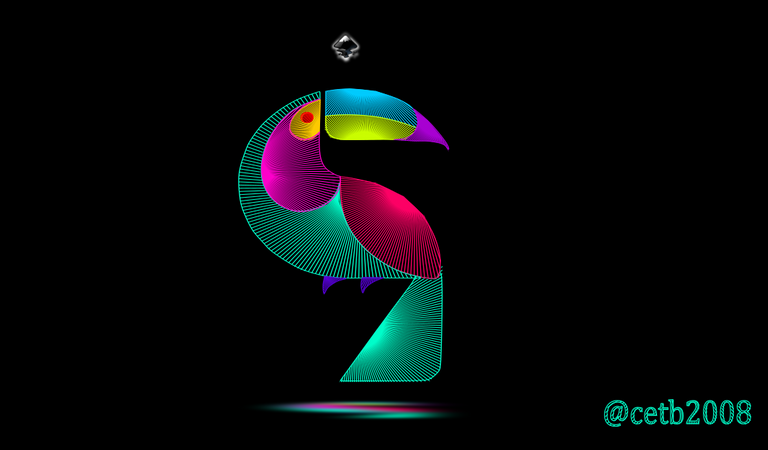
Diseño Abstracto de un Tucán en Inkscape:
Paso 1:
Se abre programa Inkscape, y desde la barra de herramienta que está en el lado izquierdo presionamos clic en la opción de dibujar curvas Bézier y se traza una figura que tiene esta forma que es parte de la cabeza del Tucán.
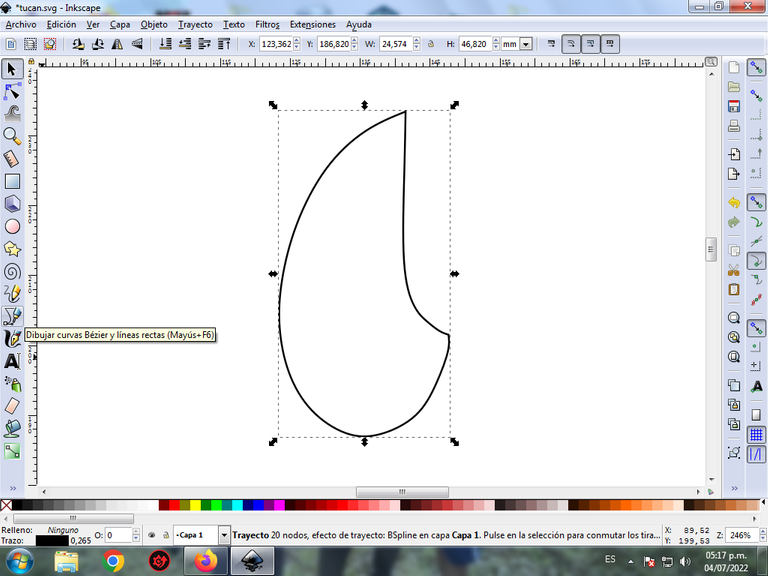
En esta parte de curvas Bézier se selecciona la opción de Crear Trayecto Modo Trayecto BSpline, para que las forma queden de forma curvas.
Paso 2:
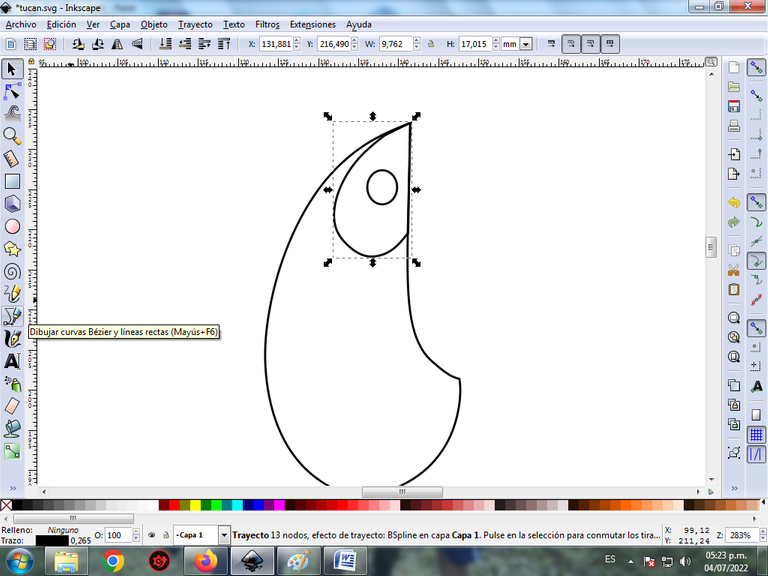
Se trazan una figura que va ser la parte que rodea al ojo, utilizando la misma herramienta, trazamos un círculo con la opción de crear círculos de la barra de herramienta.
Paso 3:
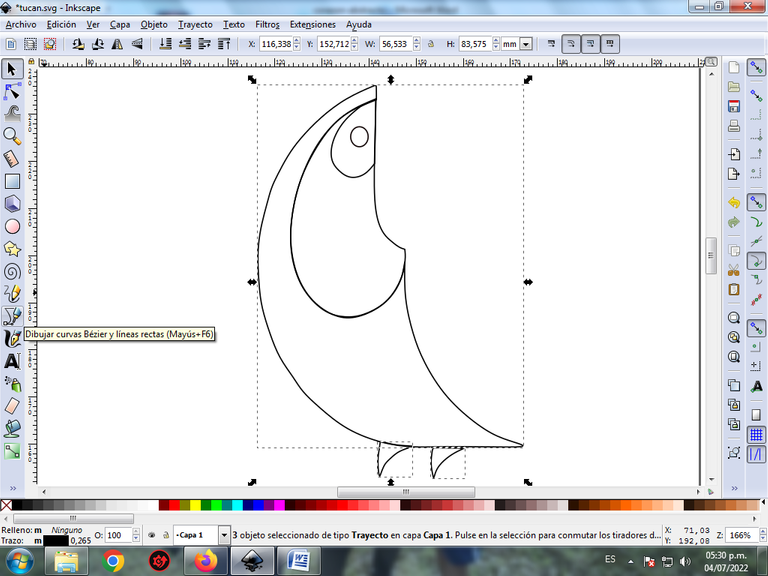
Continuamos trazando dos figuras más, que son el cuerpo y las dos patas del Tucán, con la herramienta de curvas Bézier.
Paso 4:
Se traza dos figuras que son el cuerpo y la cola del Tucán con la misma herramienta.
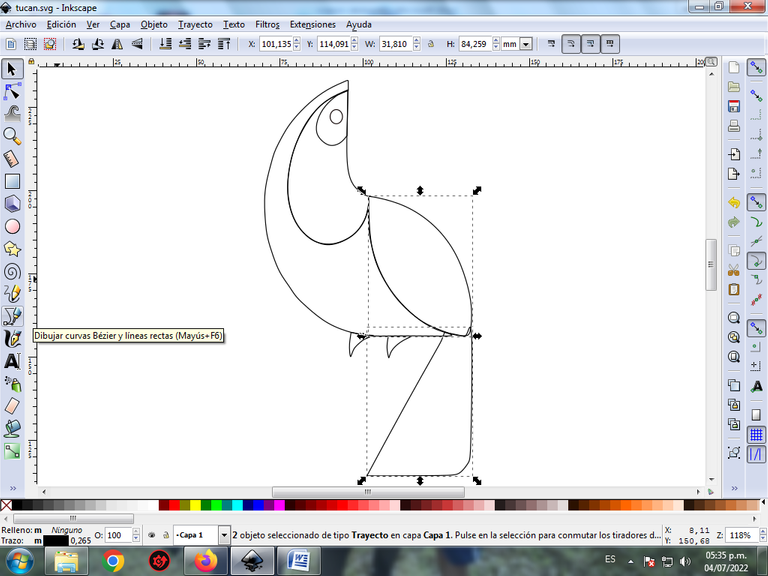
Paso 5:
Para continuar se hacen dos trazos que son parte del pico del Tucán, con la herramienta de curvas Bézier.
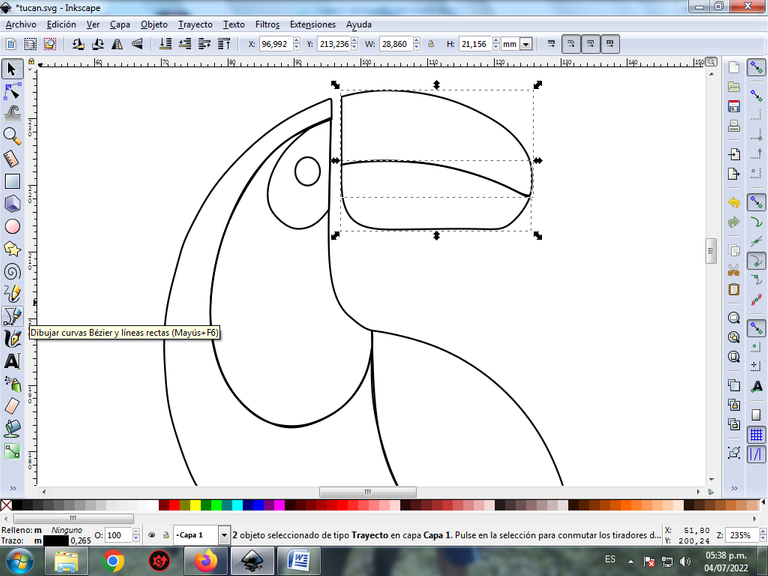
Paso 6:
Para finalizar trazamos esta figura para completar el pico del Tucán.
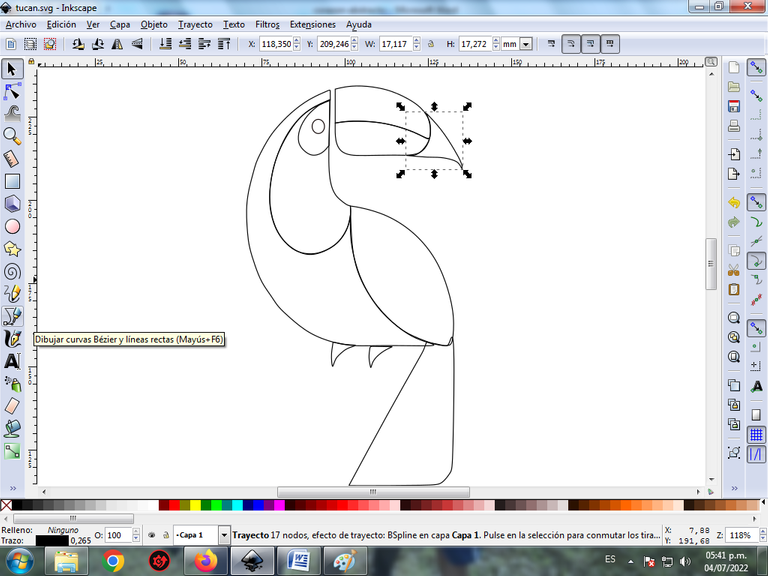
Paso 7:
Se insertan dos círculos de diferentes tamaños con la opción de crear círculos de la barra de herramientas.
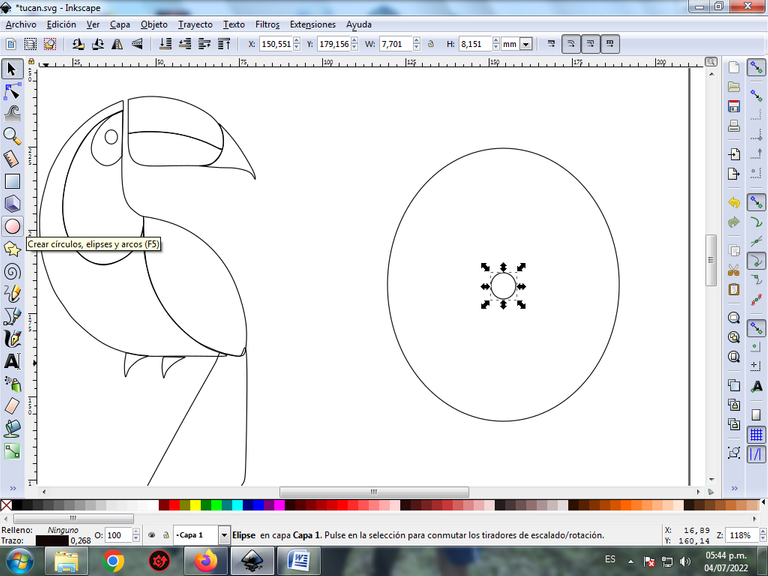
Después se selecciona ambos, y lo combinamos desde la barra de menú Trayecto.
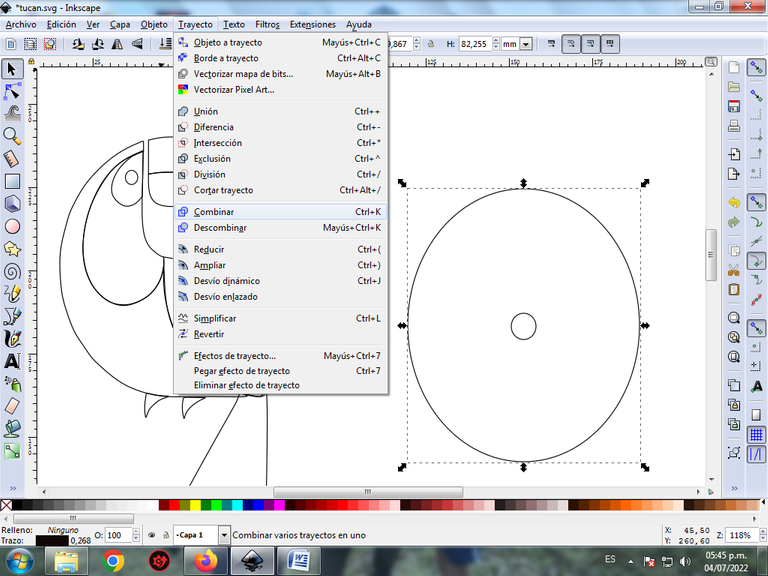
Paso 8:
Se selecciona nuevamente, hacemos clic en la barra de menú Trayecto – Efecto de Trayecto.
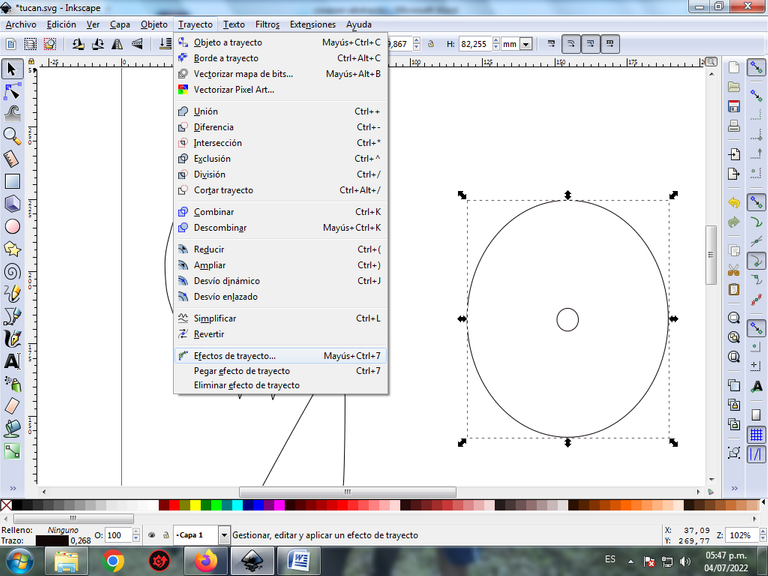
Seleccionamos añadir efecto de trayecto Coser Subtrayecto.
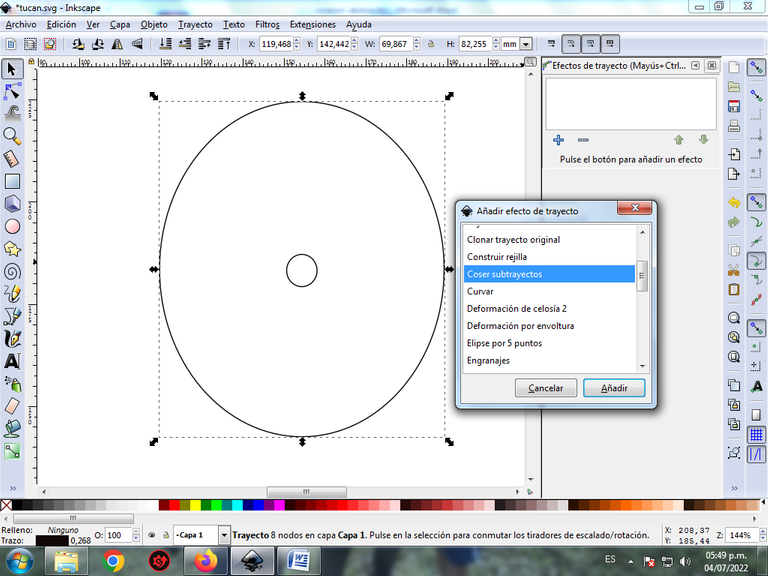
Cantidad trayecto le colocamos 200.
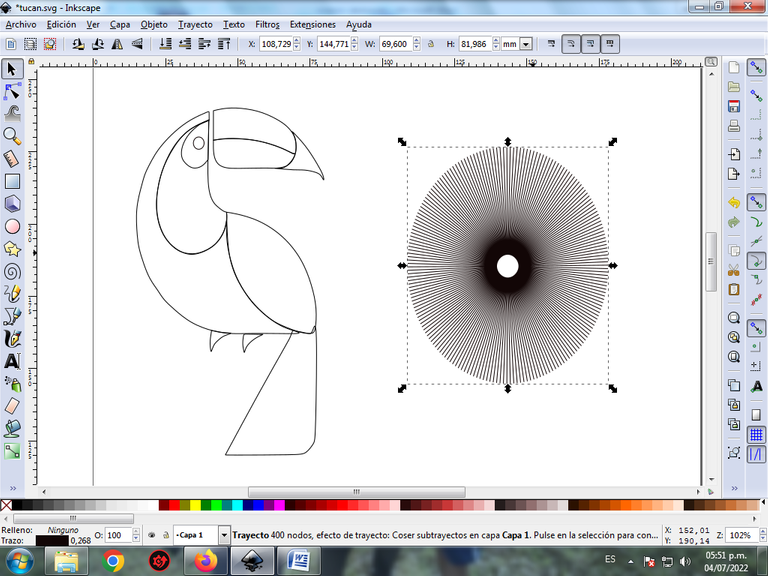
Quedando así.
Paso 9:
Comenzamos por la cola, se duplica la figura del círculo con el efecto y colamos la cola del Tucán encima, luego le damos en cortar desde la barra de menú Objeto, recorte, aplicar.
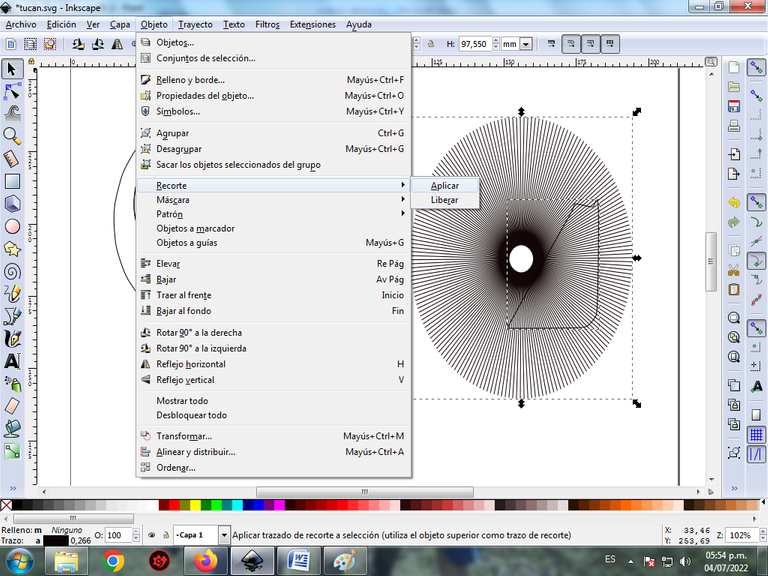
Obtenemos esta forma.
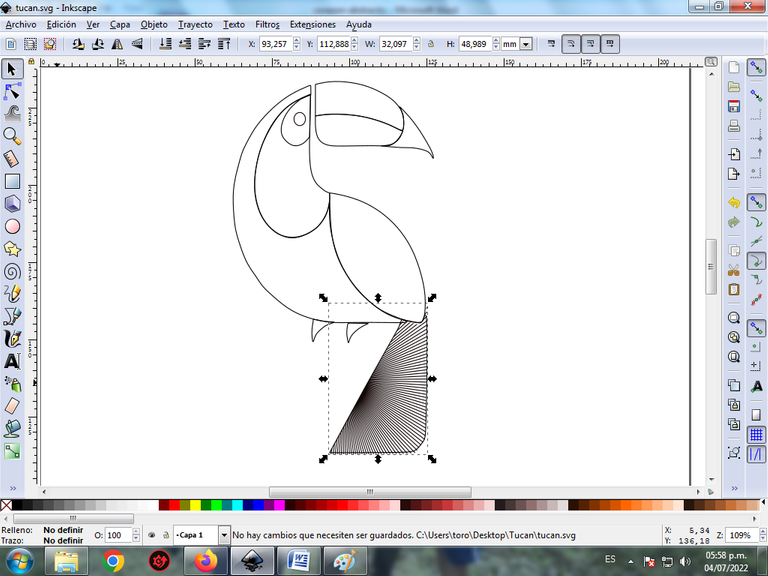
Desplazamos la figura encima de la cola, y va quedando así.
Paso 10:
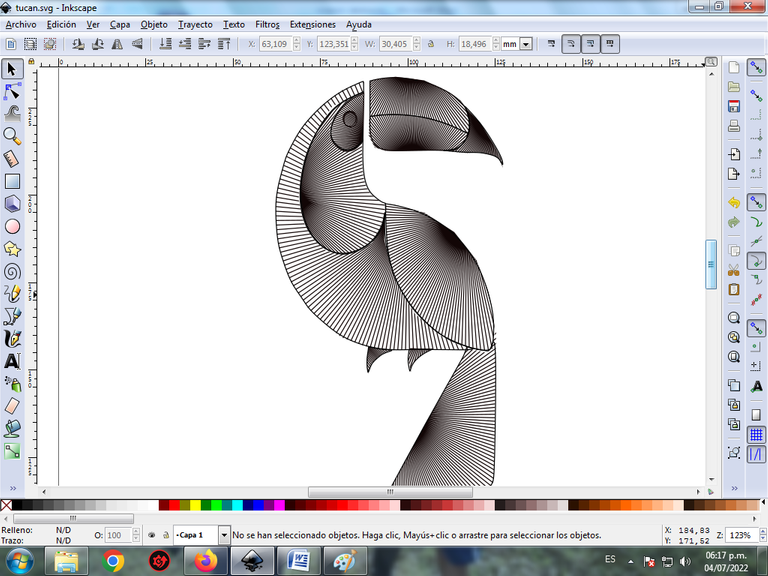
Se aplica el paso 9 en cada una de las figuras y este es el resultado final al aplicar este efecto.
Paso 11:
Se selecciona el color comenzando por el pico del Tucán, pero vamos a colocar el color es solo a los bordes de cada una de las figuras, para esto le damos clic en la barra de menú Objeto – Rellenos y bordes.
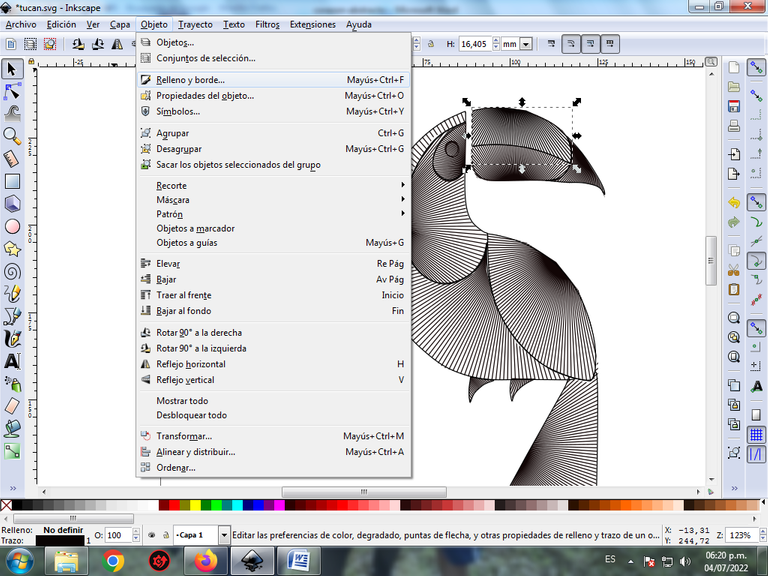
En color de trazo, se selecciona el color azul claro.
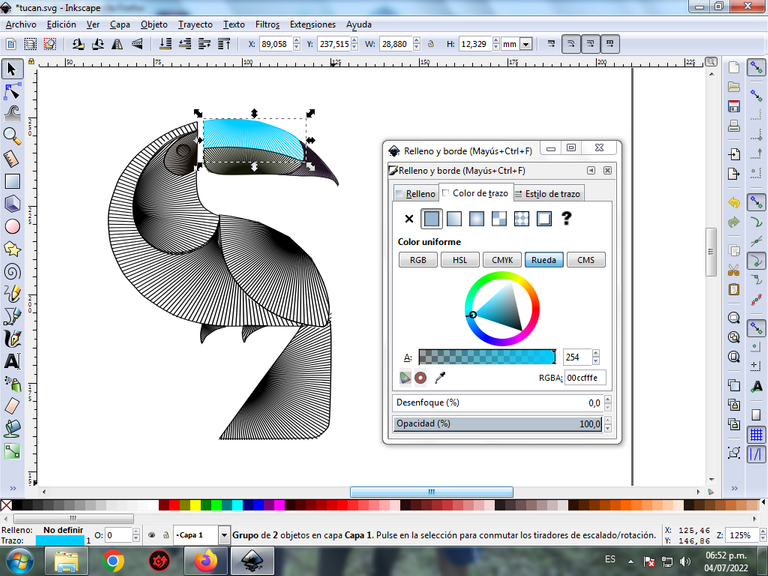
Paso 12:
Se aplica el paso 11, para aplicarle los colores a cada uno de los bordes de la figura.
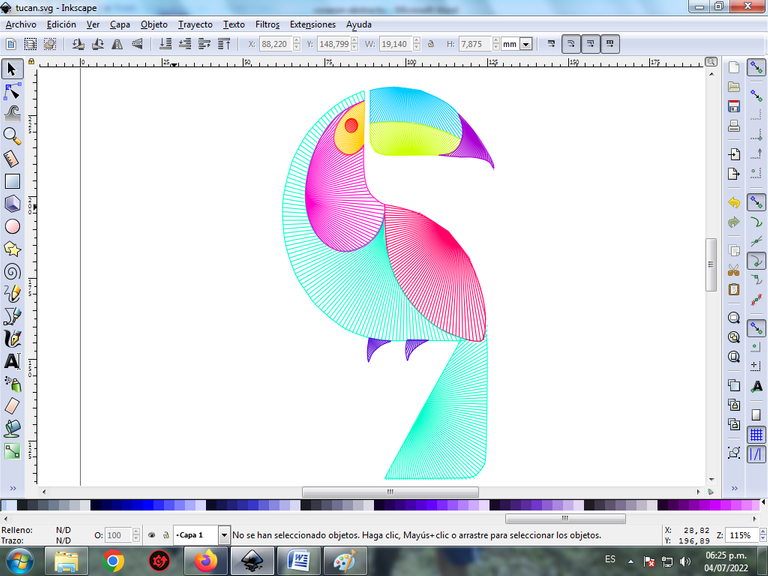
Paso 13:
Para finalizar este diseño agrupamos toda el Tucán con las teclas Ctrl + G, la duplicamos con la combinación de teclas Control + D, se reduce el tamaño, se coloca en la parte inferior y se aplica un desenfoque de 10%, quedando como una sombra. Luego insertamos un fondo color negro y tenemos listo nuestro diseño de un Tucán abstracta.

Imagen de Referencia Fuente
El programa Inkscape se puede descargar en esta dirección Fuente
Espero que les haya gustado mi tutorial, nos vemos en el próximo.
English

Abstract Design of a Toucan in Inkscape:
Step 1:
Inkscape program is opened, and from the toolbar that is on the left side we click on the option to draw Bézier curves and a figure is drawn that has this shape that is part of the Toucan's head.

In this part of Bézier curves, the Create Path BSpline Path Mode option is selected, so that the shapes are curved.
Step 2:
A figure is drawn that will be the part that surrounds the eye, using the same tool, we draw a circle with the circle option create the toolbar.

Step 3:
We continue tracing two more figures, which are the body and the two legs of the Toucan, with the Bézier curves tool.

Step 4:
Two figures are drawn that are the body and the tail of the Toucan with the same tool.

Step 5:
To continue, two strokes are made that are part of the Toucan's beak, with the Bézier curves tool.

Step 6:
To finish we draw this figure to complete the peak of the Toucan.

Step 7:
Two circles of different sizes are inserted with the Create Circles option on the toolbar.

Then both are selected, and we combine it from the Path menu bar.

Step 8:
It is selected again, we click on the Path menu bar – Path Effect.

We select add path effect Stitch Subpath.

Amount of journey we place 200.

Being that way.
Step 9:
We start with the tail, the figure of the circle is duplicated with the effect and we put the tail of the Toucan on top, then we click on cut from the Object menu bar, cut, apply.

We get this shape.

We move the figure on top of the tail, and it stays like this.
Step 10:
Step 9 is applied to each of the figures and this is the final result when applying this effect.

Step 11:
The color is selected starting with the beak of the Toucan, but we are going to place the color only on the edges of each of the figures, for this we click on the menu bar Object – Fills and edges.

Under Stroke Color, light blue is selected.

Step 12:
Step 11 is applied, to apply the colors to each of the edges of the figure.

Step 13:
To finish this design we group the entire Toucan with the Ctrl + G keys, we duplicate it with the Control + D key combination, the size is reduced, it is placed at the bottom and a 10% blur is applied, remaining as a shadow . Then we insert a black background and we have our design of an abstract Toucan ready.

Reference Image Source
The Inkscape program can be downloaded at this address Source
I hope you liked my tutorial, see you in the next one.
Translated with Traductor de Google

https://twitter.com/cbit_roxana_mdh/status/1544109983599677442
The rewards earned on this comment will go directly to the people( @cetb2008 ) sharing the post on Twitter as long as they are registered with @poshtoken. Sign up at https://hiveposh.com.
Saludos amigos @rutablockchain muchas gracias por valorar mi publicación