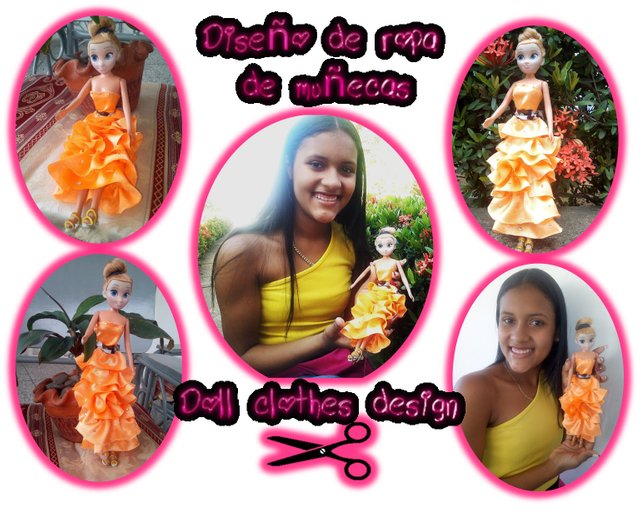
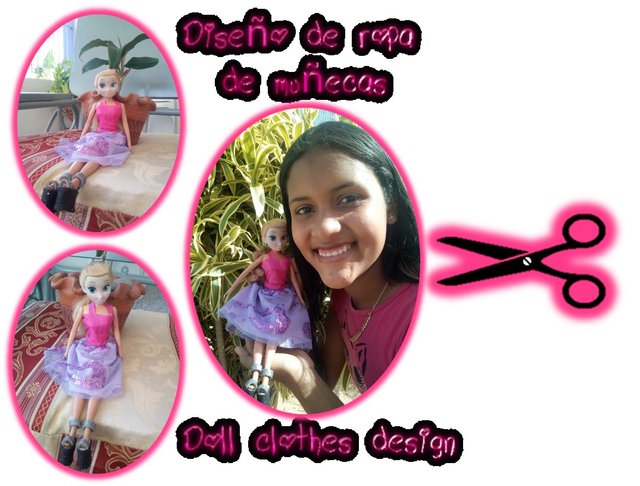
✏️❤️❀❤️✂️ | Diseño de ropa para muñeca, Vestido de noche ✂️ | Doll Clothes Design, Evening Dress. ✂️❤️❀❤️✏️ [ESP / ENG] TUTORIAL.
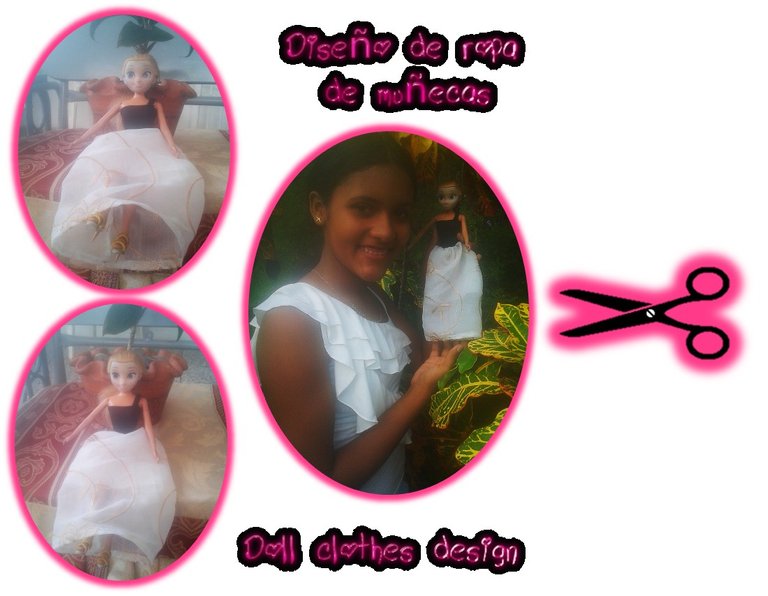

Hola a todos, De verdad me emociona poder mostrarles mi pasión por el diseño de ropa hoy les traje otra de mis creaciones, se trata de un vestido ceñido arriba y largo abajo perfecto para una cita de noche o un baile, Espero les guste mucho.
Hello everyone, I am really excited to show you my passion for clothing design, today I brought you another of my creations, it is a fitted dress up and long down perfect for an evening date or a dance, I hope you like it a lot.
Diseño de ropa para muñeca, Vestido de noche. / Doll Clothes Design, Evening Dress.
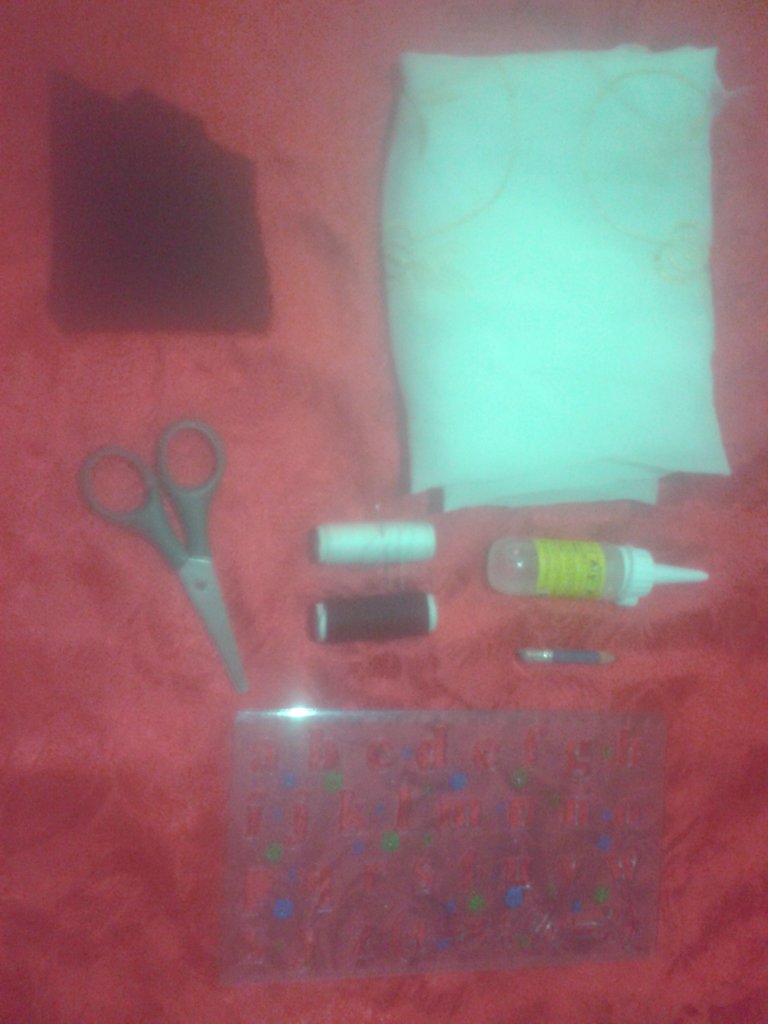
Materiales:/ Materials:
- Retazos de tela de seda y stretch (blanca estampada y negra).
Patchwork of silk and stretch fabric (printed white and black).
- Hilo y aguja.
Thread and needle.
- Tijeras.
Scissors.
- Silicon.
Silicon.
- Lápiz.
Pencil.
- La modelo.
The model.
- Cinta métrica o regla.
Tape measure or ruler.
PASO A PASO / STEP BY STEP:
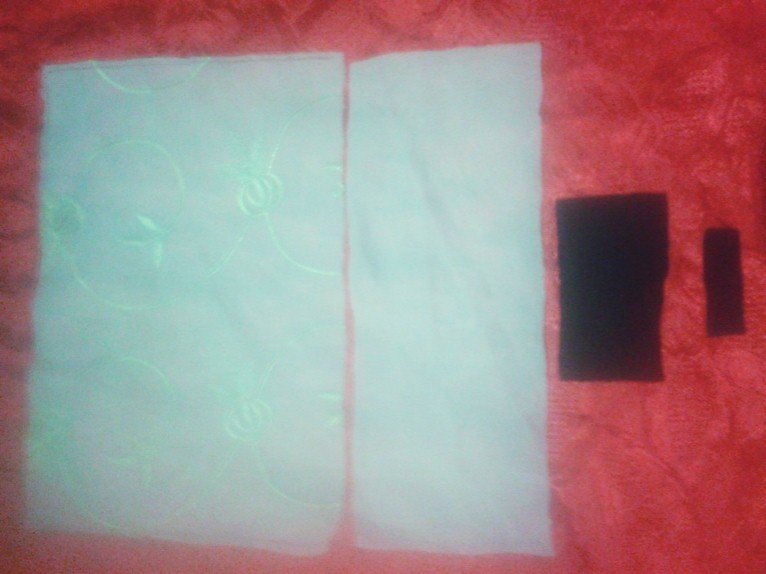
Lo primero que hay que hacer es un boceto del traje donde plasmaremos las medidas, en este caso estas son las medidas:
Encima del busto: 14cm; En el busto: 15cm; Debajo de la ultima costilla y por encima del ombligo: 11cm.
The first thing to do is a sketch of the suit where we will capture the measurements, in this case these are the measurements:
Above the bust: 14cm; On the bust: 15cm; Below the last rib and above the navel: 11cm.

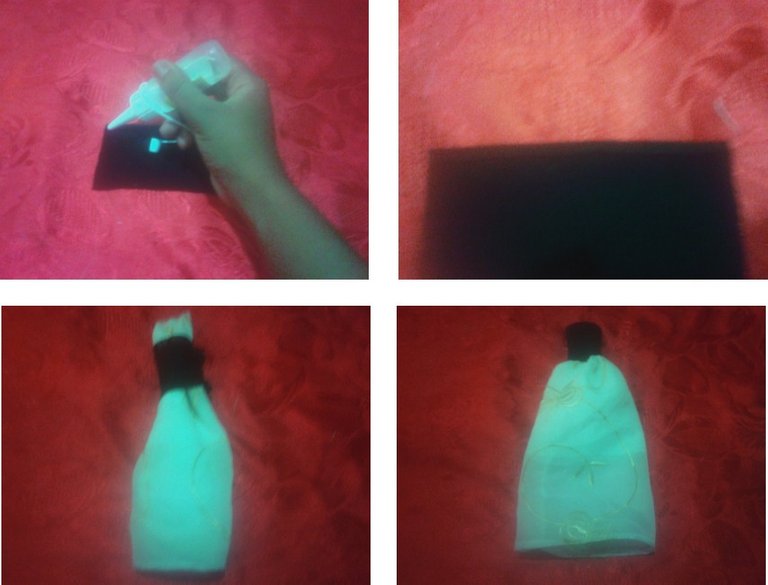
Para iniciar la confección, en la tela blanca marcamos con el lápiz y la regla (30 cm de largo y 20 cm de ancho), (30 cm de largo y 10 cm de ancho) y recortamos, eso es para la parte de abajo. En la tela negra marcamos (12 cm de largo y 6 cm de ancho), y (1.5 cm de ancho y 7 cm de largo) y recortamos, eso es para la parte de arriba.
To start making, on the white fabric we mark with the pencil and the ruler (30 cm long and 20 cm wide), (30 cm long and 10 cm wide) and cut, that is for the bottom. On the black fabric we mark (12 cm long and 6 cm wide), and (1.5 cm wide and 7 cm long) and cut, that is for the top.
Luego coloquemos la tela blanca más pequeña sobre la más grande y vamos a coserla, con el silicón hagámos el dobladillo en la punta, doblémos a la mitad al revés y la cosemos para que al voltearla quede la costura por dentro.
Then we place the smallest white fabric on top of the largest and we are going to sew it, with the silicone we make the hem on the end, fold in half backwards and sew it so that when we turn it over, the seam remains inside.
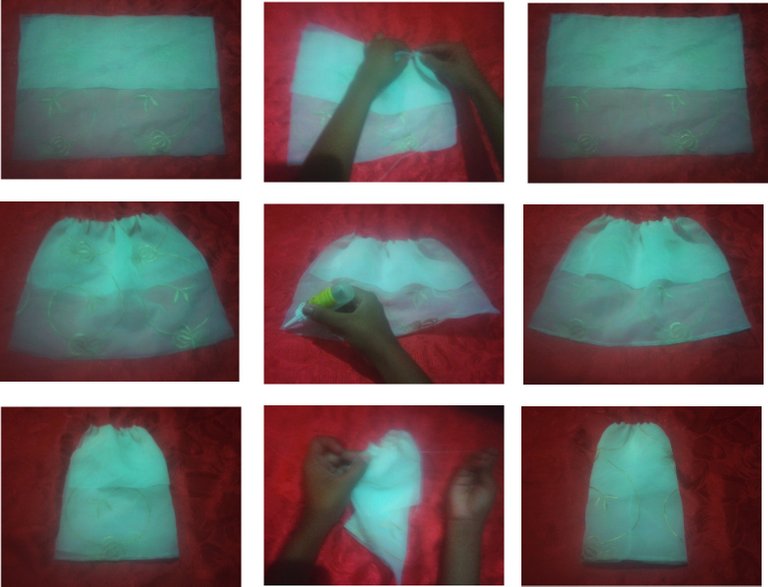
En el pedazo de tela negra más grande con el silicón vamos hacerle el dobladillo de un solo lado en este caso del lado de arriba, luego la doblamos a la mitad y la cosemos, la metemos a la parte de abajo con el dobladillo de la parte de arriba hacia abajo y lo cosemos de manera que al subirla quede así.
In the largest piece of black fabric with the silicone we are going to hem it on one side only in this case from the top side, then we fold it in half and sew it, we put it to the bottom with the hem of the part from top to bottom and we sew it in such a way that when it is raised it is like this.
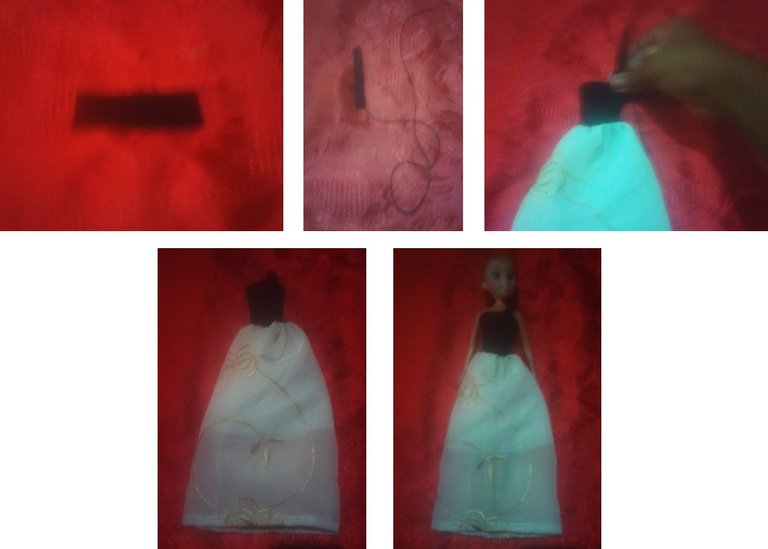
Continuamos con el trozo de tela que nos queda, lo doblamos por la mitad y lo cosimos, al finalizar ese paso procedemos a coserlo en la parte superior del atuendo por un lado.
We continue with the piece of fabric that we have left, we fold it in half and we sew it, finished that step we proceed to sew it on top of the outfit on one side.
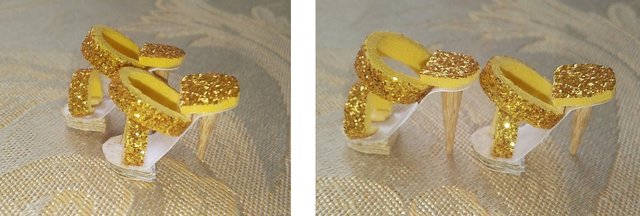
Para los zapatos usaremos los de mi primer diseño si quieren aprender como los hice aquí abajo les dejo el link (en la imagen) para que vean como los hice, y así quedo nuestro diseño.
For the shoes we will use those of my first design if you want to learn how I made them here below I leave the link (in the image) so that you can see how I made them, and so our design remains.
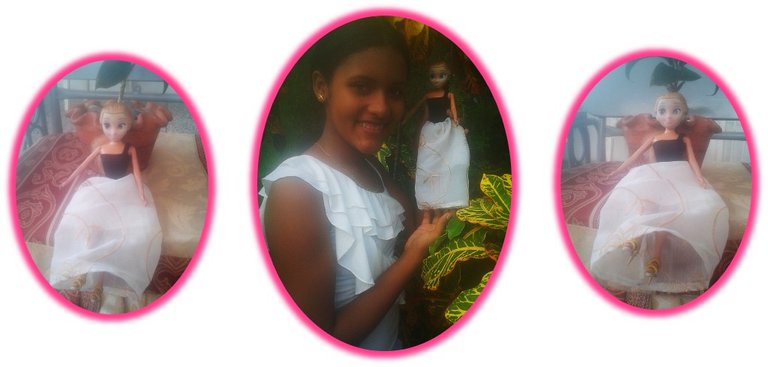
AQUÍ EL RESULTADO DEL TRABAJO / HERE THE RESULT OF THE WORK:
Clip en la imagen para ver mis otros trabajos./ Clip on the image to see my other works.:
 |  |
|---|
✏️❤️❤️ Muchas gracias a todos por pasar por mi blog y apoyarme, Dios los bendiga. / Thank you all so much for stopping by my blog and supporting me, God bless you❤️❤️✏️
Que buen trabajo hija, DIOS BENDIGA TUS MANOS.