How to draw a face shape! Tutorial - (Eng - Ger)
Hey Hiver! Ich melde mich nach einer Weile wieder. Es ist schwer aktiv zu sein, mit der Menge an Arbeit, die ich momentan für meine Ausbildung machen muss. Dafür habe ich kleines Tutorial mitgebracht, über wie man verschiedene Gesichtsformen zeichnen kann. Dieses Tutorial wende ich speziell auf meinen Kunststil an. Aber generell ist das ganze sehr einfach gehalten, sodass auch hoffentlich Anfänger lernen können! Viel Spaß :)
Hey Hivers! I am back after a while. It's hard to be active with the amount of work I currently have to do for my education. For that I brought little tutorial about how to draw different face shapes. I apply this tutorial specifically to my art style. But in general, the whole thing is kept very simple, so that hopefully beginners can also learn! Have fun :)
1
Alle Bilder wurden von mir gemacht
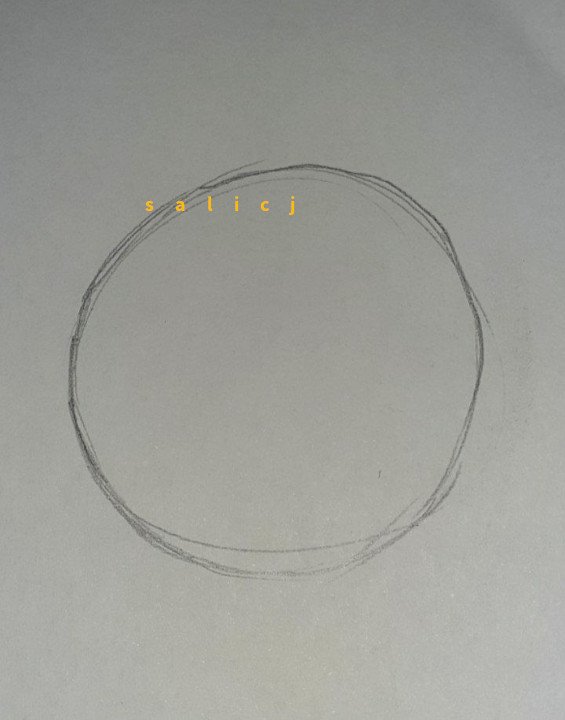
Wir fangen ganz einfach mit einem Kreis an. Beachtet das der Kreis groß genug ist, da das hier sozusagen die obere Kopfhälfte ist.
We'll start with a simple circle. Note that the circle is big enough since this is sort of the top half of the head.
2
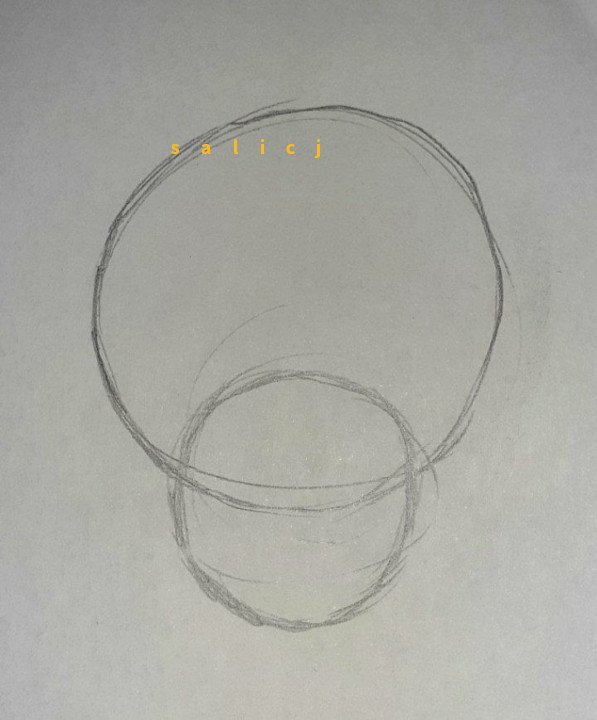
Danach zeichnen wir einen etwas kleineren Kreis, der weiter unten gesetzt wird, aber sich trotzdem mit dem oberen Kreis überschneidet. Je nachdem, wo ihr diesen Kreis platziert, wird die Länge des Gesichts so ausgemacht. Achtet auch hier darauf, dass der Kreis kleiner sein soll, desto schmaler das Gesicht sein soll und größer, desto breiter das Gesicht sein soll.
After that we draw a slightly smaller circle that will be placed further down but still intersects with the top circle. Depending on where you place this circle, the length of the face will be determined. Here, too, make sure that the circle should be smaller, the narrower the face should be and larger, the wider the face should be.
3
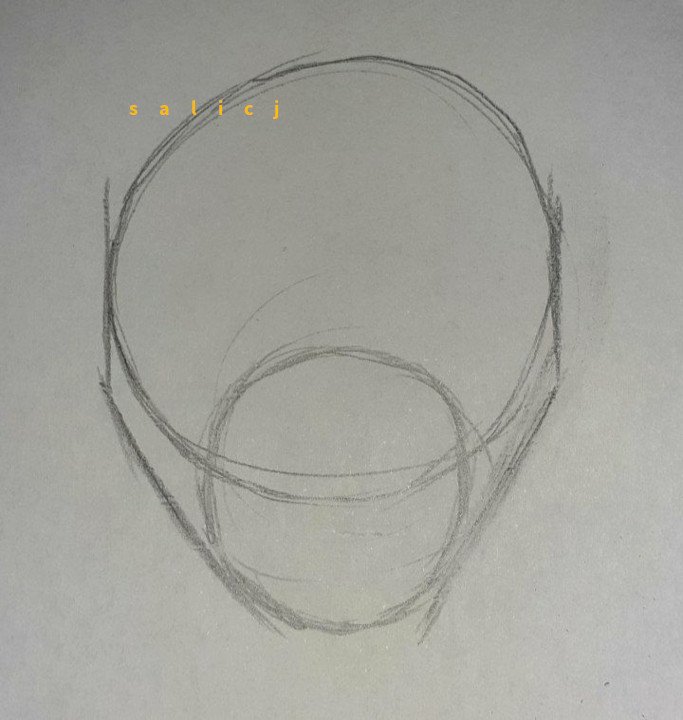
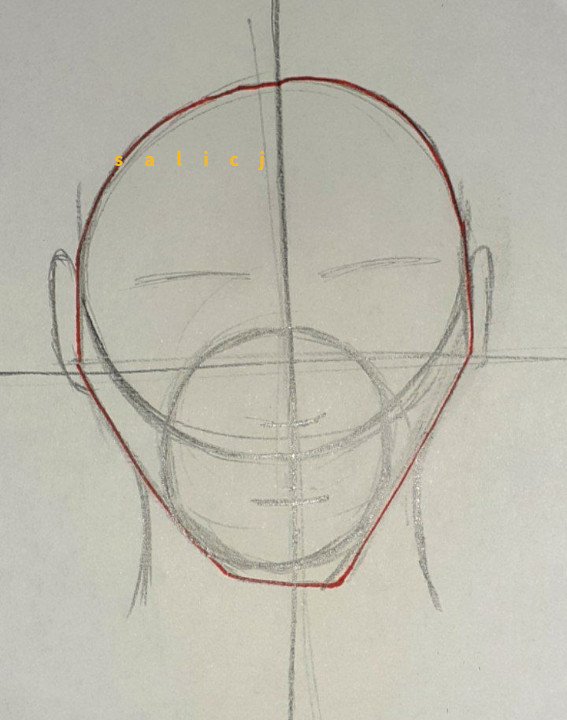
Wenn ihr das festgelegt habt, könnt ihr mit der eigentlichen Form anfangen! Ihr baut eure Gesichtsform sozusagen um diese Kreise herum. Ihr legt zum Beispiel die Linien an den Kreisen an und orientiert euch das denn Größen und Breiten der Kreise!
Once you have that determined, you can start with the actual shape! You sort of build your face shape around these circles. For example, you put the lines on the circles and orientate yourself on the sizes and widths of the circles!
4
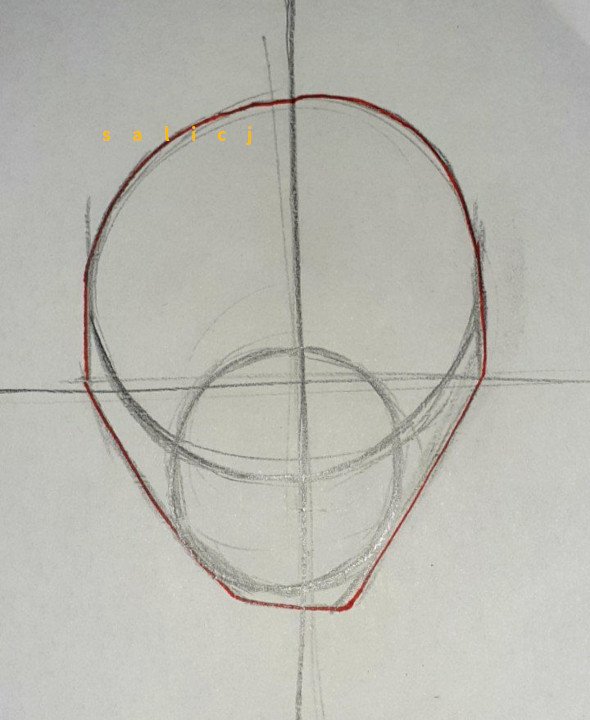
Hier habe ich die Linien, die meine noch mal in Rot eingefärbt, damit ihr hoffentlich genauer verstehen könnt, was ich meine :) kleiner Tipp; es sieht immer besser aus, wenn ihr (besonders für den Anfang) zuseht, dass alles einigermaßen symmetrisch ist. Ihr könnt euch zum Beispiel eine waagerechte und senkrechte Linie mit dem Bleistift einzeichnen. Hilft bei der Orientierung!
Here I colored the lines, mine, in red again, so that you can hopefully understand what I mean :) little tip; it always looks better if you make sure everything is reasonably symmetrical (especially for starters). For example, you can draw a horizontal and vertical line with a pencil. Helps with orientation!
5
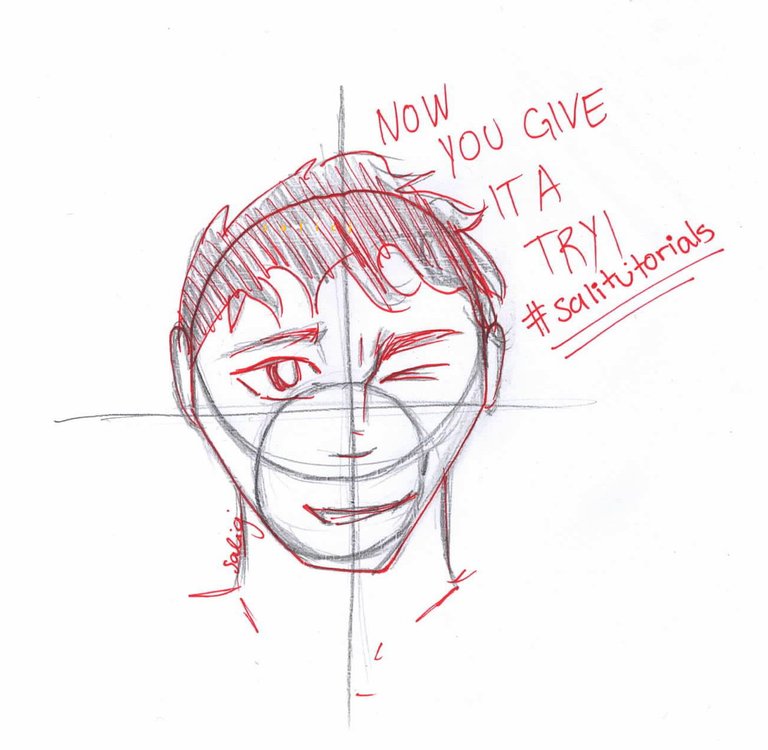
Wenn ihr das geschafft habt, könnt ihr mit den Details eurer Figur anfangen! Einfach, oder nicht?
Once you've done that, you can start detailing your character! Easy, isn't it?
Final result
Das war es auch schon mit meinem kleinen Tutorial. Ich hab es absichtlich sehr einfach gehalten und hoffe, dass es übersichtlich genug war! Wenn ihr eure Arbeit mit diesem Tutorial teilen wollt, dann benutzt gerne denn Hashtag #Salitutorials oder markiert mich. Ich gucke mir eure Arbeit gerne an und hoffe, ihr habt Spaß dabei! Euch ein gesegnetes Wochenende! ^^
That's it for my little tutorial. I intentionally kept it very simple and hope it was clear enough! If you want to share your work with this tutorial, please use the hashtag #Salitutorials or tag me. I enjoy looking at your work and I hope you enjoy it! Have a blessed weekend! ^^
Thank you for sharing this post on HIVE!
Your content got selected by our fellow curator elizacheng & you received a little thank you upvote from our non-profit curation initiative. Your post will be featured in one of our recurring curation compilations which is aiming to offer you a stage to widen your audience within the DIY scene of Hive.
Next time make sure to post / cross-post your creation within the DIYHub community on HIVE and you will receive a higher upvote!
Stay creative & hive on!
Yay! 🤗
Your content has been boosted with Ecency Points, by @salicj.
Use Ecency daily to boost your growth on platform!
Support Ecency
Vote for new Proposal
Delegate HP and earn more