So, I Made A Thing -- My Experience Designing an Anime Eye.
This one was supposed to be short because I wasn't sure if I was going to simply share my design experience or give a tutorial. However, after writing the whole thing, I decided to leave it this way because I thought it could serve as both.
I have been designing for a little over 2 years now. Back then, it started with making simple stuff on the Canva website using their templates. Then it graduated to actually doing some designs from scratch.
I didn't really take it seriously then. However, I got a lot of experience designing for my friends for free, and a few Steem doing some simple designs tasks for @Yoodoo (formerly called @oracle-d).
I've always fancied the idea of being really good with graphic design and illustration, and I finally paid more attention to growing the skill about 2 months ago. It's been quite the experience.
Drawing An Anime Eye.
I've had a lot of free time recently because of the current lockdown in my city. So, I decided to create something a bit more challenging than what I'm used to.
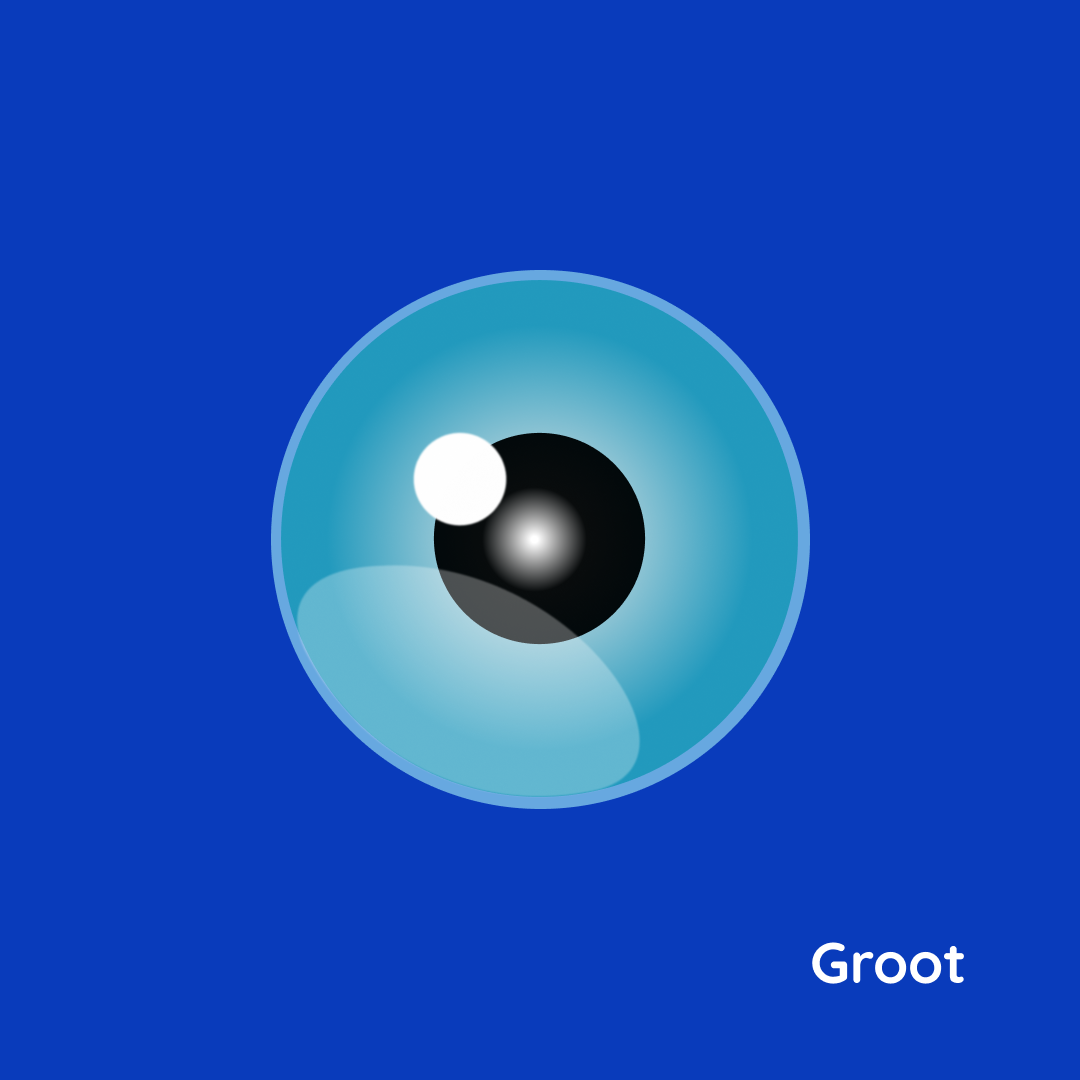
I hope it looks like an eye (because that's what it looks like to me). Usually the type you'd see in cartoons and anime movies. I designed it using the Figma desktop tool.
Most of the design relied on basic geometric shapes, knowing how to work with concentric circles and gradients to create a spherical illusion. It also involved knowing how to use the Pen Tool to make irregular shapes.
Forget the name, the Pen Tool is not a pen at all and any good designer would know how tricky those curves can be for beginners. I had to learn some tricks from a friend I met on here (@druids).
But hey, it wasn't too difficult. I think it's like learning how to ride a bike. With a bit of practice, I figured it out and it became relatively easier.
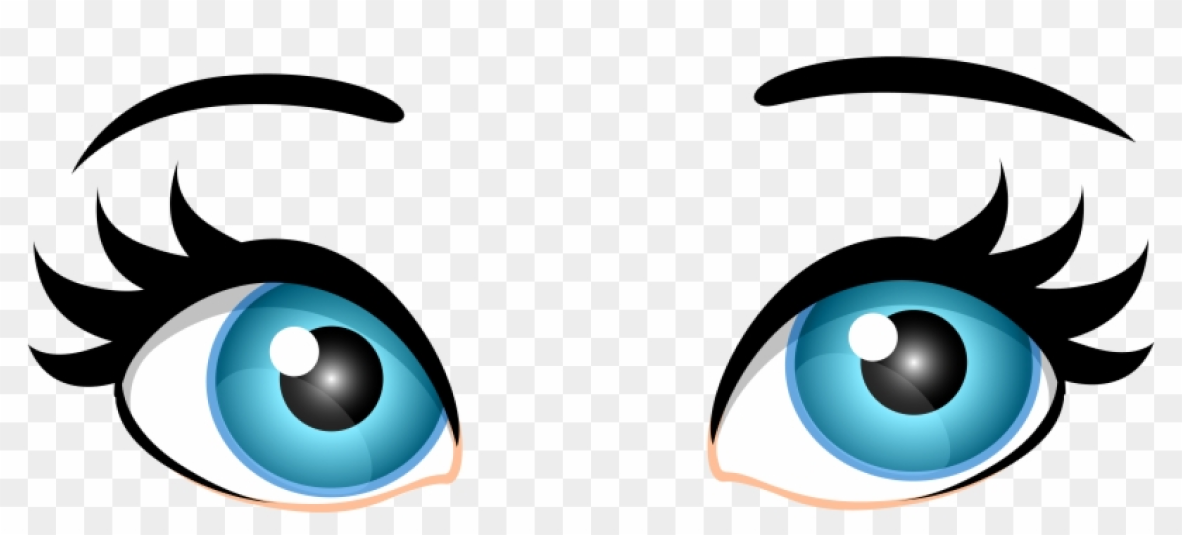
The idea was a simple one; to learn by replicating a vector image by illustration. So, I grabbed a free clipart of a pair of eyes and imported it to Figma.
Comparing the original clipart to mine, you can tell my work isn't complete because i left the lashes out. I admit that I might have felt too much for the roundness of the eyeball, or maybe I was just being lazy. Whatever, I'll finish it later.
The Process.
I started by locking the imported photo on the canvas so it doesn't move when I'm designing on it. I needed to do this to get the exact size of every element.
Then, I popped the oval tool to draw the first circle directly on the locked photo and reduced the opacity to allow me to see through the circle. By holding the Shift key while dragging out the circle, it maintained a consistent circumference.
Next, I duplicated the circle using Cntrl + D on the PC. And reduced the newly created ones to scale with the visible photo in the background. Figma has a helpful feature that makes things snap into place when moving them around. I used these guidelines to ensure both circles were concentric.
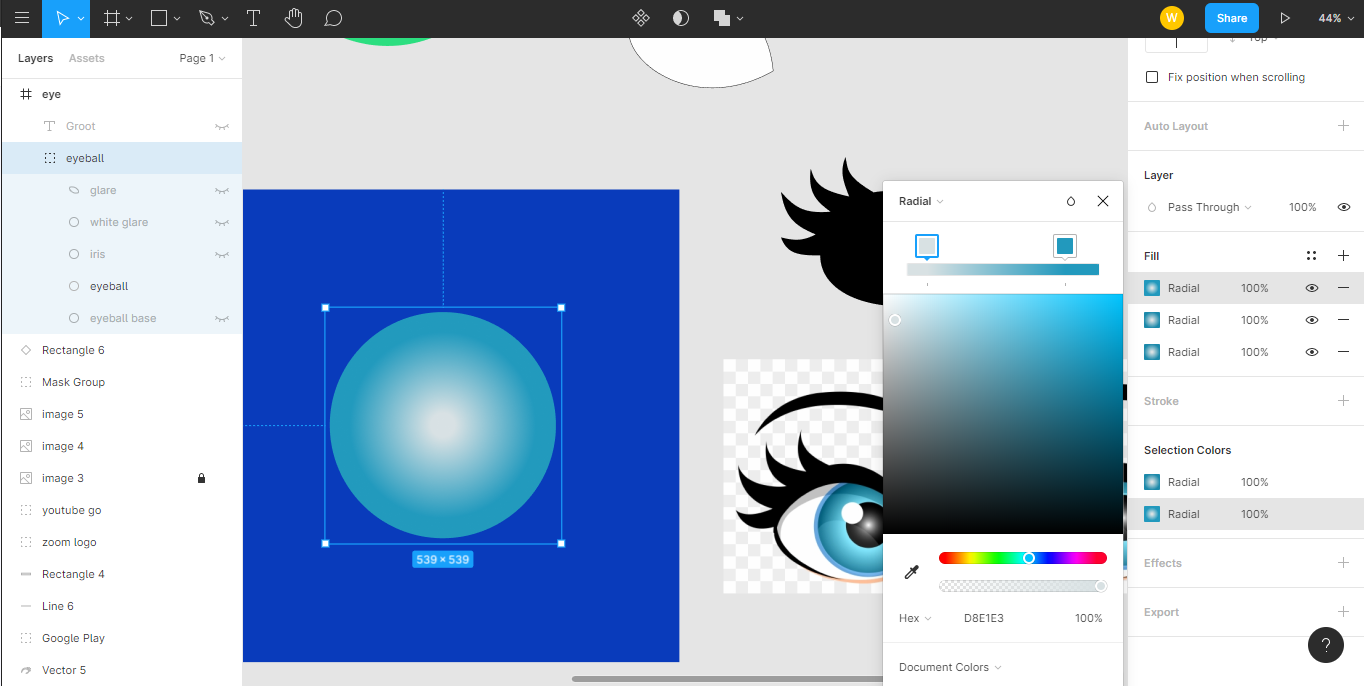
The next and most important step was giving colour and gradient to each circle by using the Fill tool on the design panel on the right. Rather of just filling it as a solid, consistent colour, I applied the radial fill as seen in the image below, and selected a slight tint (mixing white with colours creates a tint of that colour) to make the colour lighter at the middle.
A shortcut to filling colours by copying it directly from another element on the canvas is by hitting key "i" to enter the colour picker mode, and then simply locating and clicking on the colour you want to copy.
I repeated the same process for the iris by adding a tint to give it the brightness in the middle. So, it's like a reflection from a light source.
The small white glare by the side is simply a small circle with an offset. I had to blur it to make it a bit more realistic. Otherwise, it would have a pretty sharp circumference and would have stood out from the rest of the design.
The big, translucent glare was done using the Pen tool. I drew a triangle with the vertices touching 2 points on the arc of the big blue circle, and the third end just on the iris. Then I used the bend tool at the top left section of the canvas to curve the sides of the triangle.
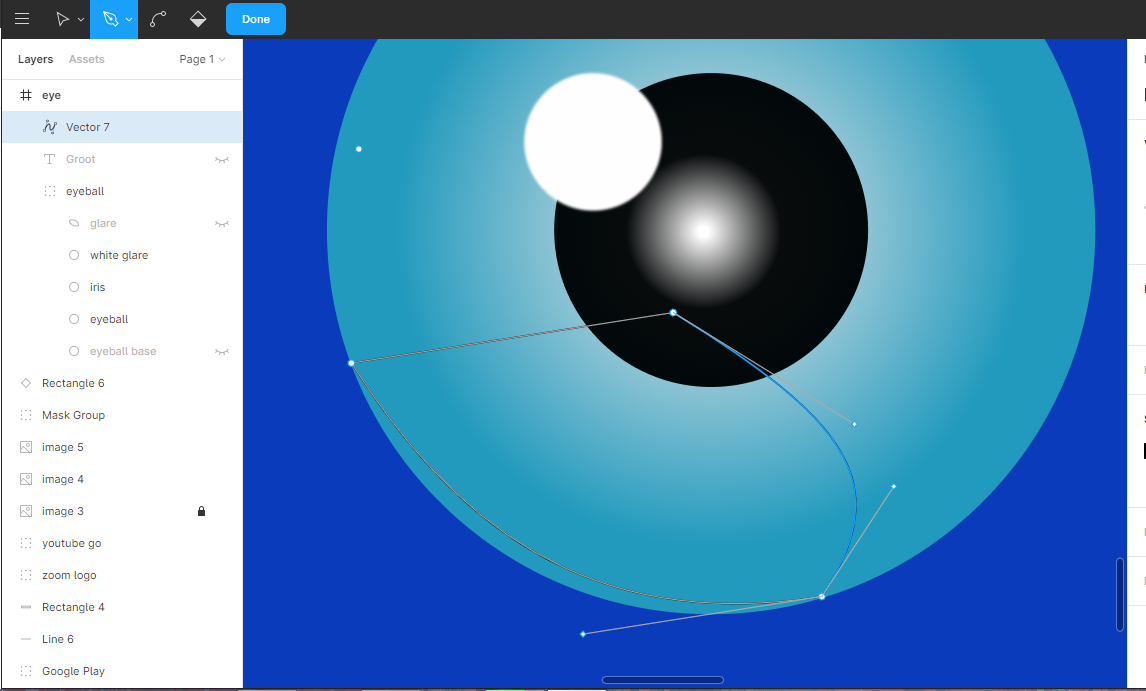
After a few frustrating minutes of pulling the anchor points to create the curved path i needed, I finally settled for this one:
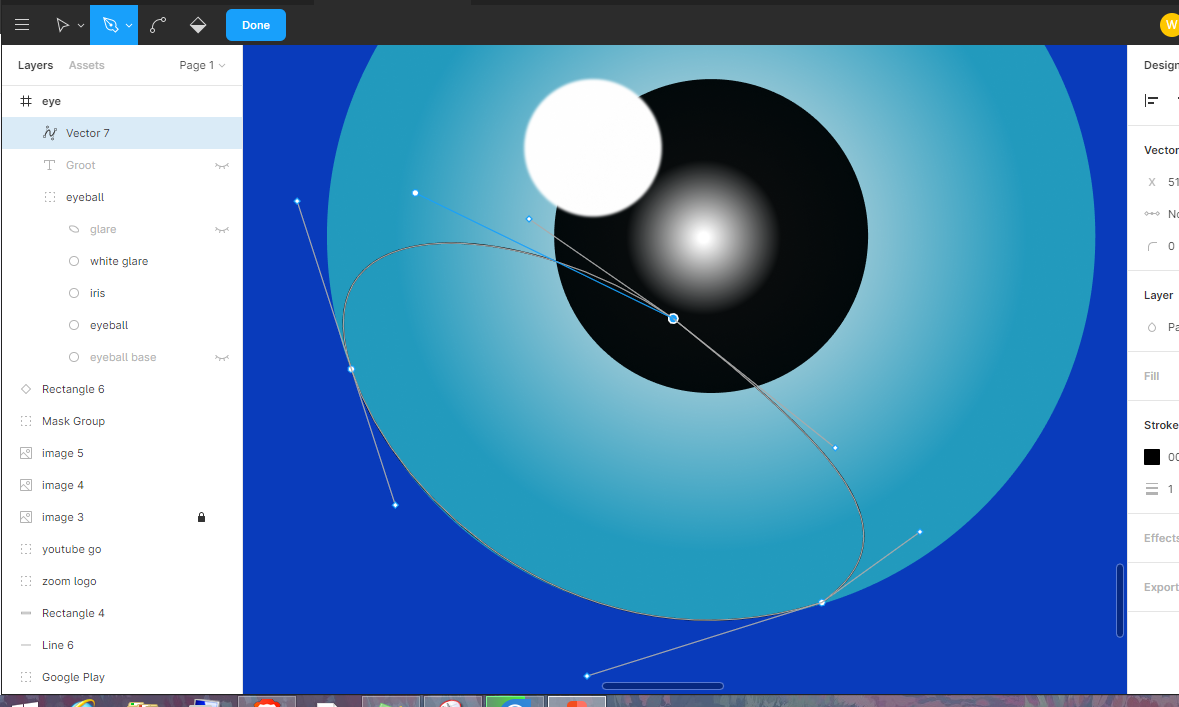
Next, I removed the border stroke around it, filled the shape with white and reduced the opacity to make it translucent. We've got our glare.
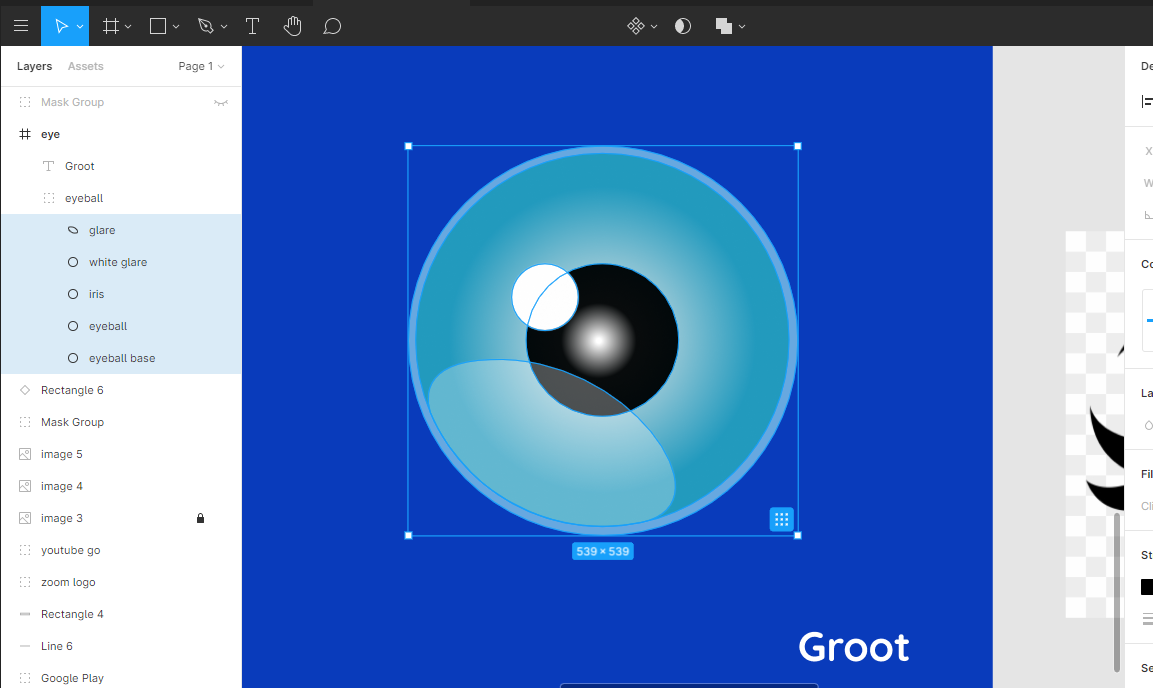
That's pretty much it. The rest of the design was about including a border to the larger circle to serve as the base and making adjustments to make sure the elements were in the right place.
I'd like to see who else might be interested in trying this out themselves so I can see what you did. Also, be sure to ahead and sign up for Figma using this link.
You can give me a mention on your blog post when you publish it so I can see what you did. Also, be sure to leave comments below this one if you need any help with it.
Cheers.
Psst!!! Over here...
I shared this on Twitter as well.
You're welcome.
So nice🤗
And yes, it looks like an eye.
I learned to use figma some months ago. I am working on an app prototype for NYSC... I don't think they will eventually make use of it though. ..
I will finish up and post my work here😉
Ah, I must have forgotten you got in on UI/UX design earlier.
Pretty significant project there. Would be great to see!
👋 Hi @pangoli, I was flipping through the blockchain and stumbled on your work! You've been upvoted by Sketchbook / a community for design and creativity. Looking forward to crossing paths again soon.
✅ Join the Sketchbook Community
Thank you.
This post was shared in the Curation Collective Discord community for curators, and upvoted and reblogged by the @c-squared community account.
If you are a community leader and/or contest organizer, please join the Discord and let us know you if you would like to promote the posting of your community or contest.
@c-squared runs a community witness. Please consider using one of your witness votes on us here
@pangoli Thanks for sharing this piece
Thank you