Beautiful Christmas-themed bow for the princesses of the house || [ESP/ENG]💖💖
Welcome to my Blog.
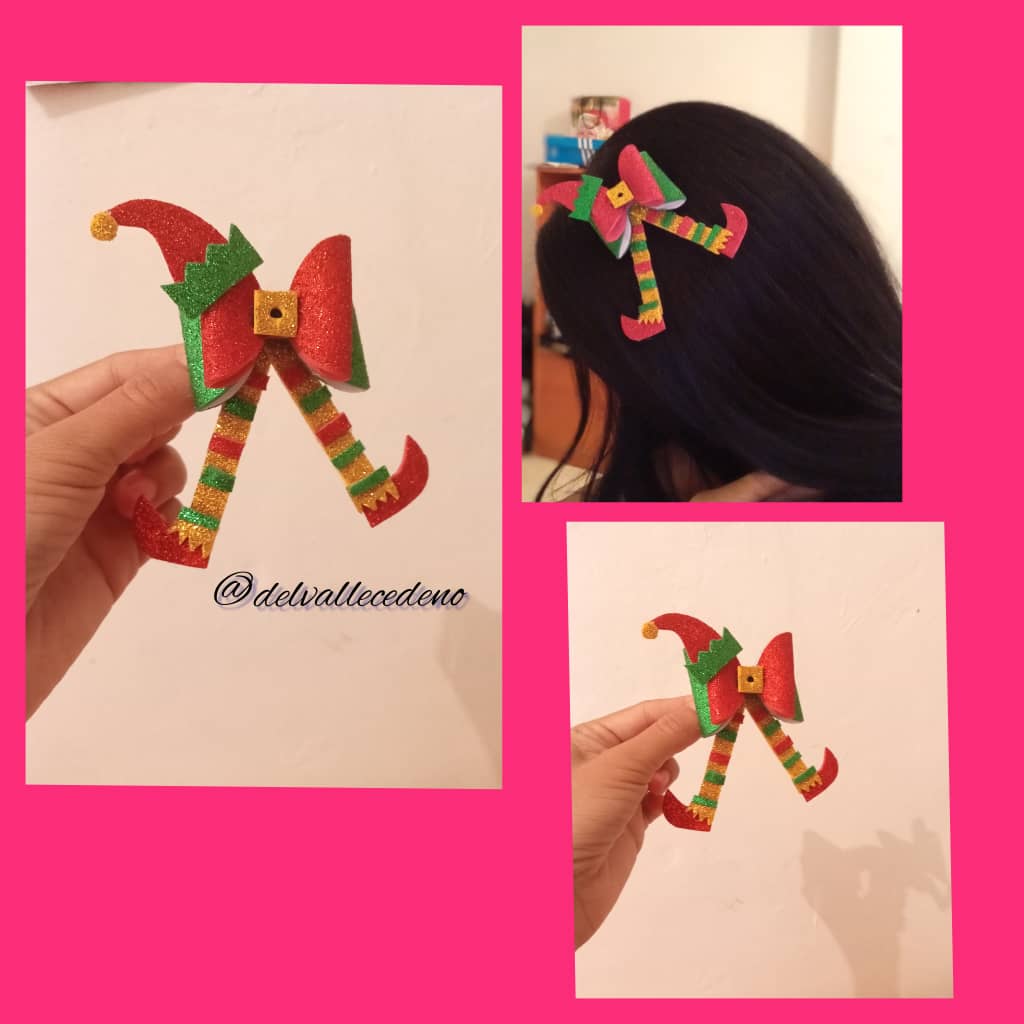
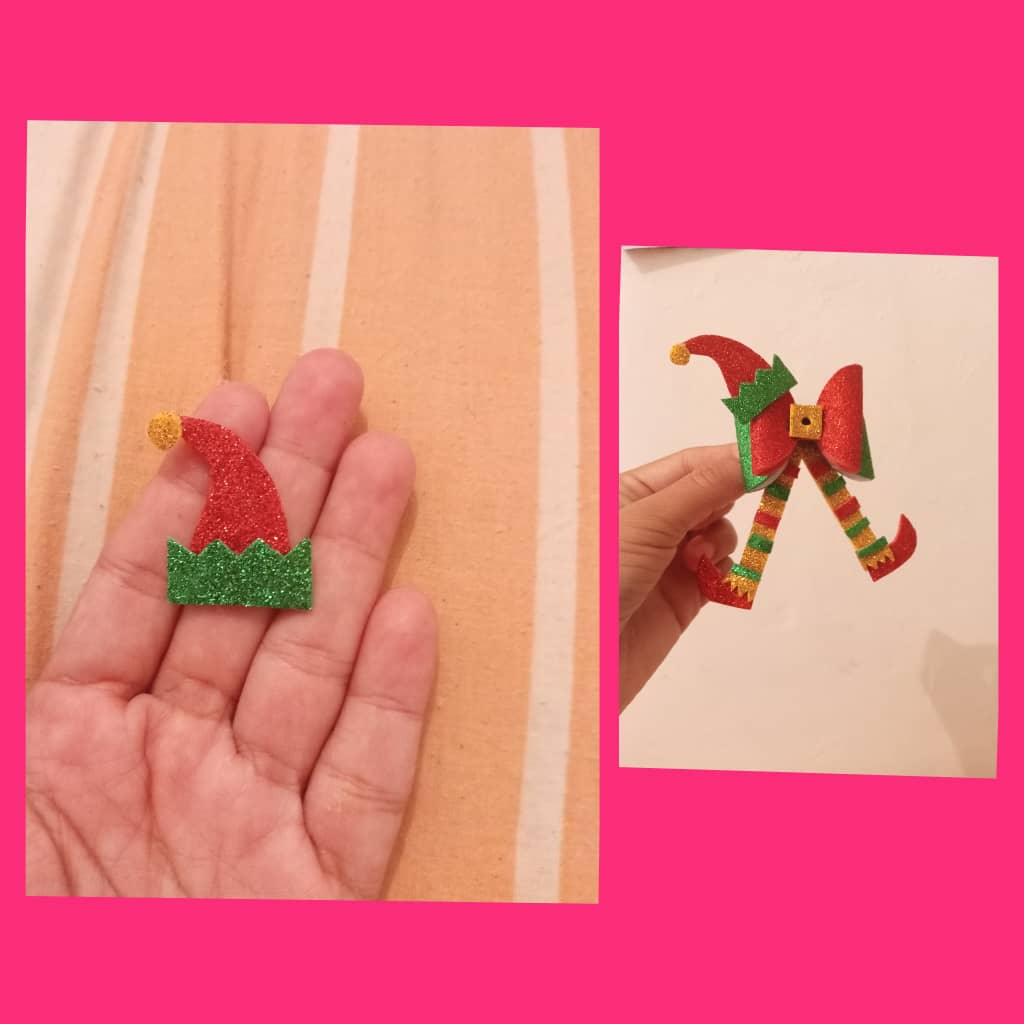
Muy buenas noches colmena de Hivers, espero que su día haya pasado en paz y alegría un fuerte y ameno abrazo virtual para todos mis amigos que laboran en esta maravillosa comunidad de @jewelry, es un gran gusto una vez más compartir mis tutoriales, Pues cómo ya saben faltan pocos días para el mes más esperado del año la época decembrina, y si aún no saben que obsequiar a la pequeña de la casa les traigo una fabulosa idea de un Bello lazo con temática navideña de pies de duende, es una bella combinación que Hice con los colores dorado, verde y rojo escarchado. El brillo se hace presente en esta temporada y no pueden faltar esos hermosos detalles para las princesas. Espero les guste y no dejen de intentarlo, A continuación les explico los siguientes pasos a seguir:
Good evening Hivers hive, I hope your day has passed in peace and joy, a strong and pleasant virtual hug for all my friends who work in this wonderful community of @jewelry, it is a great pleasure once again to share my tutorials, how You know, there are only a few days left for the most anticipated month of the year, the December season, and if you still do not know what to give to the little girl in the house, I bring you a fabulous idea of a beautiful Christmas-themed bow with elf feet, it is a beautiful combination I did with the colors gold, green and frosty red. The shine is present in this season and those beautiful details for the princesses cannot be missing. I hope you like it and do not stop trying, then I explain the following steps to follow:

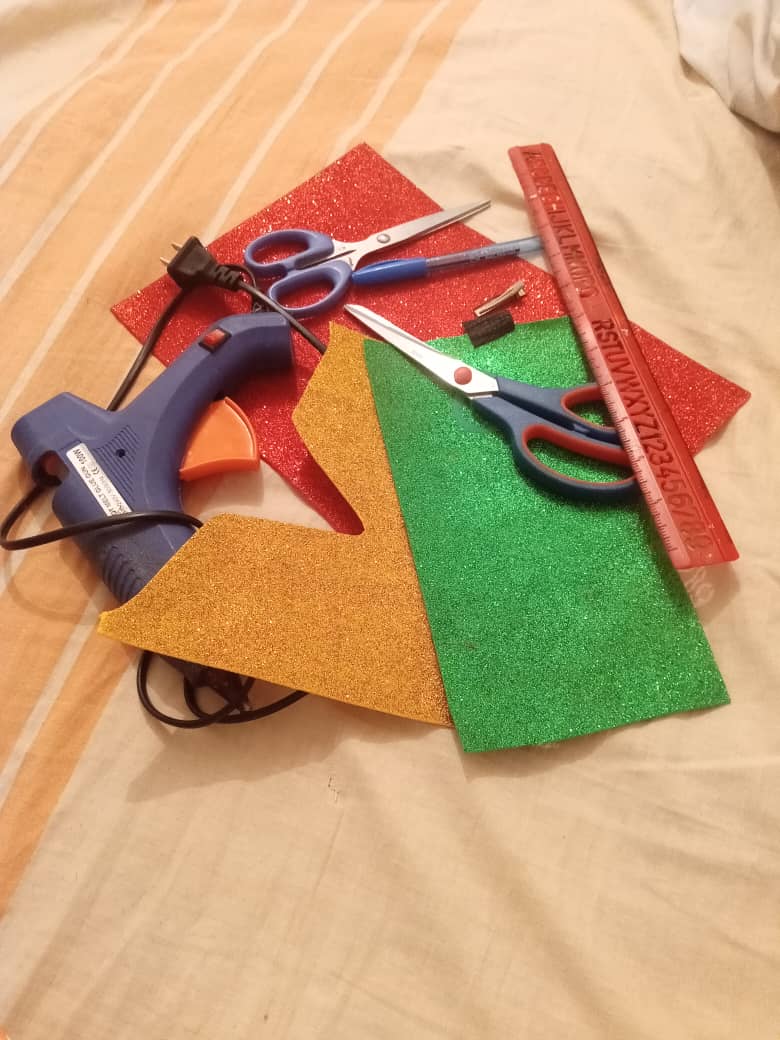
Materiales:
🍀Foami escarchado dorado, verde y rojo.
🍀Tijera.
🍀Silicón caliente.
🍀Pinza.
🍀Retazo de foami negro.
🍀Lápiz y papel.
🍀Objeto redondo.
Materials:
🍀Gold, green and red frosty foami.
🍀Scissors.
🍀Hot silicone.
🍀Gripper.
🍀Piece of black foami.
🍀Pencil and paper.
🍀round object.
Step by Step || Pasó a paso:
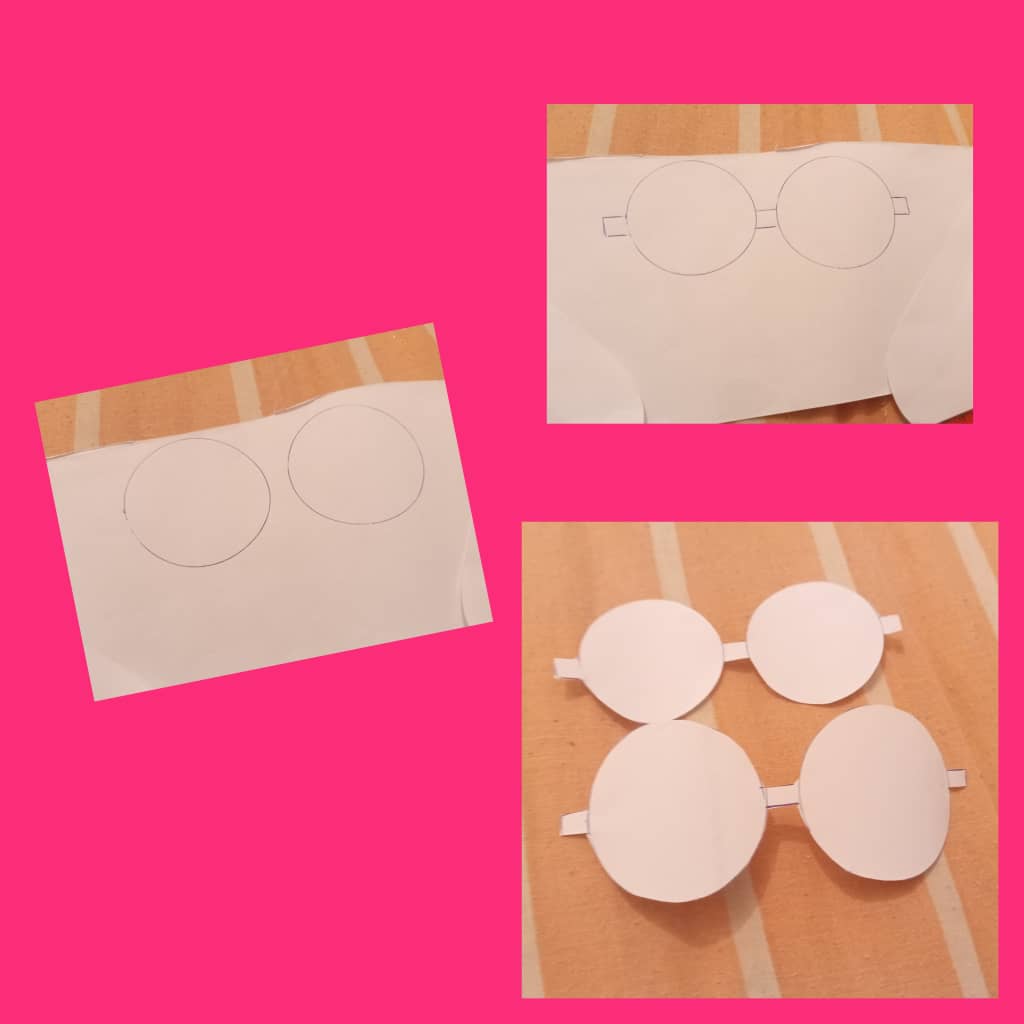
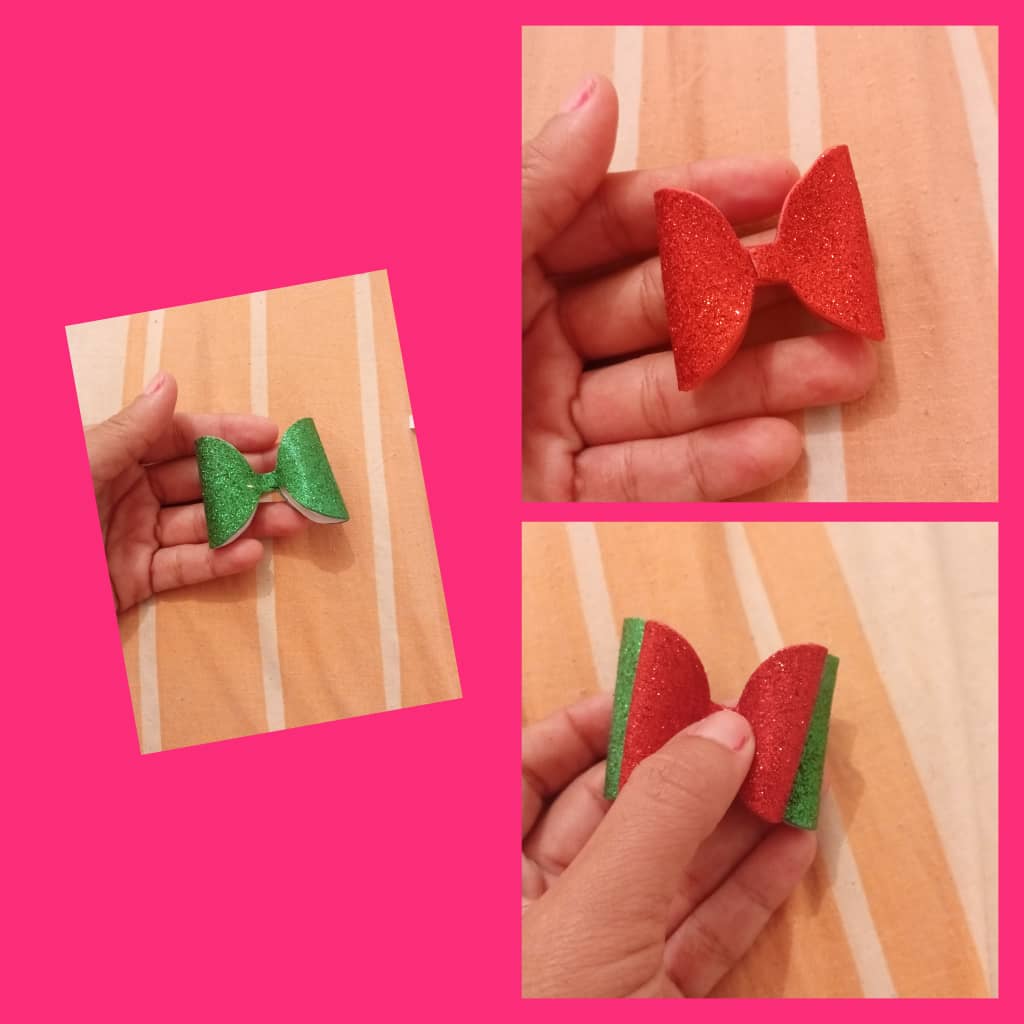
1er paso: Bueno mis amigos lo primero que vamos a necesitar son dos objetos circulares para plasmar en la hoja de papel los moldes a necesitar para nuestros lazos, tomamos para el molde más grande las medidas aproximadas de 5 centímetros por 5 cm dejamos 2 cm de distancia en ambos circulos cómo se aprecia en las imágenes de igual manera en ambos extremos, y para el más pequeño 3.5 centímetros por 3.5 y recortamos.
1st step: Well my friends, the first thing we are going to need are two circular objects to capture the molds we need for our ties on the sheet of paper, we take the approximate measurements of 5 centimeters by 5 cm for the largest mold, we leave 2 cm of distance in both circles as can be seen in the images in the same way at both ends, and for the smallest 3.5 centimeters by 3.5 and we cut.
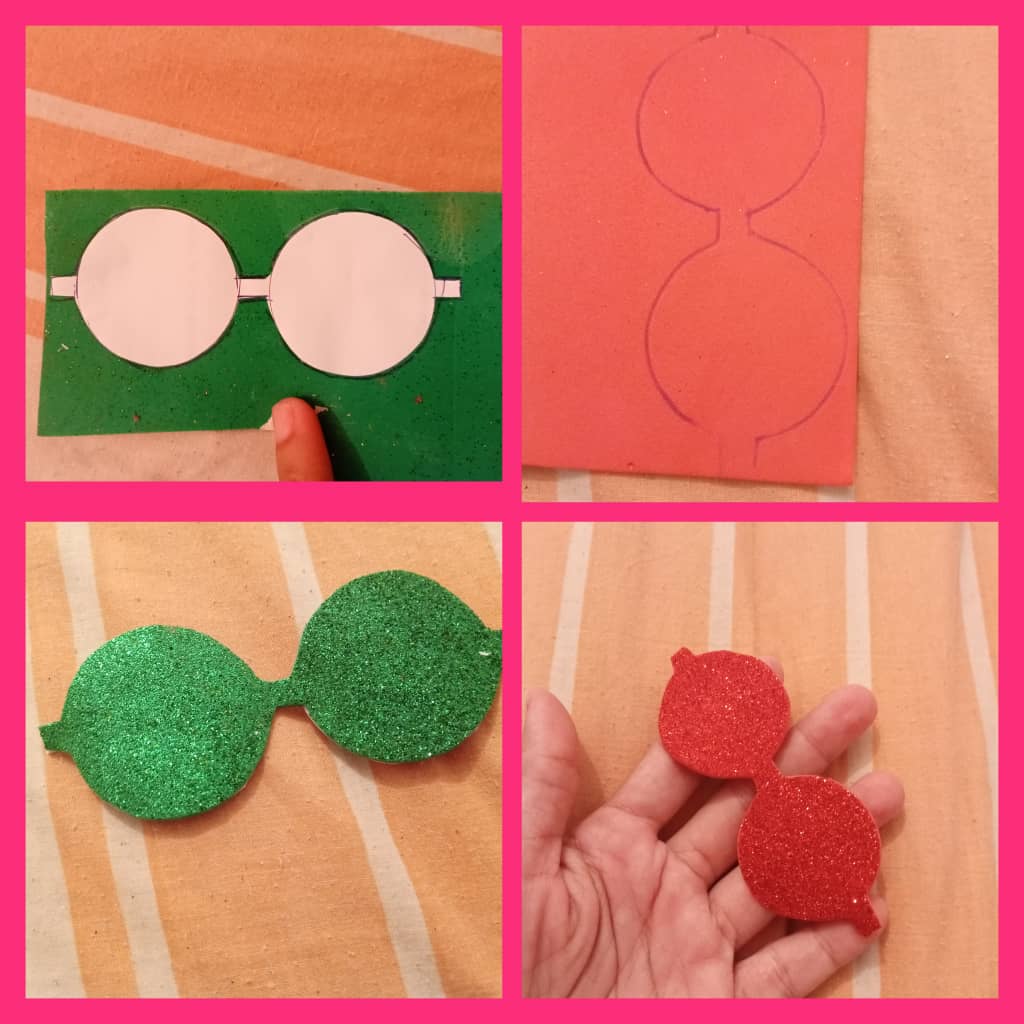
2do paso: Luego de tener ambos moldes listo vamos a plasmarlo al los foamis de color verde y rojo cómo más le guste a mi en lo para me gustaron de la Siguiente manera recortamos y unimos ambos extremos de la pieza al centro para formar los lazos y pegamos uno encima del otro cómo lo pueden ver.
2nd step: After having both molds ready, we are going to capture it in the green and red foams as I like best in what I liked as follows: cut and join both ends of the piece to the center to form the ties and we paste one on top of the other how can you see it.
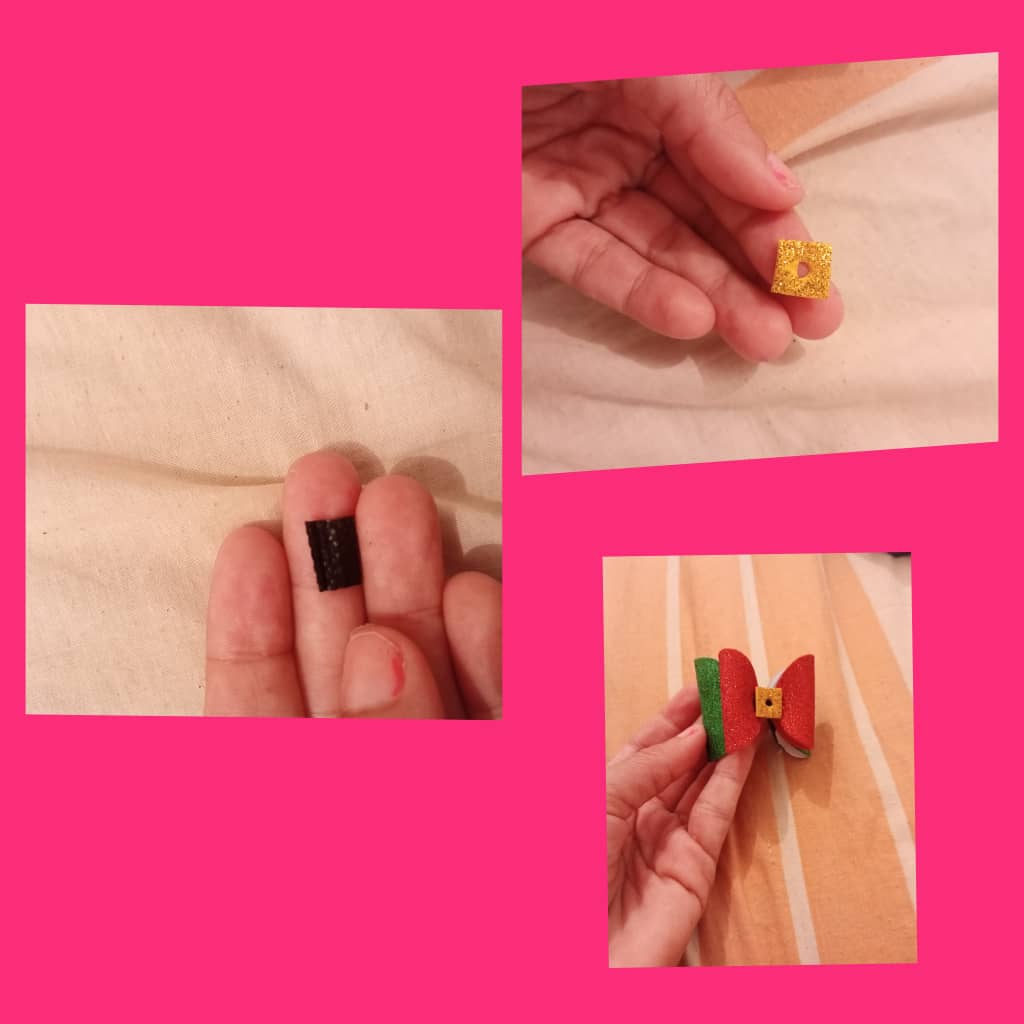
3er paso: Seguidamente vamos a tomar el retazo de foami negro y pegamos al centro de ambos lazos cómo se pueden observar, tomamos el foami dorado marcamos cuadro de 2 centímetros ancho por 2 centímetros alto y hacemos una abertura en el centro para hacer un diminutivo cinturón y pegar.
3rd step: Next we are going to take the piece of black foam and glue to the center of both ties as can be seen, we take the golden foam, mark a square 2 centimeters wide by 2 centimeters high and make an opening in the center to make a diminutive belt and paste.
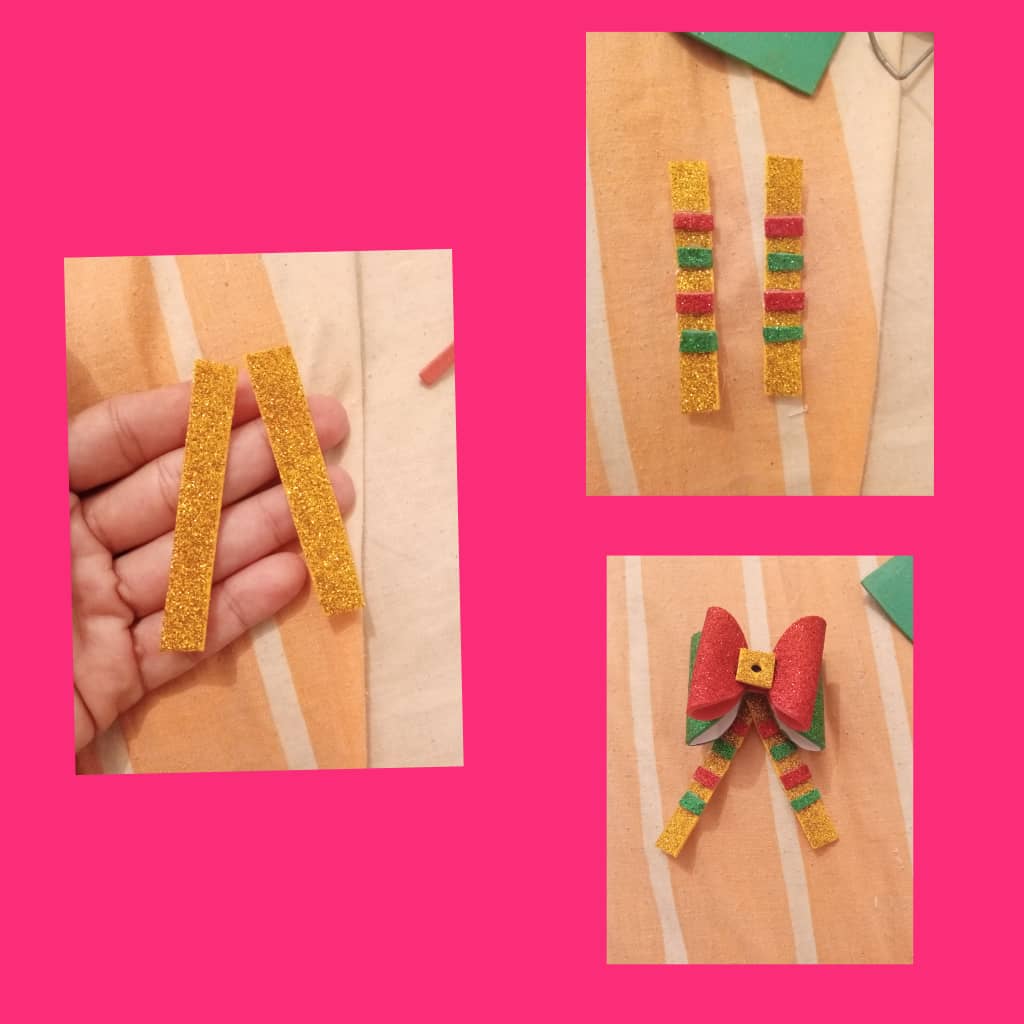
4er paso: A Continuación vamos a marcar en el Foami de color dorado y cortar dos piezas de 4 centímetros de largo por 2 de ancho y recortamos para hacer las piernas, cortamos listones de color verde y rojo y pegamos de manera intercadala, hacemos unas diminutivas botas de color rojo pegamos y anexamos al lazo.
4th step: Next we are going to mark on the golden colored Foami and cut two pieces of 4 centimeters long by 2 centimeters wide and cut to make the legs, cut green and red ribbons and glue them interspersed, we make some diminutive boots of red color we glue and attach to the loop.
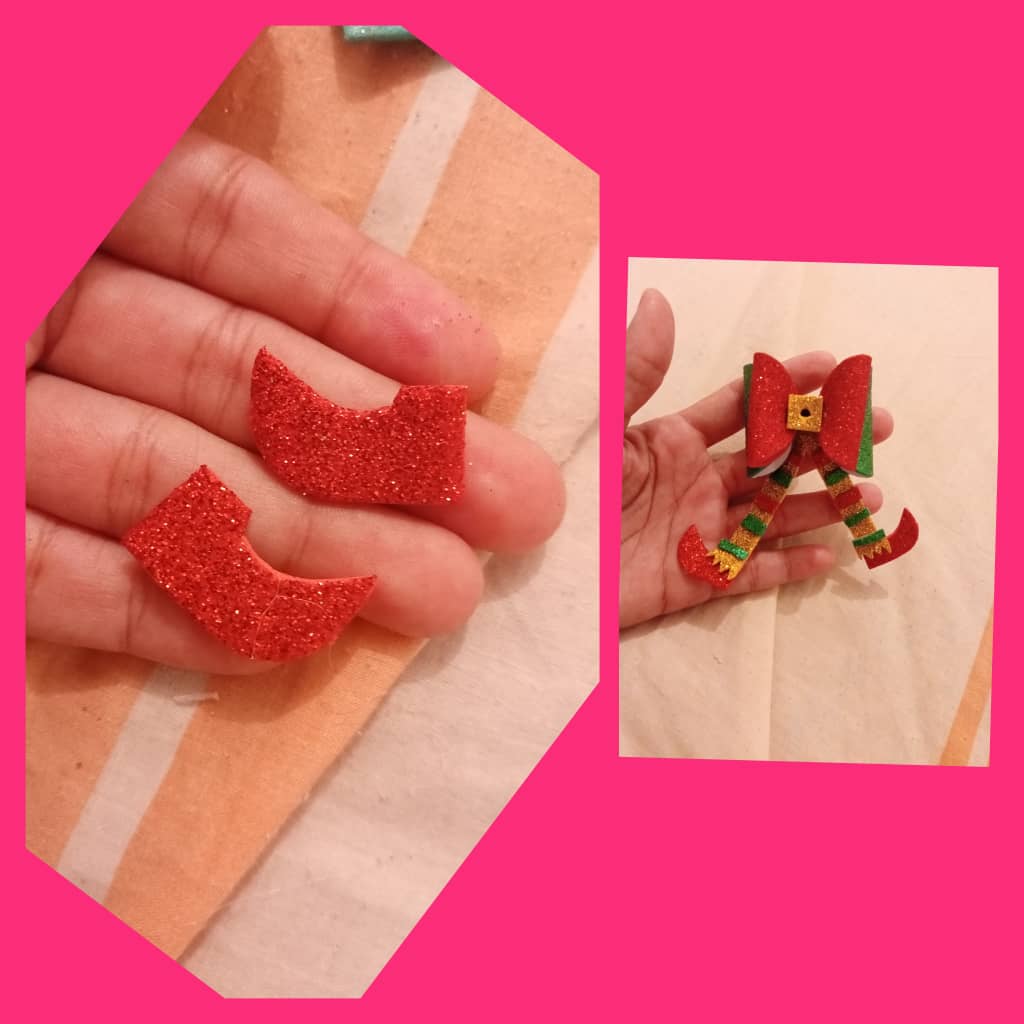
5to paso: Para finalizar hacemos un pequeño gorro pegamos en una esquina y en la parte de atrás pegamos la pinza y listo para que nuestras niñas estén hermosa en esta época navideña.
5th step: To finish we make a small hat, we glue it in a corner and we glue the clip on the back and ready for our girls to be beautiful this Christmas season.
Espero les haya gustado el tutorial que les comparto el día de hoy mis amigos, así que no se queden sin un lindo detalle para las niñas en está bella decembrina que se aproximan y lo mejor de todo es que puedes hacer con este material tan versátil y fácil de trabajar cómo lo es el Foami mis amigos. Saludos a todos y Bendiciones!.
I hope you liked the tutorial that I am sharing with you today, my friends, so do not miss out on a nice detail for the girls in this beautiful December season that is coming up and best of all, you can do with this versatile material and easy to work as is the Foami my friends. Greetings and blessings to all!.
Muchas gracias por visitar mi Blog
Thank you very much for visiting my Blog.

Me encanta este hermoso lazo para niñas, un tutorial de navidad muy creativo, se notan muy bien las piernas de duende, gran trabajo.
Me alegra que te haya gustado amiga, gracias por visitar mi blog y dejar tu lindo comentario. Saludos 🤗💖
Thank you for sharing this post on HIVE!
Your content got selected by our fellow curator jasonmunapasee & you just received a little thank you upvote from us for your great work! Your post will be featured in one of our recurring compilations which are aiming to offer you a stage to widen your audience within the DIY scene of Hive. Next time make sure to post / cross-post your creation within the DIYHub community on HIVE and you will receive a higher upvote ;) Stay creative & HIVE ON!
Please vote for our hive witness <3
Gracias por el apoyo!
https://twitter.com/150356289/status/1597288657349906432
The rewards earned on this comment will go directly to the people( @noalys ) sharing the post on Twitter as long as they are registered with @poshtoken. Sign up at https://hiveposh.com.
Gracias por el apoyo brindado amiga @noalys. 💖💖
Demasiado hermoso 🥰 También hago lazos pero más simples y con menos detalles 🤭 Pero éste tutorial me motiva a intentar hacer estos navideños ☺️
Muchas gracias amiga por visitar mi blog y dejar tu lindo comentario. Saludos 🤗
Siempre es un gusto 🌟
Hola @delvallecedeno. Te quedó hermoso felicitaciones. ¡Saludos!
Hola amiga gracias por la visita ☺️ y dejar tu lindo comentario 😘. Saludos 🤗