My first home-hand-made jam, with the recipe and walk-through
Lately, I found myself cooking, experimenting, improvising and generally playing more in the kitchen during the covid-isolation. I believe preparing our own food is not only cheaper but also more delicious, much healthier but sometimes also sooo satisfying! The feeling of creating something that makes you lick your fingers is simply amazing :)
That night, there was a strong wind storm and the next morning I picked up from our garden what the wind has shaken down. Look who gave me a helping hand, typical for a #Caturday... Ops, a helping paw. Her name is Chochy, a young mother of four, she's very caressing and always comes to me when I call her :)
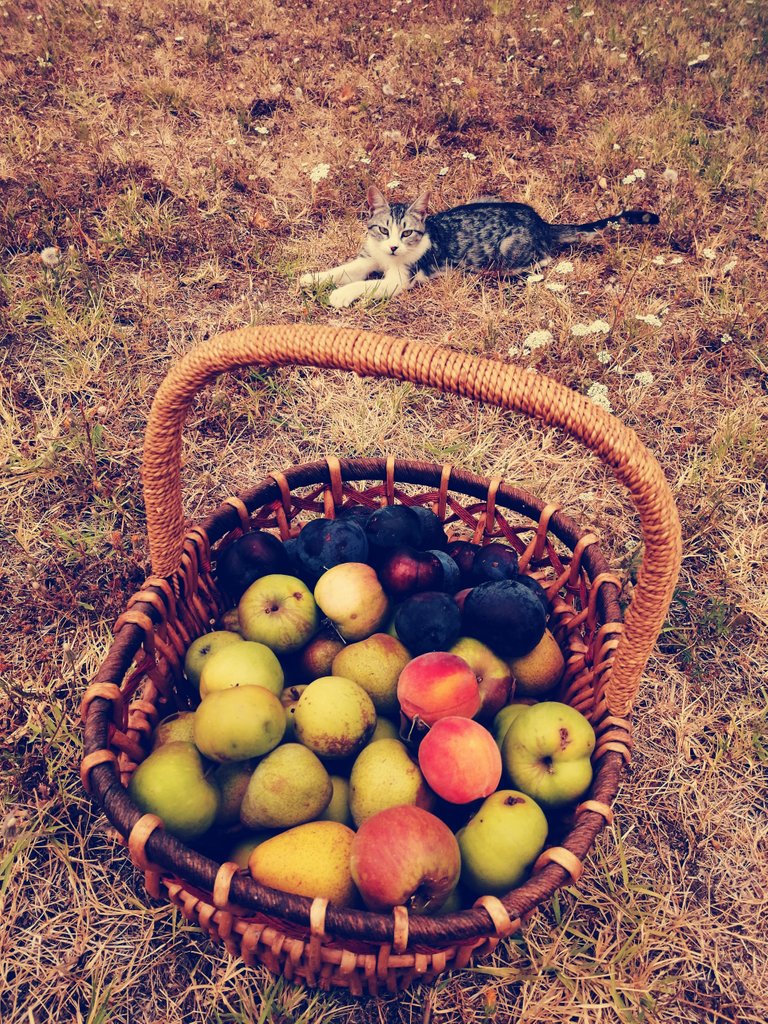
Too bad I can't pass you the aroma of that wind-picked fruit basket, it was heavenly :)
So...
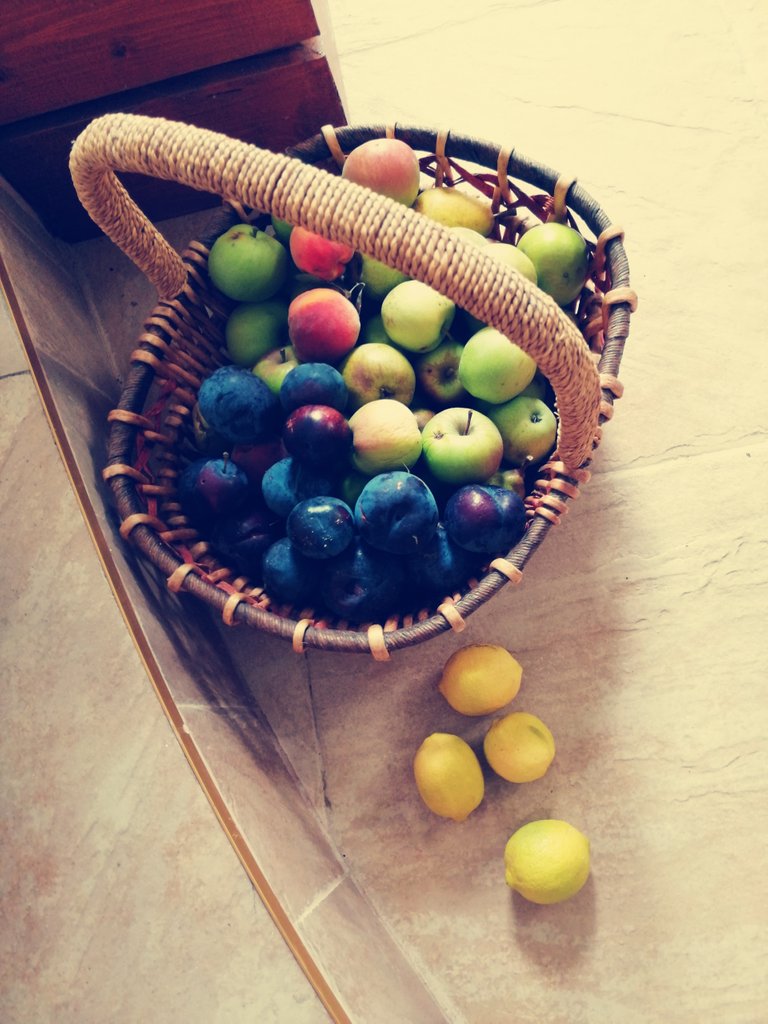
Step 1 - Pick up fruits - check!
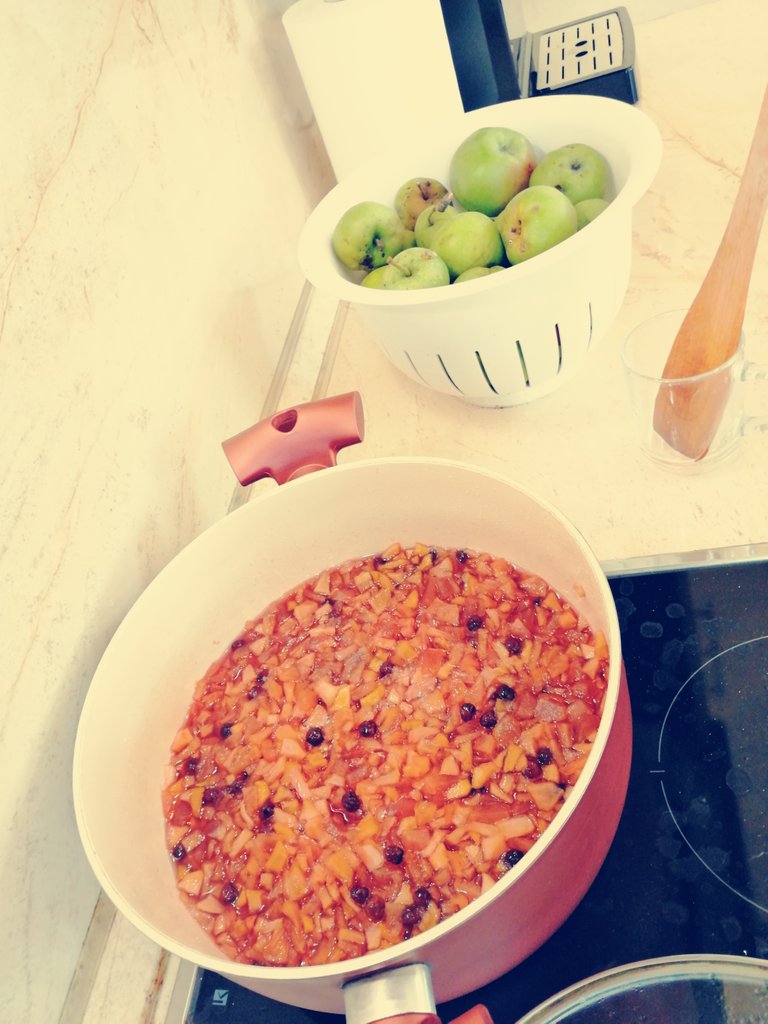
I decided to go with whatever our garden gives at the moment. The fruits are not ripe enough yet, but as the wind shaken them all off, I think the jam was only solution to preserve those natural vitamins and fibres... Apples, pears, plums. There were few peaches, but I have eaten them, so nothing left for the jam, LMAO.
After checking several recipes online, all quite different and a bit confusing, I decided to test a single "dose".
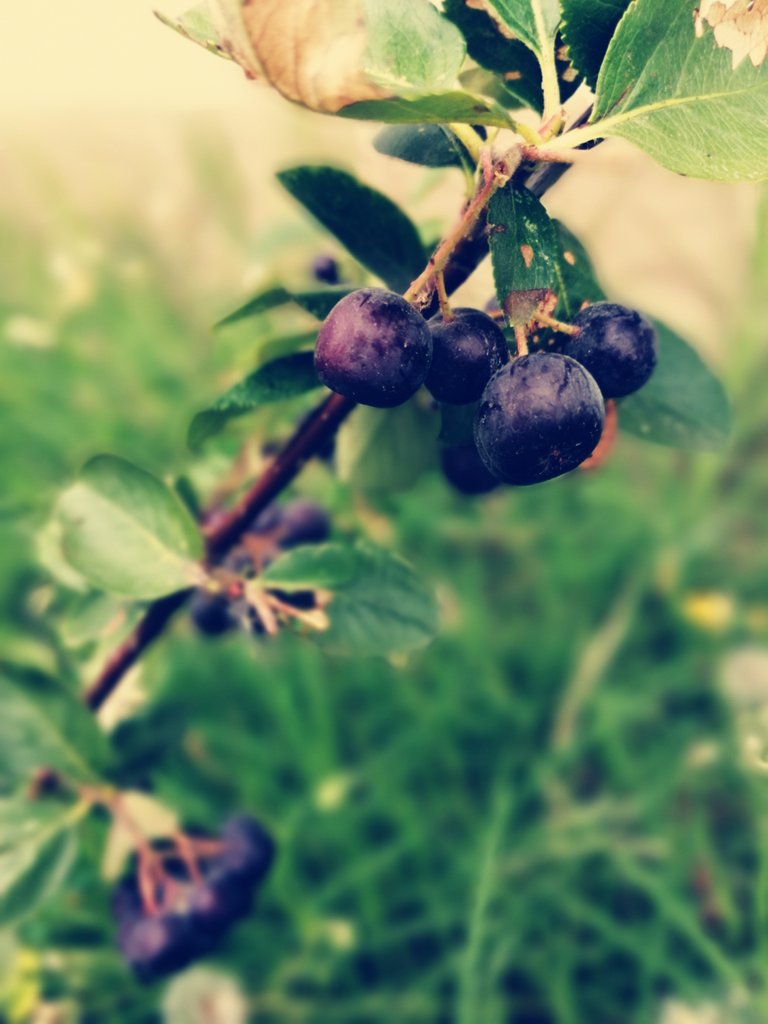
This spring I planted a small Aronia berry plant and I was really surprised to see it heavily laden with big fruits even the very first year, so I decided to put some in the jam as well.
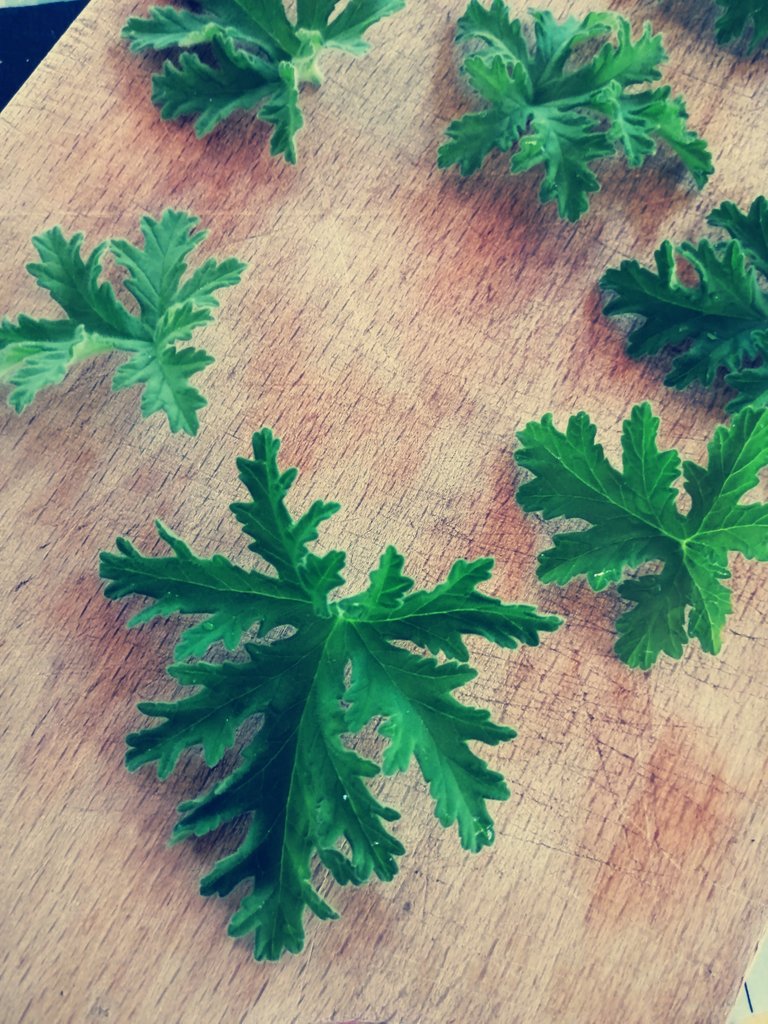
From my childhood, I adore this aromatic plant, called "Индрише" / Indrishe in Bulgarian, the Latin name is "Pelargonium Roseum". Put to anything sweet and it makes it... simply divine! So I picked few small leaves, one for each of the jars.
Step 2 - Prepare all ingredients
- 2 kilograms of fruits
- 1 kilogram white crystal sugar
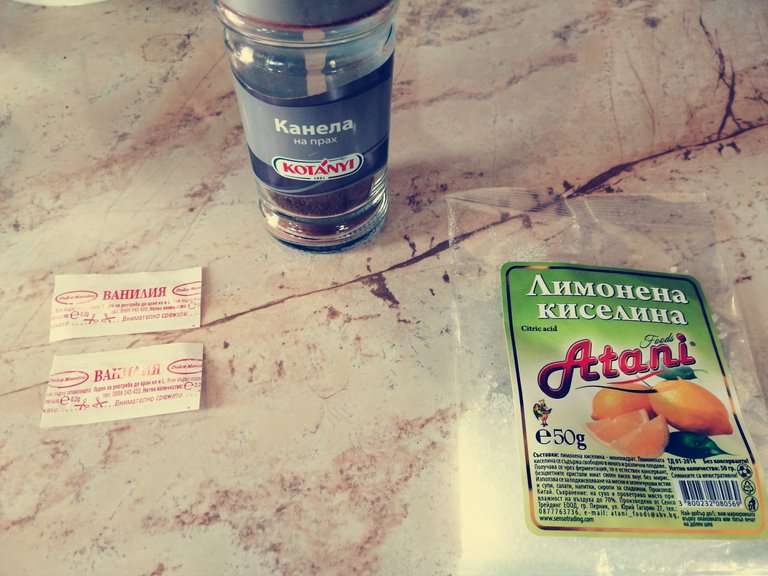
- 1 teaspoon of Citric Acid (this is the only preservative)
- 1/2 litre water
- 1 teaspoon of cinnamon
- 2 packs of vanilla
Step 3 - Boil the water with the sugar until the syrup becomes semi-thick.
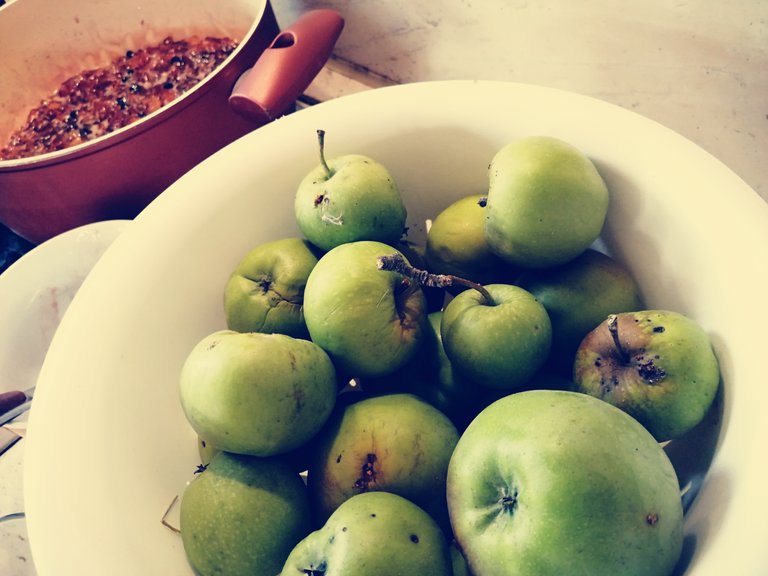
Step 4 - Wash, peel off and cut everything into small pieces
Now I have to admit this is the longest and the most annoying part. Maybe because we try to grow everything as "bio" as possible, there are many "defects" in the fruits like bruises, worms, etc. :) So here you have to find a way to include the members of your household to help you. Otherwise it will be a long hour. :D
A trick to prevent the apples and pears becoming brown /oxidizing/ while you cut the pieces is to pour them instantly into the hot syrup, of course, remove the pan from the hot-plate.
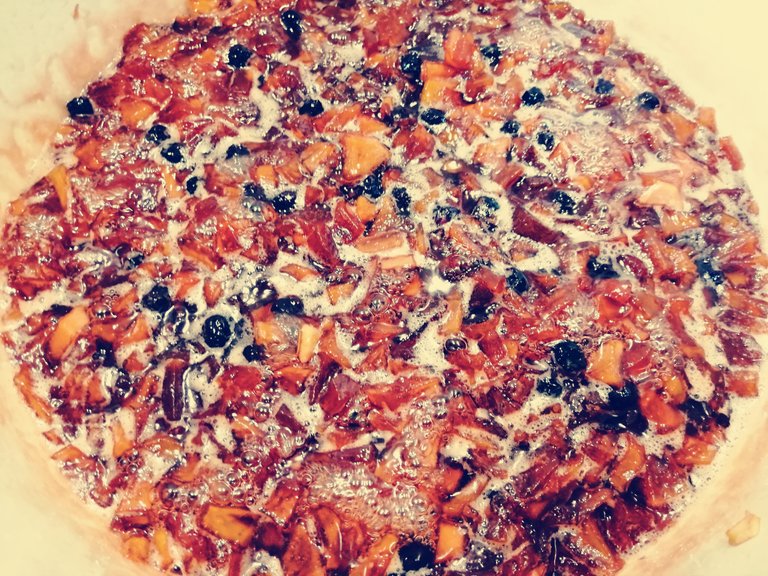
Step 5 - Slow cook for about an hour or so.
I like the jams to be thicker and well done so an hour was enough. Our hot-plate has 9 levels, I used the 5th.
Remove the white foam that forms on top. I don't know why but I remember that from the times I was helping my grandmother.
Step 6 - Wash and sterilize the jars
The best way to do that is wash them carefully and then leave them in a preheated oven at 100 degrees Celsius for about ten minutes. You know, above 60 degrees C every bacteria and microbe dies ;)
Step 7 - Add the preservative
Once you decide the jam is ready, dissolve the teaspoon of citric acid into two tablespoons of hot water, stir up very well and cook for another 2-3 minutes. Then remove the pan from the hot-plate.
Step 8 - Add the cinnamon and vanilla and stir up well again.
Step 9 - Fill up the warm jars, close the caps and turn upside-down.
While it all cools down, the process creates a vacuum thus helping for even longer storage.
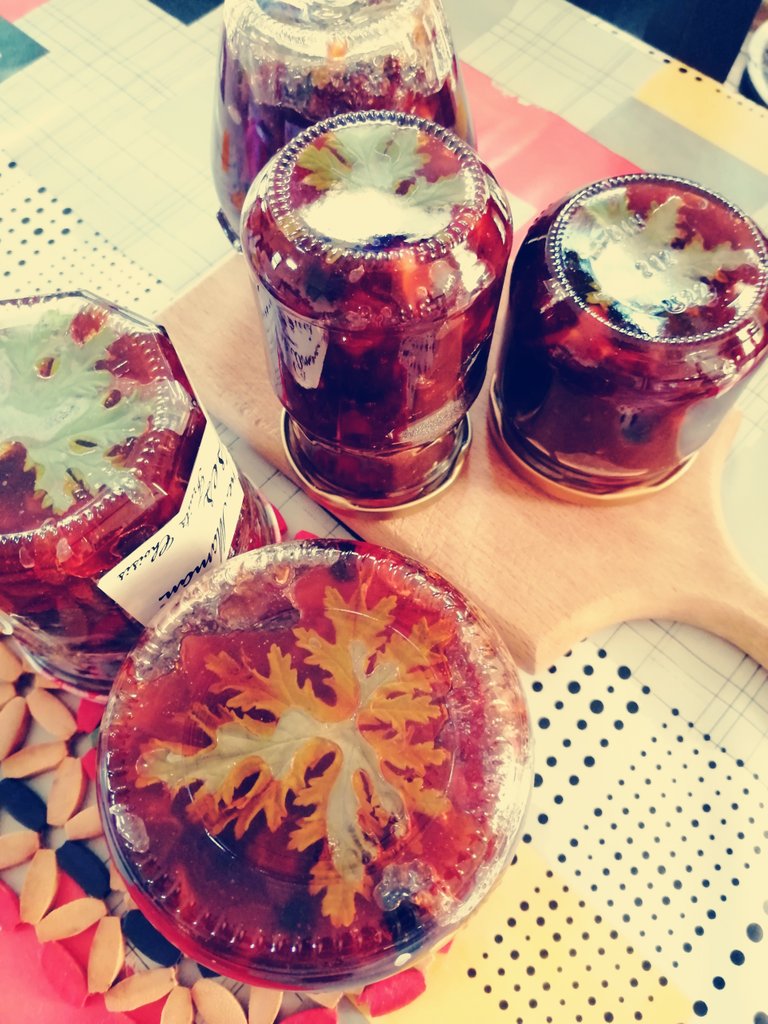
Well, here you see only five jars, I'm guilty as charged for eating some of it during the fill up process, LMAO. I really loved the result and that's why I'm sharing the whole process with you!
I am bringing tomorrow one of the jar to some friends to taste it and if they like it, I will do more. Frankly, I they do not like it, I will still make more, as I totally enjoyed it!
I hope you've enjoyed it! Thanks and stay safe!
Copyright: Damian Hadjiyvanov, Light Captured
Check out my photo site: https://hadjiyvanov.com/
For licensing my photos, please drop me a message on Discord: lightcaptured#2698
Thank you for all the support!
Have a great photo! :P

Thank you, @ackhoo and @qurator :)
You're welcome! :)
@tipu curate
Upvoted 👌 (Mana: 8/32)
Thanks!
Thanks!
#posh
https://twitter.com/hadjiyvanov/status/1292085491052019712?s=20
Looks very delicious 🥘. Like everything you cook. Can't wait to taste it!🚗
Hehehe, thanks, soon, I hope :)
Congratulations @lightcaptured! You have completed the following achievement on the Hive blockchain and have been rewarded with new badge(s) :
You can view your badges on your board And compare to others on the Ranking
If you no longer want to receive notifications, reply to this comment with the word
STOPTo support your work, I also upvoted your post!
Do not miss the last post from @hivebuzz:
Thank you :) Keep up the great work ;)
You are welcome @lightcaptured! We will give our best to achieve that! ❤️🙂👍