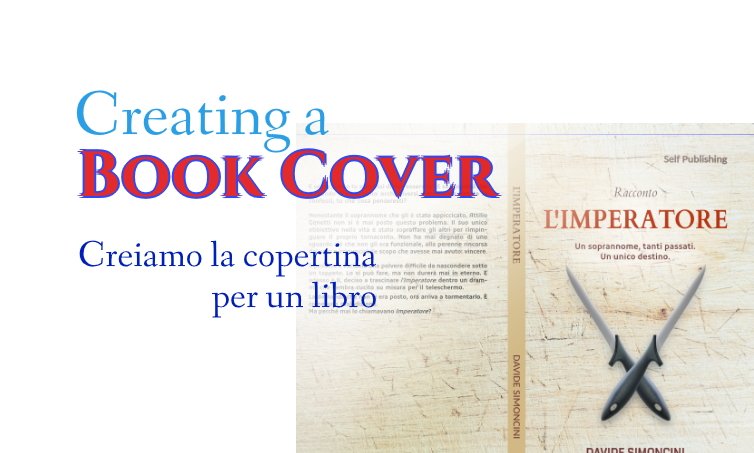
HOW DO WE CREATE A BOOK COVER? | The main steps during a personal experience
All Rights Reserved.
All the images contained in this post are taken, created and/or modified by me. All the contents in this post are copyright-protected. All the uses of the contents - and their derivatives -, except for the spread without modifications through social media channels, are strictly prohibited without the explicit consent of the author.
This post wasn't created for promotional purposes, although it may have.
Hello Hive!
I recently decided to publish a new story on the Amazon platform, using the excuse of participating in a contest that will expire in a few days. Publishing as an independent, I had to get my hands dirty myself with the creation of the cover, a process that I decided to document by providing some useful ideas for those who want to try their hand at this type of adventure. Let's see it in more detail.
Start!
The first step in creating covers for our books is to ask those who will be in charge of the printing for the precise formats and - if possible - templates. This is because there are specific measurements for each book format that we will choose to print, measurements that must be respected to the millimeter. Any design error or any post-print finishing error will result in an off-centered, crooked cover, or whatever other bad result that we certainly wouldn't want to see.
Firstly, it's good to start from a template: a very simple example can be found in the figure below. The template is nothing more than a scheme with the most basic elements of a project. In our case, it's made up of areas that will be filled with more important elements and areas where absolutely they will not be inserted.
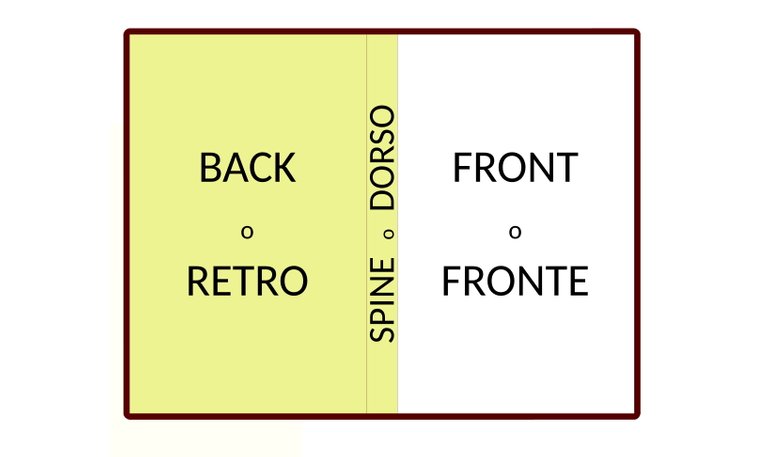
The cover I treated is the one for a physical book. We can distinguish an anterior part ("front"), a rear part ("back") and a side ("spine"). These three sections will be filled with the various book information.
I started by entering the TITLE, the AUTHOR and the PUBLICATION TYPE, as you can see below.
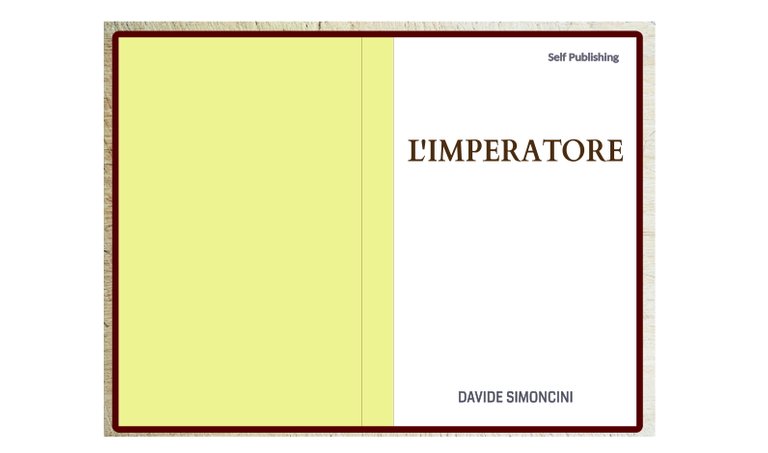
To fill the project more carefully, I took as an example a cover created for my previous novel, using the same type of font and layout: we can distinguish various areas within it, which I will discuss better along the way.

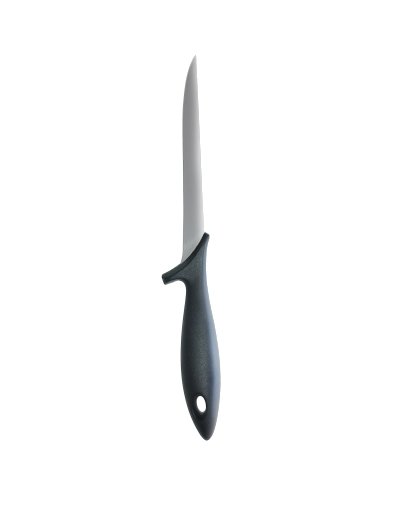
I started preparing the elements to insert, beginning with the background image. I took two photos, one of a knife that I found among the cutlery, and the other of an old wooden cutting board worn to the right point. Here's a preview.
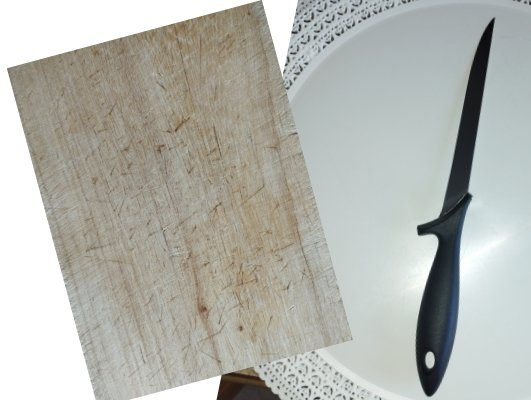
I reviewed the colors of the wooden board and used the resulting image as a properly-called background. I decided to characterize it thanks to two crossed knives, a subject that I made after having trimmed the image of the knife and adding some artificial reflection.
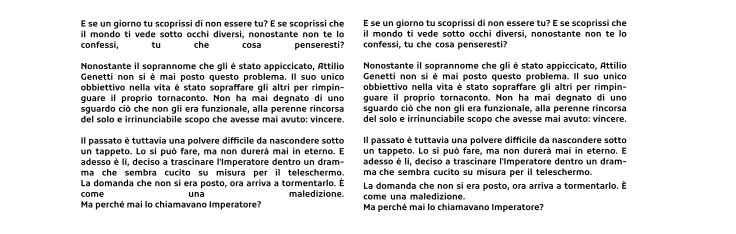
The next element belongs to the back cover, which is the descriptive text of the whole book. I first created the text, then I reshaped the layout, trying to gather it and create a result acceptable to the eye.
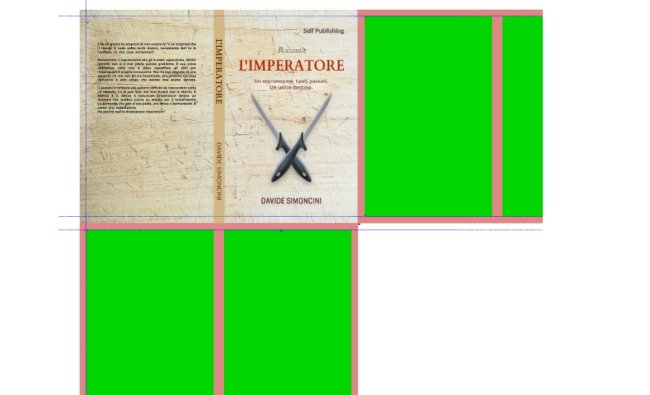
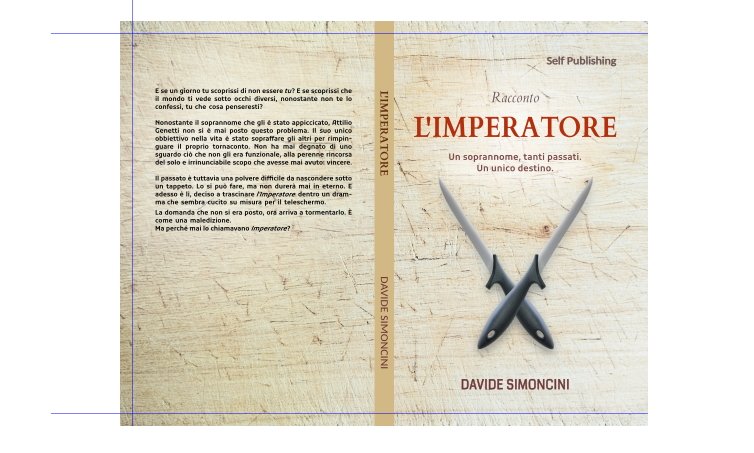
At this point, it was necessary to insert each element in the right place: I started with the front. Inside I have inserted the TITLE, the AUTHOR, the TYPE OF PUBLICATION and the TYPE OF WORK, then a small ANTICIPATION or SLOGAN, and finally the BACKGROUND IMAGE.

Then I moved on to the back, containing the DESCRIPTION of the book, a BACKGROUND IMAGE and an area that I highlighted with a black brush stroke, an area that will be covered by the SALE CODE (for the Amazon platform, the ISBN or ASIN code).
The last side of our cover is the "spine". Inside, I have inserted the TITLE of the book, the AUTHOR, and a BACKGROUND IMAGE (this time in a solid color).

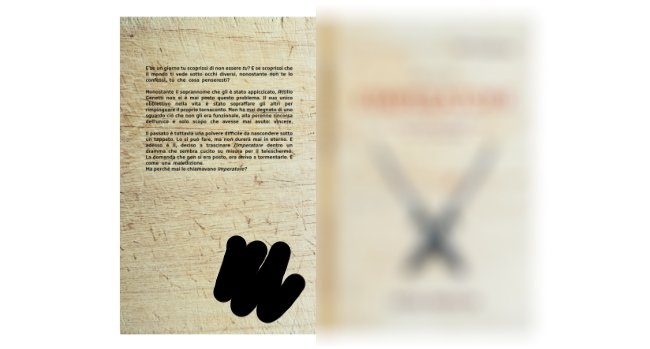
At this point, the big thing is done, but we have to carry out a thorough check on the centering and margins: for physical covers, a part of the cover will be eliminated, either by means of some folds or with a clean cut. Within these areas, there must be no information about our book, otherwise, they will be eliminated or hidden from view. In addition, we will have to center the elements by calculating from the beginning the part that will remain after the cutting or folding phase, because only that portion will be visible: if we don't, we will get an off-center cover. Here is a screenshot taken during the process, where I helped me with guidelines and copies of the templates used from the start.
During the last check, I noticed that the textual portions were not very contrasting with the background image, and I decided to solve the situation by inserting areas of light and shadow areas between the writing and the background. The finished result? Here it is.
Cover done!
As you've seen, creating a cover isn't too difficult. It takes time and some basic knowledge of the graphics platform you are going to use. In the example case, I made use of the open-source Inkscape, which I recommend if you want to obtain easily resizable files without loss of detail. The rest is very subjective, variable according to personal taste, the themes of the book, and everything that can come to your mind. The “right” cover can make a difference, even if getting it is always a bet (which, as often happens, is not easy to win). The colors present can already give an idea of the themes that will be treated. I opted for warm colors that contain a text of just 50-60 pages, halfway between general fiction and thriller. We will see what the results will be.
With this, I greet you, and I hope that the post has served to give you an idea of how to start designing a cover. If you'd like more insights into simple graphic designs, stay tuned to the #digitall tag here on Hive.
https://twitter.com/EveryWork1/status/1561710144542703618
The rewards earned on this comment will go directly to the people( @davidesimoncini ) sharing the post on Twitter as long as they are registered with @poshtoken. Sign up at https://hiveposh.com.
Many people are able to combine the two activities of traveling and earning money https://tilsner.net/2022/11/15/how-to-quickly-earn-money-while-traveling/ . Some ways to do this include being a digital nomad, teaching English abroad, working as a tour guide, being a freelance travel writer, or working as an au pair. Additionally, some people are able to find remote jobs or contract positions that allow them to work while traveling.
Posted using PALnet
Thank you for sharing the link with me :)