Soil...is Sexy! (Free & Easy Soil Amendements)
Hello, friends and fellow worker bees!
Today I'd like to offer some tips on cheap and easy soil amendments. However, first of all, I'd like to bore you all with an anecdote. It was my first week at my new High School. Growing up in rural Northumberland, our schools have vast catchment areas encompassing the many small towns and villages in the region. Due to the rural nature of our lives and the local economy, our first year of High School included a mandatory Agriculture class. This class was to take place in an improvised classroom built on the adjoined school farm (still never heard of one of these anywhere else in the UK)
As our class of around 25 pupils filed in and took our seats on the long wooden benches, we discovered the subject of that days lesson...SOIL. This made sense for an agriculture class, right? However, we also noticed that some mischievous pupil, presumably one of the first into the room, had written 'is sexy!' alongside the title. Our teacher strolled into the room as the lesson was about to begin. He quieted the pre-lesson chatter by exclaiming in a loud voice "SOIL" before wheeling around to the blackboard and seeing the improvisation! He merely continued "is sexy! Yes it is!" As I'm sure you can all imagine this brought raucous laughter from myself and the rest of the young students. It also leads me nicely to my topic for today...SOIL! 😆

Now that I am a few years in to my gardening journey it is time to move on from the basics and advance towards the thinking of a more experienced gardener. While my initial concerns in the very early days were simply 'Can I grow any kind of crop successfully?' as well as 'Can I afford to start a food-producing garden off?' my thoughts are now geared towards sustainability. Consequently, as I've grown and harvested over the last few seasons I've come to realise that sustainability starts first and foremost with the health of my soil.
Here are some tips and tricks that I've picked up along the way to improve my soil health in a cheap and easy way. Hope you all enjoy and find these tips useful (and sexy!) in your own efforts!
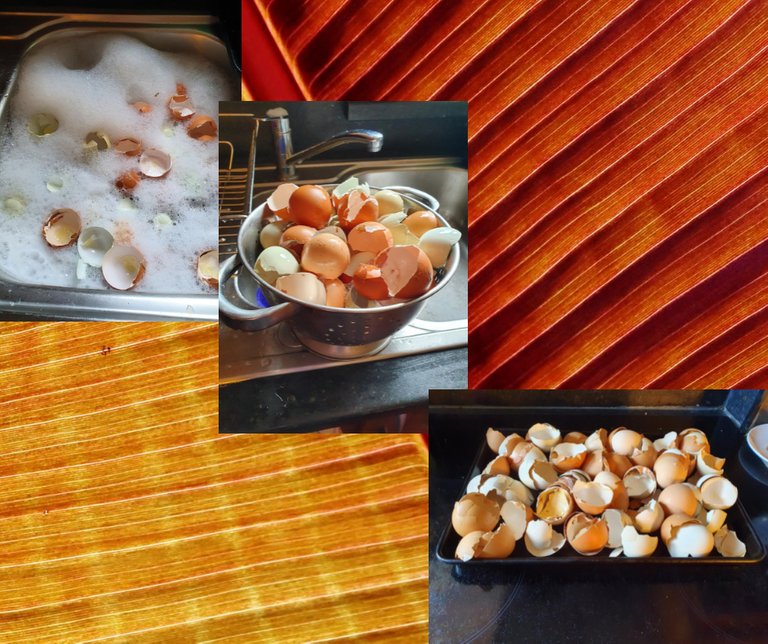
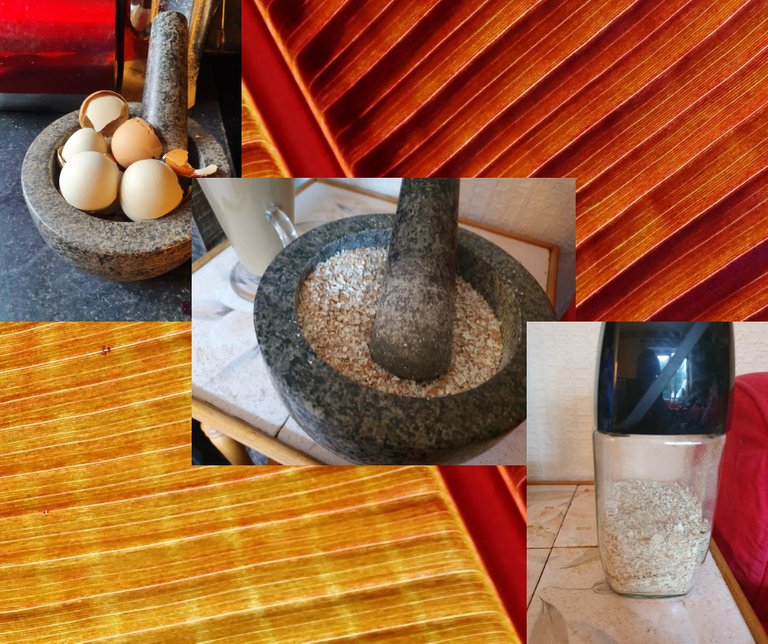
1. EGG SHELLS
My first free soil amendment comes from a readily available item found in a lot of homes...egg shells! Egg shells are a great way to restore valuable nutrients to your soil that may not but present in a lot of commercial fertilisers. The shells contain around 40% calcium as well as around 26 other trace minerals. Blossom end rot can be prevented on the fruits of tomatoes, aubergines and peppers, which comes from a plant having a deficiency in calcium. Crushed egg shells are a slow-release method of amending the calcium levels in your soil. This is a rundown of how to speed up the process.
- Wash the shells to get rid of harmful bacteria like Salmonella.
- Drain the shells so that they are not full of water.
- Bake the shells in the oven at 200 degrees celsius or 390 fahrenheit for around 20 minutes to make the shells brittle. (Make sure you have your window open as cooking the shells smells slightly unpleasant.)
- Grind the shells and store until needed. (This can be done in a food processor however, I prefer to save electricity whenever possible and as such use a pestle & mortar.)
2. Banana Skin Brew
My second method is a much faster method of getting nutrients back into tired soil and that is by making a banana skin brew. When we think of a typical commercial garden fertiliser we usually consider the product's NPK rating. This represents N=Nitrogen, P=Phosphorous and K=Potassium. Nitrogen encourages growth of the leaves, phosphorous helps growth of a strong root system/blooms and potassium benefits the plant's overall health. This is where banana brew comes in useful. While commercial plant feeds are generally weighted towards nitrogen at roughly NPK 20-5-6, banana skins are known to contain 25% phosphorous and 42% potassium. To make banana brew follow these easy steps.
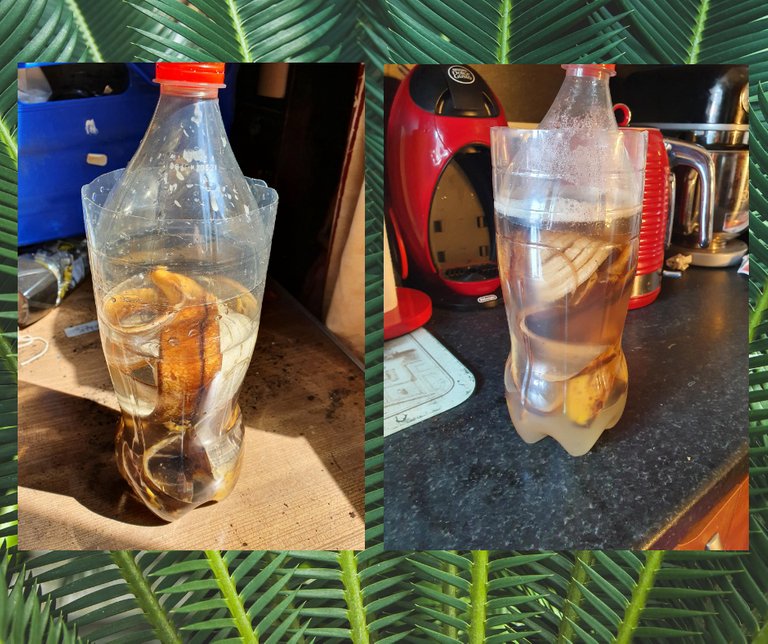
- Cut off the top of a used bottle.
- Stuff with banana skins.
- Cover with water (make sure skins are fully covered so they
don't go mouldy). - Slide the top of the bottle back in place to protect from fruit flies.
(I punched some holes in the lid to prevent bad smells.) - Leave out of direct sunlight for 1-2 weeks for the nutrients to be passed into the water.
*Another method that can be used for a slower release is to place the skins outside on a metal tray until dry. The dry skins can then be ground in to small pieces using a pestle and mortar.
3. Nettle Tea
The nettle is a plant that grows abundandtly in many areas of Europe. A weed to most people and avoided due to it's stinging needles, it is widely misunderstood. The nettle is in fact one of the most nutrient-dense plants found on the planet! This can be used to our benefit in many ways including by eating it, drinking it in a tea, or in our case by using it as a fertiliser.
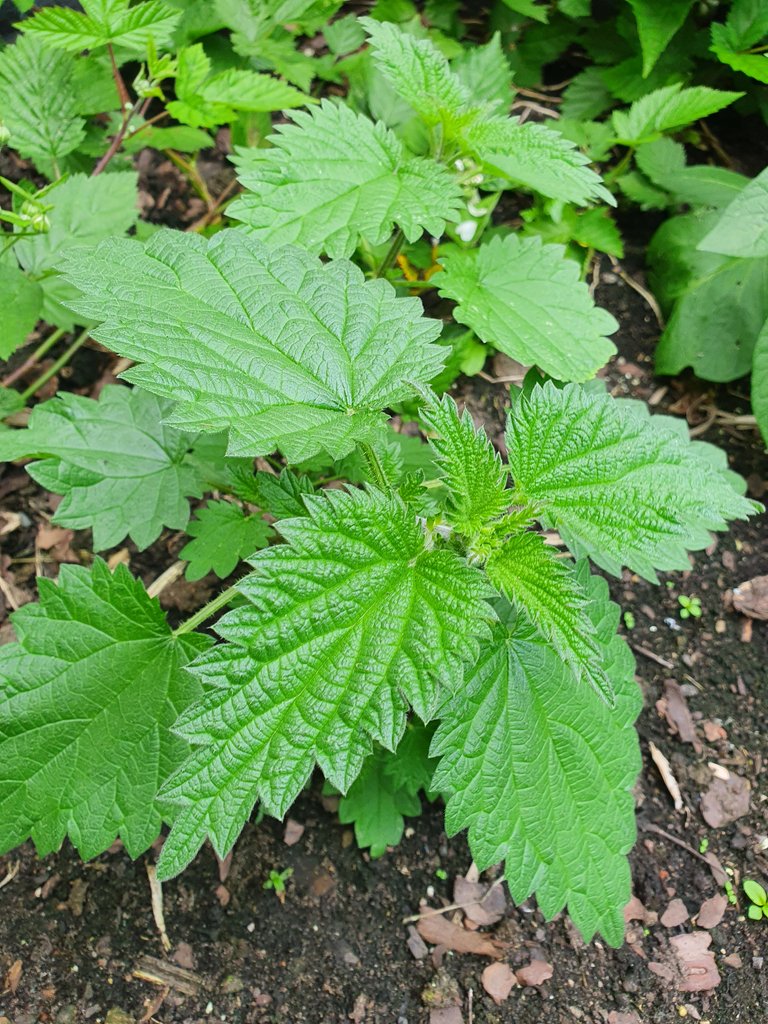
This can be achieved in a similar way to the banana brew.
- Collect nettles and pack into a container.
- Cover with water. (Make sure your container is air tight as this
method produces pungent smells.) - Leave in the container for 2-3 months ideally.
- When brewing is complete, use the fertiliser by mixing it with
water at a ratio of roughly 10-1.
4. Human Urine
First off, don't worry. I'm not going to subject you all to images of me pissing into a bottle, however this is a method I have often used. Human urine is regularly found to contain around 95% water and 2% urea. Urea is found is many commercial feeds so we're not doing anything that hasn't been done before. Urine from the average human with a relatively healthy diet has an NPK rating of around 11-1-2, meaning it is great for leafy greens.
In many parts of the world farmers use urine combined with wood ash and water to make a near perfectly balanced fertiliser. So give this one a go, it's piss easy! 😆
Thank you for your time and I hope these tips can help you increase your yields while keeping your soil full of nutrients! As always, big love to my friends and guild mates in #The Alliance.


Hi @brucegryllis,
Thank you for participating in the #teamuk curated tag. We have upvoted your quality content.
For more information visit our discord https://discord.gg/8CVx2Am
great tips, I also use nettle liquid manure
Thanks! What kind of results do you get and what do you tend to use it on?
as an additive when watering the plants as a fertilizer. the way it stinks it must be good
Congratulations @brucegryllis! You have completed the following achievement on the Hive blockchain and have been rewarded with new badge(s):
Your next target is to reach 20 posts.
You can view your badges on your board and compare yourself to others in the Ranking
If you no longer want to receive notifications, reply to this comment with the word
STOPTo support your work, I also upvoted your post!
Check out the last post from @hivebuzz:
Support the HiveBuzz project. Vote for our proposal!
Yay! 🤗
Your content has been boosted with Ecency Points, by @brucegryllis.
Use Ecency daily to boost your growth on platform!
Support Ecency
Vote for new Proposal
Delegate HP and earn more
That is really interesting, I didn't know you could use eggshells like that! 😎
Yeah, it's a useful tip. I've been doing it for years and as long as they are ground up they break down really quickly. I believe they are also good for a worm's digestive system.