Delicious melon marmalade [ENG-ESP]

Image designed in GridArt
Greetings dear friends and vegan food lovers. Jams are really delicious, in my childhood days I remember that my parents used to buy several flavors, my favorite, strawberry. Instead of buying a packaged one with artificial preservatives, I said to myself, why not make a homemade one. I would have preferred to make a strawberry jam, however, having a juicy melon at hand this would be the fruit of choice, so I prepared a delicious melon jam.
The recipe is very simple, it only requires three ingredients, but some patience because it needs more than 30 minutes of cooking. On the other hand, the melon needs more cooking than a strawberry, because it is a little more fibrous. To speed up the consistency of the jam I opted to help a little by using the blender. This is my first time preparing jam, I was a little nervous, but I was happy with the result, I got a delicious flavor and a perfect consistency. After refrigerating it, it simply tasted great..
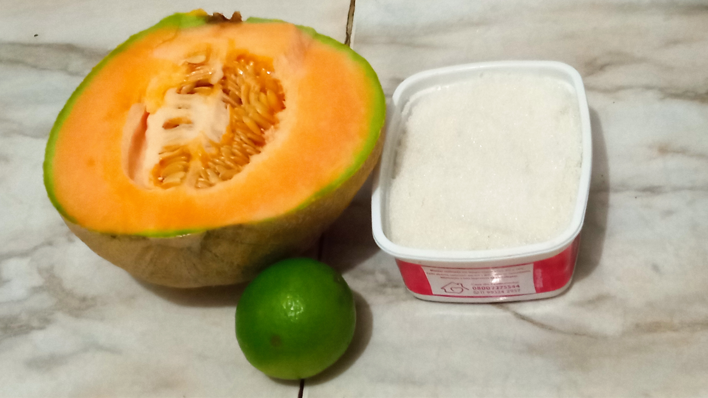
Ingredients
- ½ Melón
- 1 ½ cup sugar
- 1 Lemon
Preparation
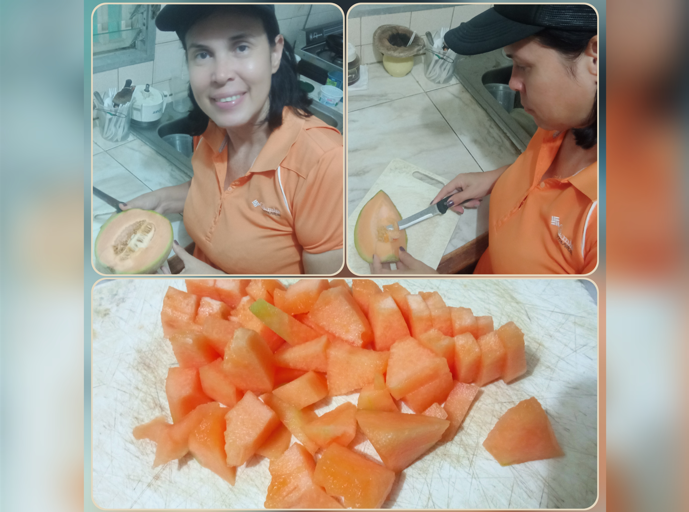
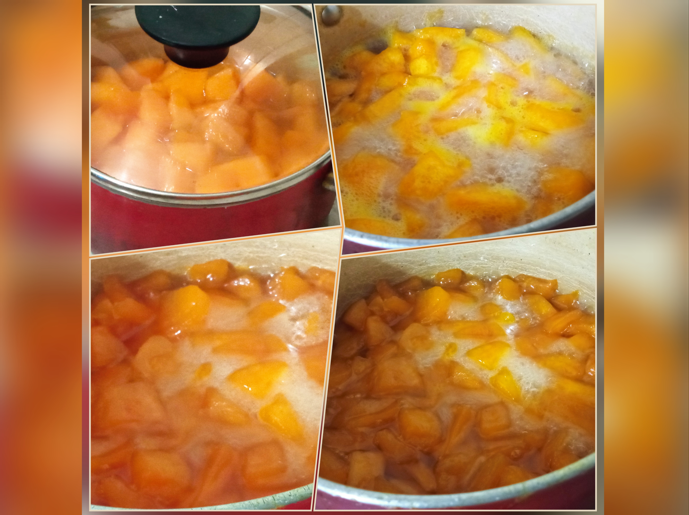
1.-. We remove the seeds from the melon, its peel, wash it and cut it into small pieces. Pour it into a pot.
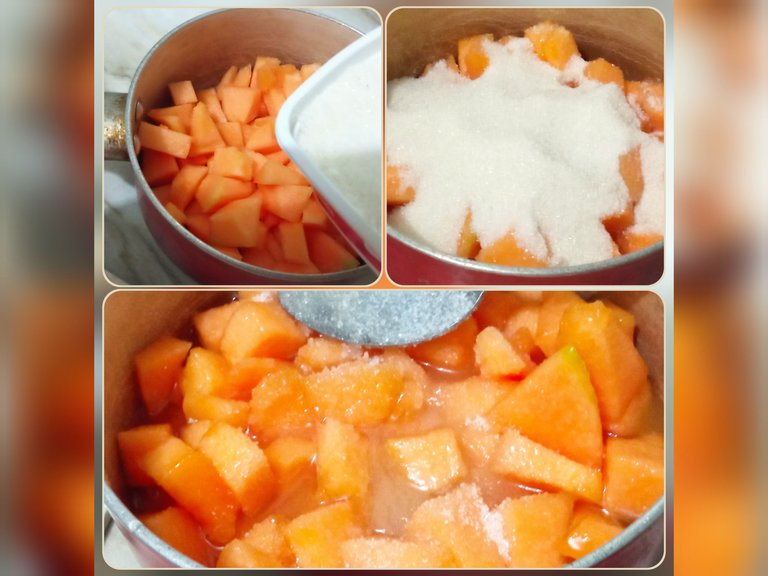
2.- Add the sugar to the cut melon and mix immediately. Then, we hermetically cover the pot and refrigerate it at the bottom of the refrigerator for at least 1 hour. However, it can be left to macerate for longer, even up to 24 hours. In my particular case, for this recipe it was 6 hours. With this step we get a kind of melon syrup.
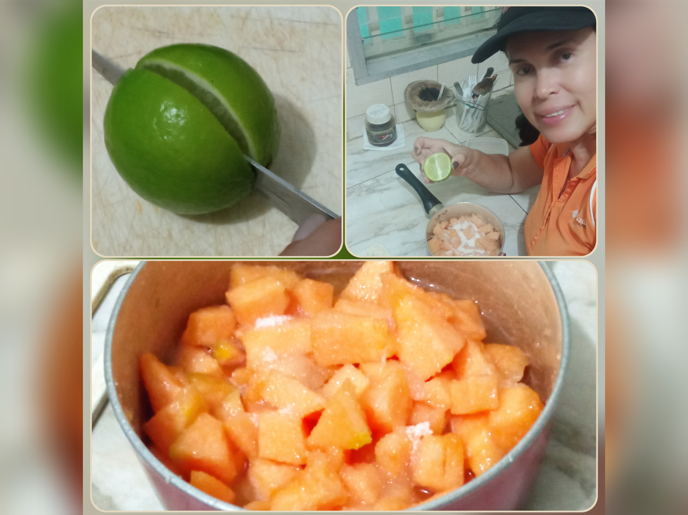
3.- After the maceration time established at our discretion, we squeeze the lemon juice. We mix it again so that it joins with the melon and the sugar. Why do we add the lemon at the end? Because it tends to give a bitter taste when left for a long time.
4.- Place the melon with the sugar and lemon on the stove over high heat and when it starts to boil, lower the heat. From time to time we stir it with a spoon to prevent it from sticking or burning. When we notice that the melon has taken a transparent tone, it is ready to blend it.
5.- Blend the melon with all the liquid from the syrup for about 10 seconds so that it is not too light or too thick.
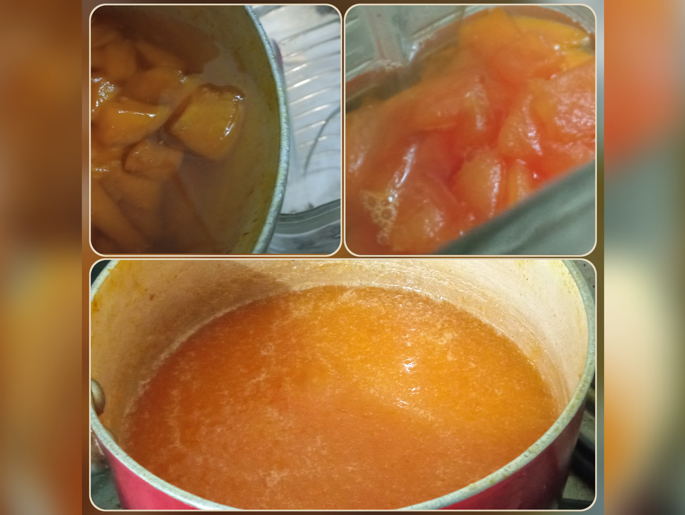
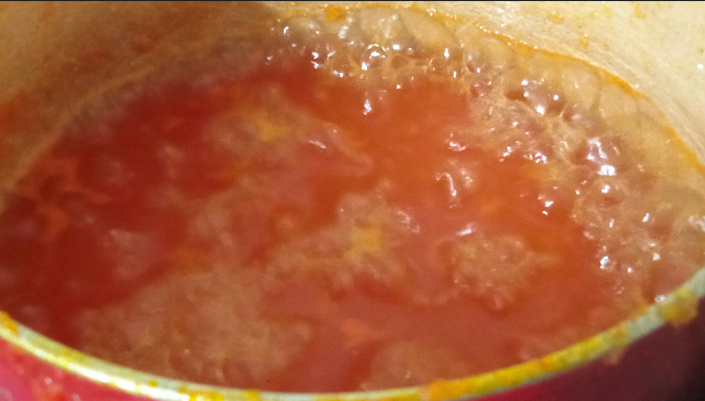
6.- Stirring frequently, we watch the progress of the cooking. The mixture will darken and the excess water will reduce. We will see how little by little it caramelizes. This step is very important, the consistency of the jam depends on it. To know if it is ready, we must be attentive to the humidity, it must be with almost nothing of liquid. In a plate we pour a little, if we pass the spoon and a groove is made, it is ready. Otherwise, if it comes together again, it is undercooked. Make sure it is not too dry because when it cools it will become very hard. The idea is that it has some firmness, but that it is soft.
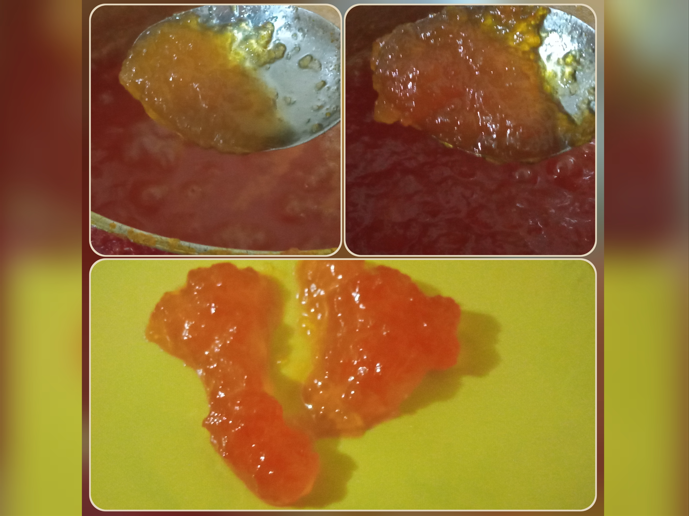
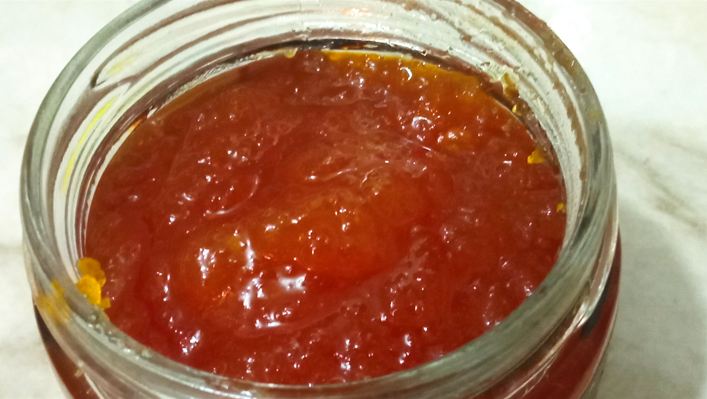
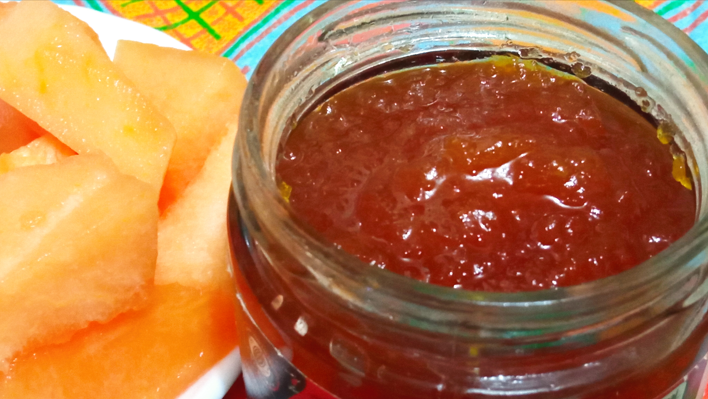
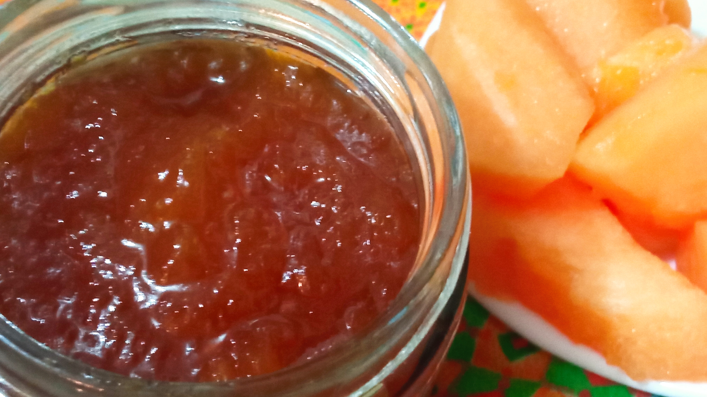
7.- The last step is to pack it in a clean glass container and let it cool at room temperature to start enjoying it. Look at the color and texture.
I hope you liked it. See you next time.
All photos are original, taken with my Xiaomi Redmi 9 cell phone. The editions were made with the application GridArt. The separators were designed in Canva
Imagen diseñada en GridArt
[ESP]
Saludos estimados amigos y amantes de la comida vegana. Las mermeladas son realmente deliciosas, en mis tiempos de niñez recuerdo que mis padres solían comprar de varios sabores, mi favorita, la de fresa. En lugar de comprar una envasada y con conservantes artificiales, me dije, ¿Por qué no preparar una casera?. Hubiera preferido hacer una mermelada de fresa, sin embargo, teniendo a la mano un jugoso melón esta sería la fruta elegida, así que preparé una deliciosa mermelada de melón.
La receta es muy sencilla, solo se requieren tres ingredientes, pero sí algo de paciencia porque necesita más de 30 minutos de cocción. Por otra parte, el melón necesita más cocción que una fresa, por ser un poco más fibroso. Para adelantar la consistencia de la mermelada opté por ayudar un poco usando la licuadora. Les cuento que esta es mi primera vez preparando mermelada, estaba algo nerviosa, pero me sentí feliz con el resultado, conseguí un delicioso sabor y una consistencia perfecta. Después de refrigerarla sencillamente quedó comprobado.
Ingredientes
- ½ Melón
- 1 ½ taza de azúcar
- 1 Limón
Preparación
1.-. Le retiramos las semillas al melón, su cáscara, lo lavamos y cortamos en trozos pequeños. Lo vertemos en una olla.
2.- Al melón que hemos cortado le añadimos el azúcar y enseguida mezclamos. Luego, tapamos herméticamente la olla y lo refrigeramos en la parte de abajo de la nevera o frigorífico por al menos 1 hora. Sin embargo, se puede dejar macerando por más tiempo, incluso hasta 24 horas. En mi caso particular, para esta receta fueron 6 horas. Con este paso conseguimos una especie de almíbar de melón.
3.- Pasado el tiempo de maceración establecido según nuestro criterio, exprimimos el zumo de limón. Volvemos a mezclar para que se una con el melón y el azúcar. ¿Por qué se agrega el limón al final?. Porque tiende a dar un sabor amargo cuando se deja por mucho tiempo.
4.- Colocamos el melón con el azúcar y el limón en la cocina a fuego alto y cuando comience a hervir, bajamos el fuego. De vez en cuando removemos con una cucharilla para evitar que se pegue o se queme. Cuando notemos que el melón haya tomado un tono algo transparente, estará listo para licuarlo.
5.- Licuamos el melón todo el líquido, serán unos 10 segundos para que no quede tan ligero ni tan espeso.
6.- Sin dejar se remover con frecuencia, vamos viendo el progreso de la cocción. La mezcla se irá oscureciendo y el exceso de agua se va reduciendo. Veremos como poco a poco se va caramelizando. Este paso es muy importante, de éste depende la consistencia de la mermelada. Para saber si está lista, debemos estar atentos a la humedad, debe quedar con casi nada de líquido. En un plato vertemos un poco, si pasamos la cucharilla y se hace un surco, está lista. De lo contario, si se vuelve a unir, le falta cocción. Pendiente que tampoco quede muy seco porque cuando se enfríe se pondrá muy dura. La idea es que tenga algo de firmeza, pero que quede suave.
7.- El último paso será envasarla en un recipiente de vidrio bien limpio y dejarla enfriar a temperatura ambiente para comenzar a disfrutarla. Miren que color y que textura.
Espero que les haya gustado. Nos vemos en la próxima oportunidad.
Todas las fotografías son originales, tomadas con mi celular Xiaomi Redmi 9. Las ediciones las hice con la aplicación GridArt. Los separadores fueron diseñados en Canva
@hylene74
0
0
0.000
https://twitter.com/rodriguez_ylen/status/1716957546827702764
#posh
#hive
https://inleo.io/threads/omarrojas/re-leothreads-oqsnsr6u
The rewards earned on this comment will go directly to the people ( omarrojas ) sharing the post on LeoThreads,LikeTu,dBuzz.
The melon jam must be a delight, spread on a soda cracker, my friend @hylene74 . It fascinates me, it looks very good. Successes.
How are you Mr. Omar? I thought the same, he would be the ideal companion. Thank you for your appreciation. Best regards.
You've been curated by @plantpoweronhive! Delegations welcome!
Thank you
I just found out that melons can be used as delicious jam, thank you for sharing @hylene74
I hope you make this recipe and enjoy it as much as I do. Best regards
Amiii que rico se ve eso jamás la he probado de melón. Una receta yimmy
Quedó muy sabrosa, tampoco había probado mermelada de esta fruta, quedé encantada con el resultado. Saludos.